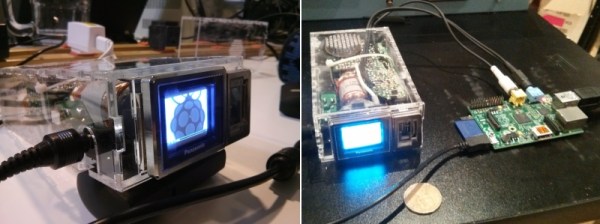
For $5, [William] of Toronto’s Hacklab hackerspace got a hold of one of the smallest CRT screens ever made – about the size of a large coin. Over the course of a couple sessions – including a public hack boothside at their Mini Makerfaire – [William], [Igor], and several other members managed to connect it as a monitor directly off a Raspberry Pi. The end-goal is the world’s smallest MAME cabinet (smaller by almost half than this LCD one).
As Canada followed the US and stopped broadcasting analog back in 2011, it became quite a challenge to feed the screen a video source. They disclosed early that the easiest solution would just be an RF transmitter on the Pi and then tune the micro-set to that channel. Too easy. They wanted something elegant and challenging so they went digging into the circuitry to find a place to insert a composite video signal directly.
The real story here is their persistence at reverse engineering. The PCB was folded like a cardboard box to fit in the original case, making large portions of the circuitboard and wiring inaccessible. Even when they managed to trace the signal to what they thought was the appropriate chip (marked C80580), they could not find any information on the 30 year old chip. Noting that every other chip on the board was Panasonic and started with “AN5”, [Igor] suspected the mystery silicon was just renamed and went through every single datasheet he could find with that prefix. Combined with form factor, pin count and purpose, his sleuthing was rewarded with a guess for a match – the AN5715. His hunch was correct – using that datasheet led him to the answers they required.
Then they just had to figure out how get the composite signal the Pi outputted into something the chip would use to display the correct image. There were no shortage of challenges, failures and dead ends here either, but they had help from the rest of their membership.
Their project log is an interesting narrative through the process and in the end of course, it worked. It is displayed beautifully with a clear acrylic case and ready for a cabinet to be built.