Why Didn’t We Think Of Making A Remote Trigger Button?

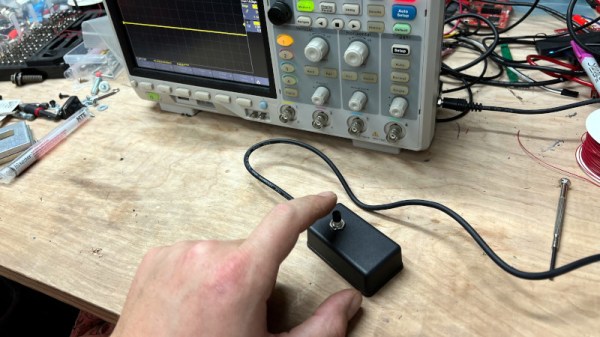
One of the many functions a digital oscilloscope offers over its analog ancestors is a trigger button. Alongside the usual electronic means of triggering the instrument, you can reach over and press a button to “freeze-frame” the action and preserve the trace. Sometimes doing it repeatedly it can become a chore to reach for the ‘scope. That’s where [Kevin Santo Cappuccio]’s remote trigger button comes in.

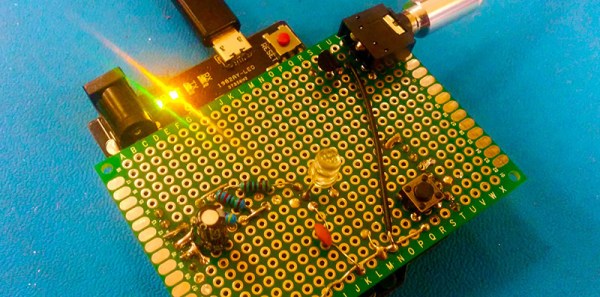
The button itself is about as simple a hack as it gets. The ‘scope was carefully dissected and some fine wires laid from the contacts within the front panel to a connector on the case. From there a cable goes to a box with a momentary action button switch. Plug in the box, and you can trigger the ‘scope from a distance!

We have to admit to rather admiring this hack, as needing to trigger the ‘scope is a well-known problem here. It’s easy to stab the wrong button and lose what you are looking for, so we’re rather surprised we didn’t think of this one ourselves. But then again from another viewpoint, it involves dissecting an expensive instrument which is best left unmolested. Perhaps manufacturers should consider adding this functionality.

This may be the most straightforward oscilloscope hack we’ve shown you, but it’s certainly not the first.

How Fast Is Your Flash?

What’s cooler than learning about timers and interrupts on AVRs? Well, if you’re like [Matt], you can use that learning experience to build something useful – in this case, a timer for various camera flashes.

There are two ways to measure the speed of a flash. The first is the lag between when a button is pressed and when the flash goes off. As long as this is consistent, everything’s okay. The second type of speed is the pulse width. When looking at a xenon flash as time vs. brightness, they have a large spike at the beginning followed by a significant amount of decay. LED flashes are pretty much one cycle of a square wave.

To measure both types of flash speed, [Matt] used a $0.50 photodiode an a 3.5mm jack that ties into the flash remote. These bits are wired up to an Arduino, a little bit of fun work with timers and interrupts happens, and [Matt] learns how fast his flash is.

Call A Cell Phone, Find A Tent

relay Finding your tent at a music festival is a tricky endeavor – not only are there miles and miles of tents exactly like yours, you most likely have a few beers or other substances in you that affect your sense of space and/or time.  [James] came up with a great solution to finding your tent by illuminating it with Christmas lights and a cell phone.

The basic idea of [James]’ build is having Christmas light flicker whenever he calls a phone. One feature in nearly every phone that can be exploited to accomplish this task is the backlight turning on when a call is received. Add a phototransistor, a little bit of circuitry, and some Christmas lights, and you have a fully functioning tent finder.

[James]’ circuit is a simple relay driving the Christmas lights, triggered by a phone right on top of the phototransistor. It’s a simple circuit that can be built on a piece of veroboard, and with a few pieces of plastic forming the enclosure, provides a reasonably bulletproof device that will survive the rigors of a music festival. As a bonus, there’s no need to modify the phone to trigger a remote circuit. Video of the device in action below.

Continue reading “Call A Cell Phone, Find A Tent”

Remote Shutter Module Uses LCD Screen For Setup

Here’s a full-featured remote shutter project which [Pixel-K] just finished. It seems that he’s interested in taking time-lapse images of the cosmos. Since astrophotography happens outside at night, this presented some special design considerations. He wanted something that he could configure in the dark without zapping his night-vision too much. He also wanted it to be easily configured with a pair of gloves on.

The project enclosure is a 4x AA battery box. He removed the partitions between each cell, leaving plenty of room for the guts. Inside you’ll find a lithium battery and a micro-USB recharger board. It powers the Arduino mini pro which drives the 1.8″ LCD screen and actuates the optoisolator which is responsible for triggering the camera. On the right you can see the clear knob of the clickable rotary encoder. All of the user settings are chosen and selected using just this one knob.

He’s already tried it out on a 6-hour shoot and had no battery life problems or other issues.