Running Into The Form 1 Printer At Maker Faire

[youtube=http://www.youtube.com/watch?v=yxNqMg_dwJI&w=470]

The Form 1 resin printer Kickstarter met its funding goal in just about 8 hours, and after five days is on track to be the most successful Kickstarter to date. Being so successful meant we had to drop by the FormLabs booth at Maker Faire to see what the hubub is.

From the sample prints floating around the booth, the Form 1 printer has amazing resolution – a 3 inch tall statue of a Greek god had as many features as a life-sized statue.

In the video (both above the fold and after the break), [David Cranor] goes over the features and finishing process of objects made on the Form 1.

Continue reading “Running Into The Form 1 Printer At Maker Faire”

Test Your Project’s Mettle With A Protected Dummy Load

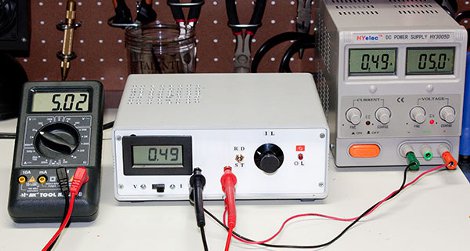
For a power hungry project the supply is sometimes a pretty big unknown. Whether stapling together a few different power supplies to meet a current requirement, or designing a system from the ground up: a big power supply can be quite a dangerous thing. It helps to have some kind of a dummy load to really shake down the electronics and get an idea of how hot things get or test stability before trusting the supply to run your stuff. [Paulo Oliveira] has constructed just such a thing, a slick looking adjustable constant current load.

Following the popular LM324 circuit from [David Jones] at EEVblog [Paulo] decided to make use of the two spare op-amps to provide both a thermal overload and a cooling fan circuit. We have seen other tweaks to [David]’s circuit in the past but through some resistors and MOSFETs [Paulo] can now load up to 7A (limited by resistor wattage). We would have used a really crazy server vacuum fan to make it genuinely frightening to push heavier loads. Thanks [Paulo]!

Mbed And A Few Resistors Runs Console, VGA, And PS/2

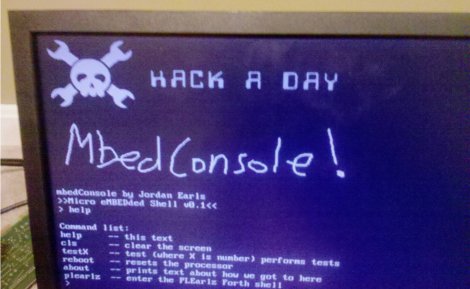
[Jordan] writes in to show us a project he has been working on called MbedConsole. Living up its name [Jordan] has managed to run a 640×480 VGA output, PS/2 port and console all from the mbed itself. We really mean from an mbed only; no extra hardware is required aside from a few resistors and connectors, a VGA monitor and PS/2 keyboard. The code is open source and links are included in the blog. There are even instructions for including your own graphics.

There are a few things to tackle still, like SD card support. Currently the PS/2 keyboard lights for caps-lock are not functional. [Jordan] would love to know what else we’d see going on something like this, with 400k of flash and 20k RAM left there certainly is a bit of room for some interesting stuff. One of his main goals is to get rid of the C interface and port an interactive shell over that could do something like BASIC or Forth (to give it that retro environment feel). We have seen the mbed in a handful of projects, what do you think?

CNC Jacquard Loom Will Weave Anything

[youtube=http://www.youtube.com/watch?v=osCPWMyJOj8&w=470]

The Jacquard loom, invented in the early 1800s, used punched cards to manufacture relatively complex textiles such as damask and brocade. These punched cards were eventually used by census workers, mechanical calculators, early analog computers, the earliest digital computers, and even the humble Arduino.

That doesn’t mean the Jacquard loom was left in the 17th century, though. This one made it to the Open Hardware Summit in New York last week and it was so cool the organizers of the Maker Faire graciously found space for it.

The entire loom is controlled by computer – no punched cards required – and is build out of inexpensive aluminum extrusion. It can also make any two color graphic into a textile (yes, even the Hackaday logo). The loom wasn’t quite operational during the one day it spent at Maker Faire, but we’ve been promised updates in the future.

Ginormous Ultimaker Can Print Slightly Smaller Ultimakers

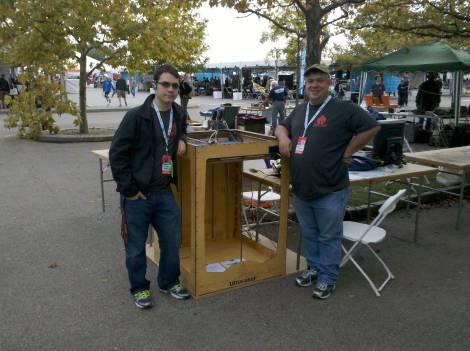
[bwattendorf] showed off his Gigimaker, a huge version of a Ultimaker at the Maker Faire this weekend.

It’s got a print area 2.5 feet square and 3.5 feet high. Currently, the team is using the machine to print off parts for smaller desktop-sized 3D printers, but theoretically this printer could be used to print life-sized companion cubes or full sized [Nefertiti] busts.

If you’d like to build your own giant Ultimaker, grab a few sheets of plywood and grab the git repo for the Gigimaker.

Rideable Hexawalker Is Chibikart’s Kin

[youtube=http://www.youtube.com/watch?v=hnG96qDibo0&w=470]

The folks from MIT made their way to the NYC Maker Faire, and of course brought a pair of Chibikarts. [Nancy Ouyang] wouldn’t allow those portable go karts take center stage at the MIT booth though; her Hexarideablepod (yes, that’s what she calls it) saw much more action from the kids clamoring to take something for a drive.

From the video above, [Nancy] shows off her six-legged, tennis ball-footed creation. The entire machine is powered by car batteries and is controlled via two joysticks in something resembling driving a tank Nope, it’s powered by A123 lipos and controlled with triggers taken from an electric drill.

As per [Nancy]’s wishes, I must mention that this project was for MITERS, a.k.a. the people from MIT that came down to Maker Faire.

Proper video after the break. The Internet at Maker Faire is horrible, give me a break.

Continue reading “Rideable Hexawalker Is Chibikart’s Kin”

Putting A Workshop On Your Bike Rack

As a member of the Repair Cafe in Maastricht, [Bertoa] sometimes needs to take a few tools out into the field to repair mechanical and electronic devices. His previous solution to the problem was a toolbox in the trunk of his car, but he knew he could come up with a more environmentally friendly solution. He created a portable workbench that fits right on his bike rack that is able to transport all the tools needed for light repairs using only a bike.

[Bertoa]’s portable workbench is made up of two parts; each side has one small slide drawer perfect for storing screwdrivers and wrenches, as well as a second tilting drawer able to hold heavier items such as an electric drill.

The work surface joins the two sides of the workbench together and is able to fold out with the help of a piano hinge and a few brackets. The workbench is removable from the bike rack and is able to stand on its own (stowable) legs made of aluminum tubes.

Even though the portable workbench only weighs about 10kg, it’s able to support [Bertoa]’s full body weight; a wonderful addition to any maker’s bicycle and a great solution to working on projects in the field.