Time’s Up For Mbed

In a forum post has come the announcement that mBed, ARM’s accessible microcontroller development platform, is to reach end-of-life in July 2026. This means that the online platform and OS will no longer be supported by ARM, though the latter will remain an open source project. The website will be shuttered, and no new projects can be created after that date using ARM infrastructure.

mBed was originally launched back in 2009, as a competitor to the Arduino IDE for ARM’s chips. Its easy development made it attractive and there were soon an array of boards from different manufacturers supporting it, but perhaps due to its support for only the one architecture, it failed to find success. It’s certainly not the first time a single-architecture microcontroller development platform has been discontinued, we need only look to the Intel Edison for that, but given the success of ARM platforms in general it’s still something of a surprise. Perhaps it’s time to take the press release explanation that other platforms such as Arduino have simply been much more popular.

Will a community form around an open source mBed? Given that it’s been a definite minority among Hackaday projects over the years, while we hope it does, we’re not so sure.

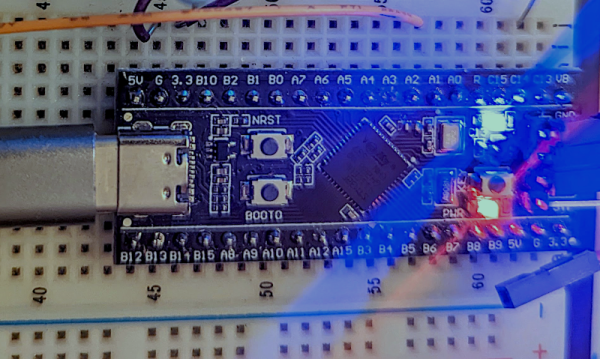
mBed board image: Viswesr, CC BY-SA 3.0.

Linux Fu: The Infinite Serial Port

Ok, the title is a bit misleading. Like most things in life, it really isn’t infinite. But I’m going to show you how you can use a very interesting Linux feature to turn one serial port from a microcontroller into a bunch of virtual ports. In theory, you could create over 200 ports, but the reality is you will probably want to stick with fewer.

The feature in question is what’s known as pseudoterminal or sometimes a pty or pts. These special files were made to feed data to programs that expect to accept data from a terminal. The files provide two faces. To the client, it looks like any other terminal device. To the creator, though, it is just another file. What you write to that file goes to the fake terminal and you can read anything that is sent from the program connected to the terminal. You use these all the time, probably, without realizing it since running a shell under X Windows, for example, doesn’t attach to a real terminal, after all.

You could, of course, do the same trick with a composite USB device, assuming you have one. Also assuming you can find a working driver and get it working. However, many microcontrollers have a serial port — even one with a USB converter built-in — but fewer have full-blown USB hardware. Even the ones that do are often at odds with strange drivers on the PC side. Serial ports work and work well even on the simplest microcontrollers.

The Plan

The plan is simple enough. A Linux program listens to a real serial port and watches for special character sequences in the data stream. Those sequences will allow you to switch data so that the data stream will go to a particular terminal. Data coming back from the terminals will go to the real serial port after sending a sequence that identifies its source.

Continue reading “Linux Fu: The Infinite Serial Port”

A Rotary Encoder: How Hard Can It Be?

As you may have noticed, I’ve been working with an STM32 ARM CPU using Mbed. There was a time when Mbed was pretty simple, but a lot has changed since it has morphed into Mbed OS. Unfortunately, that means that a lot of libraries and examples you can find don’t work with the newer system.

I needed a rotary encoder — I pulled a cheap one out of one of those “49 boards for Arduino” kits you see around. Not the finest encoder in the land, I’m sure, but it should do the job. Unfortunately, Mbed OS doesn’t have a driver for an encoder and the first few third-party libraries I found either worked via polling or wouldn’t compile with the latest Mbed. Of course, reading an encoder isn’t a mysterious process. How hard can it be to write the code yourself? How hard, indeed. I thought I’d share my code and the process of how I got there.

There are many ways you can read a rotary encoder. Some are probably better than my method. Also, these cheap mechanical encoders are terrible. If you were trying to do precision work, you should probably be looking at a different technology like an optical encoder. I mention this because it is nearly impossible to read one of these flawlessly.

So my goal was simple: I wanted something interrupt driven. Most of what I found required you to periodically call some function or set up a timer interrupt. Then they built a state machine to track the encoder. That’s fine, but it means you eat up a lot of processor just to check in on the encoder even if it isn’t moving. The STM32 CPU can easily interrupt with a pin changes, so that’s what I wanted.

The Catch

The problem is, of course, that mechanical switches bounce. So you have to filter that bounce either in hardware or software. I really didn’t want to put in any extra hardware more than a capacitor, so the software would have to handle it.

I also didn’t want to use any more interrupts than absolutely necessary. The Mbed system makes it easy to handle interrupts, but there is a bit of latency. Actually, after it was all over, I measured the latency and it isn’t that bad — I’ll talk about that a little later. Regardless, I had decided to try to use only a pair of interrupts.

Continue reading “A Rotary Encoder: How Hard Can It Be?”

Arm Pumps Up The Volume With Mbed And A Potentiometer

Last time, I told you how to get started with the “Black Pill” STM32F411 board using the Mbed OS. The example program, admittedly, didn’t use many of the features of the OS, unless you count what the USB serial port driver uses behind the scenes. However, this time, we’ll make a practical toy that lets you adjust your PC’s volume level with a pot.

The Black Pill module on a breadboard.

The Black Pill is a good choice for this application since it has analog inputs and can act as a USB keyboard. In fact, the Mbed OS has drivers for all kinds of USB devices. We’ve seen the serial port, but you can also look like a mass storage device or a mouse, for example. Just for practice, we’ll create two threads of execution. One will read the pot and send a message over to the other thread. That thread will communicate with the PC as a USB keyboard. Any computer that understands media keys on a keyboard should work with the device.

Threads

Creating threads is very simple. For many cases, you just define a void function that takes no arguments and use it with a Thread object:

readknobThread.start(vol_thread);

Of course, the function shouldn’t return unless you want the thread to end. As I mentioned in the last post, you can sleep with the ThisThread::sleep_for call. There is also a yield call if you simply want to give up the time slice without sleeping for a specific amount of time.

Continue reading “Arm Pumps Up The Volume With Mbed And A Potentiometer”

Arming With An OS

We see tons of projects with the infamous “Blue Pill” STM32 boards. They are cheap and plentiful and have a lot of great features, or at least they were before the chip shortage. I recently picked up a “Black Pill”, which is very similar but has an even more powerful processor. For a few bucks, you get an ARM CPU that can run at 100 MHz (but with USB, probably 96 MHz). There’s 512 kB of flash and 128 kB of RAM. There’s a USB type C port, and even a button and an LED onboard. The thing fits on a breadboard and you can program it with a cheap STLink dongle which costs about $10.

The Black Pill module on a breadboard.

Of course, you then have to consider the software. The STM32Cube stuff is a lot to set up and learn but it does let you do just about anything you can imagine. Then there is the STM32Duino plug-in that lets you use it as a beefy Arduino. That works and is easy enough to set up. However, there’s also Mbed. The only problem is that Mbed doesn’t work right out of the box. Turns out, though, it isn’t that hard to set up. I’ll show you how easy it is to get things going and, next time, I’ll show you a practical example of a USB peripheral that uses the mBed RTOS features.

First Steps

Obviously, you are going to need a Black Pill. There are at least two choices but for as cheap as they are there is little reason not to get the STM32F411 version that has more memory. The DIP form factor will fit in whatever breadboard you happen to have and a USB C cable will power the board so unless you are driving a lot of external circuitry, you probably don’t need an external supply.

Continue reading “Arming With An OS”

Arduino On MBed

Sometimes it seems like Arduino is everywhere. However, with a new glut of IoT processors, it must be quite a task to keep the Arduino core on all of them. Writing on the Arduino blog, [Martino Facchin], Arduino’s chief of firmware development, talks about the problem they faced supporting two new boards from Nordic.

The boards, the Nano 33 BLE and Nano 33 BLE Sense are based on an ARM Cortex M4 CPU from Nordic. The obvious answer, of course, is to port the Arduino core over from scratch. However, the team didn’t want to spend the time for just a couple of boards. They considered using the Nordic libraries to interact with the hardware, but since that is closed source, it didn’t really fit with Arduino’s sensitivities. However, in the end, they took a third approach which could be a very interesting development: they ported the Arduino core to the Mbed OS. There’s even an example of loading a sketch on top of Mbed available from [Jan Jongboom].

Continue reading “Arduino On MBed”

Ground Penetrating Radar For The Masses

Radar is a useful tool with familiar uses such as detecting aircraft and observing weather. It also has some less known applications, such as a technology known as ground-penetrating radar (GPR). Despite the difficulty of sending and receiving radio waves through solid objects, with the right equipment it’s possible to build a radar that works underground as well.

GPR is used often for detecting underground utilities, but also has applications in other fields such as archaeology and geology. For those people in these fields, a less expensive GPR was the priority of a group presenting at a 2017 National Institute of Telecommunications of Poland conference (pdf warning). The presentation goes into specific detail on how to build a GPR for around €600, much less than commercial offerings.

The presentation begins by highlighting the basics of GPR, then details the hardware bill of materials for the transmitting circuit, receiving circuit, and the DC power supplies. It also details the theory behind the software needed to get the circuit running properly, and has code as well. The processing is done on a 32-bit Mbed platform, and the rest of the GPR is built with easy-to-source components as well.

It’s always good to see useful hardware projects that bring costs of traditionally expensive equipment down to the grasp of average people. Even traditional radar systems are now available for hundreds of dollars, and we’ve even seen attempts at other GPR systems before as well.

Thanks to [Stefan] for the tip!