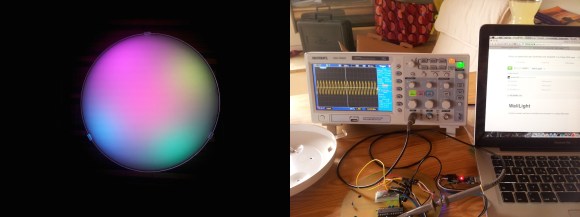
[Daniel Grießhaber] just finished his latest electronics project and we love it. He’s taken a cheap IKEA wall/ceiling light and completely revamped it with RGB LEDs and intelligent control!
The light he used is called the LOCK, and is a mere 1.79€ or about $4 USD. It has lots of room inside and a nice frosted glass dish which results in some excellent color diffusion. He’s designed a nice big circular PCB to mount inside off of the original mounting points. To do this, he used Eagle software to create the circuit and his trusty desktop CNC to mill out the pattern.
To control the lights he used an old ATMega8 board he had lying around, with the Arduino IDE and WS2812 Library. He’s outlined all the parts, diagrams and program sketches you’ll need to make your own over on GitHub.
Unfortunately the LEDs aren’t quite as bright as he hoped so it can’t be used to replace a regular room light — instead he plans on turning this project into sunrise timing light in one of the bedrooms — still pretty cool!


How many CFL’s and LED’s that screw in will burn out in these fixtures?
It looks like a typical incandescent legacy enclosed fixture, a oven with light.
Make the lights do UFO effects, it looks like one.
1.79 euro = 2.44 USD
Exactly! Disappointed I am.
yeah I know but its even worse:
http://www.ikea.com/us/en/catalog/products/20055751/ US-Price is $4.99
http://www.ikea.com/de/de/catalog/products/00055691/ DE-Price is €1.79
Is IKEA always that much more expensive in the US?
He made up a custom PCB with just five WS8212 LEDs. No surprise it’s not bright enough to “replace a regular room light”. Given that the communications protocol of WS2811/WS2812 lets you hang an arbitrary number off one GPIO, one very good option would have been to design the PCB to hold many more. You can just jumper over any unpopulated slots, or alternatively produce the PCB with all the DIN/DOUT pins shorted, and cut that trace for each slot you populate. The downside is that you need to spec your 5V power supply to supply current to however many LEDs you may use, so _if_ five had proven sufficient, it would be massively overbuilt.
But the best solution, which would completely avoid being surprised at the final brightness, is to throw together a prototype first. You can of course get that flexible LED strip with the same LEDs (most commonly 60/m), so grab a meter or so of that and a 5V power supply, literally plug one wire into an Arduino or STK500 header (and maybe another to ensure a common ground with your PSU), and code up a simple little demo that just lights the first five LEDs full brightness. If that lights up your room adequately, you’re good — when you realize it doesn’t, just keep increasing the number it lights, until you see how many you do need. Then spec your 5V power supply and design your PCB to suit that many LEDs.
I converted this same model into leds to light my bathroom a few ago: http://serkeros.wordpress.com/2012/11/12/el-llum-del-sostre-del-bany
(in catalan, sorry. google translate will help)
The price in Catalonia’s Ikeas is higher than in Germany’s, like in the US: http://www.ikea.com/es/es/catalog/products/00055691/
Ikea: a country, a price (?)