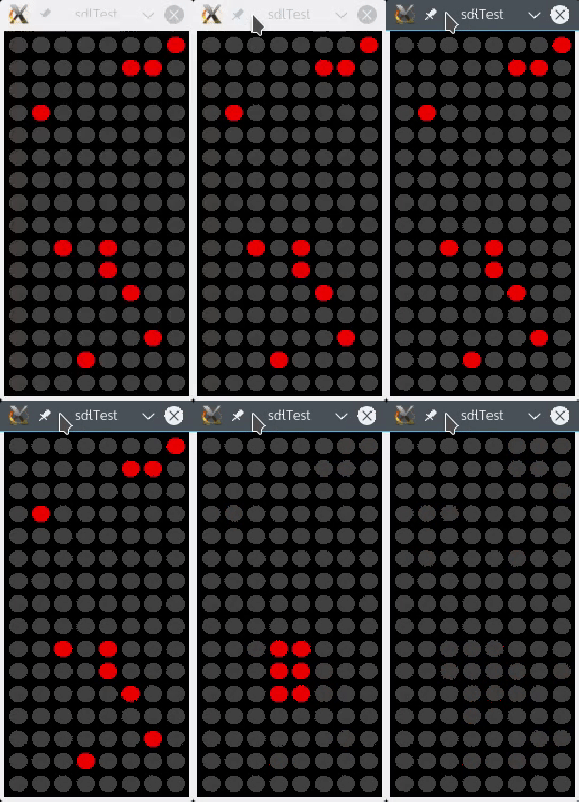
Our Hackaday Chief [Mike] sent me an e-mail the other day with a link to the Belgrade Hackaday Badge simulator. He clearly wanted me to enter something into the demo scene competition. The good news is that because of the simulator, you didn’t have to leave your desk to participate. The bad news is that I had very little time left at the end of the month, so I wanted to do something appealing but it had to be fairly easy to roll out. I wound up doing a very quick project but it had a few fine points that I thought I’d share. The end goal was to have an interesting display of Conway’s game of life on the badge.
By the way, there was a completely different project with the same goal by [Jeremias] on Hackaday.io. As far as I know, this was just the result of two people setting out to do the same thing. You’ll see the user interface is a good bit different, so you might see which you prefer.
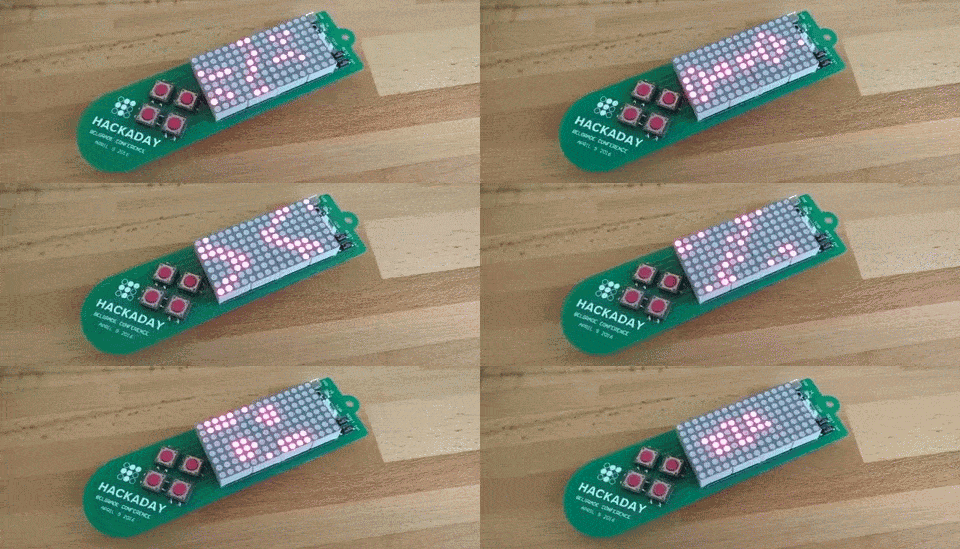
If you haven’t seen it, the real badge is below. The emulator, of course, just runs as a window on your PC. For those that will be at the conference, or just want to program closer to the actual hardware, there is now a preconfigured MPLABX framework for the PIC18LF25K50 and the bootloader/kernel running on this badge.
The API
If you look at the example code in the original framework, you can see there are only a handful of calls you need to create your demo:
- displayPixel – Set a pixel at x and y coordinates ON or OFF (on the real badge, this is immediate; on the emulator it only takes force when you call displayLatch)
- displayLatch – Write the pixels to the display (on the real badge, this call does nothing)
- getControl – Returns UP, DOWN, RIGHT, LEFT, or ESCAPE (ESCAPE doesn’t exist on the real badge)
- displayClose – Turn off the emulator
There are a few calls in the H file you can ignore because the framework calls them for you in the built-in main function. That function also calls animateBadge which is your main entry point. Your code, then, can be pretty simple. Write an animateBadge function that uses the display calls to create your animation and, if you like, use getControl to accept input.
There are two other calls of interest: getTime and controlDelayMs. The getTime returns an up-counting 32-bit timer where each count is worth a millisecond. For the truly lazy, you can call controlDelayMs to just jam up everything for a certain number of milliseconds.
The Plan
Being basically lazy (and, honestly, short on time) I went out to find a simple C-language life implementation. I wound up finding one at RosettaCode (an interesting site in its own right). I compiled it as-is first, to make sure it worked and, of course, it did.
The original code uses console-based output (see below) and I noticed that with an 8×16 grid it had a tendency to eventually go to a blank board and, of course, stop. I knew that was going to be a problem later.
Looking at the code structure, it was clear that I really only needed to do four things:
- Rewrite the show function to display on the badge
- Rewrite the main function to kick off everything
- Fix the size of the grid to match the badge
- Get a random seed change so the game didn’t always play the same pattern.
That last one is a little tricky. In the game function, the original code uses the C library rand call to randomly populate the board. The problem is, without a random seed, most implementations will produce the same number sequence. This is to aid in reputability, but for a game, it is the wrong approach. In addition, I wanted to add a few extra features, but first, I needed to get it all running.
The Port
Rewriting show was easy until I started adding features. I just used a loop to scan each pixel and call display latch:
 for_xy displayPixel(x, y, univ[y][x]?ON:OFF);
 displayLatch(); // update
The for_xy construct is a macro from the original code.
Rewriting main wasn’t very hard either:
// Badge "main"
void animateBadge(void) {
 unsigned int seed;
 // assume the framework main called all the init* calls

 while(1) {
     seed++; // get a quasi random seed
     switch (getControl()) {
         case (ESCAPE):
             displayClose(); // exit (only for emulator)
             return;
         case (DOWN): // set up new game on down key
             srand(seed);
             game(8,16);
             break;
    }
}
By calling getControl, the badge can wait for the user to push the down arrow before starting. It increments the seed value until this happens, so the random number generation gets an unpredictable seed value. In addition, the call to game has 8 and 16 hard coded, so this one section of code takes care of 3 different port goals (numbers 2, 3, and 4).
Extra Features
 At that point, the badge (well, technically, the emulator) works, but it has a few things that are annoying. First, it is too fast (I took out the usleep call since I wasn’t sure it was on the physical hardware badge). Second, most games converge to a steady state. If that steady state is a cycle where the LEDs appear to move, that’s no big deal. But a static display (or, worse, one where all the LEDs go dark) isn’t very attractive.
It was obvious that putting a timer in the show routine would take care of the speed. The steady state problem is a little more interesting. First, I factored the code that clears the board into a function named init and I changed the game function to call it instead of doing the work internally. The init function randomizes the board.
The next step was to change the evolve function. This is the code that computes the next generation of pixels from the current one. The last step in that process is to copy the new game board to the old one.
I provided a change variable and then tested the two arrays to see if they were the same. If they are not, the code proceeds with the copy as before. If they are the same then we are in a static display, so the code calls init and then everything starts fresh.
In show, I needed more than just a timer. I need another call to getControl to provide a user interface after the game starts. The left and right arrows control a speed variable. The up arrow pauses, and the down arrow calls init so you can start over if you get bored with the current game.
Timing Without Overflow
The timing is an interesting bit of code. The timer is a 32-bit millisecond timer. Since each tick is a millisecond, realistically, you’ll never see the timer overflow (assuming it starts at zero each time). After all 32-bits holds about 4.2 billion milliseconds, which is just under 50 days.
However, old habits die hard, and I always worry about what happens if the timer does overflow. If, for example, it didn’t start at zero, or if it were a faster (or shorter) counter, that could happen.
The typical way to handle a counter like this is to add the delay you want and then test the counter. If you are certain you will test every tick at least once, you can test for the count to equal the target. Otherwise, you need to test for the count being greater than or equal to the target.
For an example where that works, consider if the count were 100 and you wanted a 500 millisecond delay. You’d figure the target was 600 milliseconds and you’d loop around waiting until the count was 600 or bigger.
Problem is, what happens if the counter is about to overflow? Let’s consider a shorter counter to make it easier to understand. A 16 bit counter will roll over after 65535 (assuming it is unsigned). Let’s try the same example, but this time use 65200 as a starting point. Adding 500 (assuming 16 bit math) give you 164.
You could detect that the roll over was going to occur and then wait for it before testing. If you don’t, then you might ask if 65201 is greater than or equal to 164 and discover that it is, making a very short time delay. There are other straightforward ways to deal with the rollover, but I prefer a simple way–so simple, that even in this case where it probably doesn’t matter, I’ll use it anyway because there’s virtually no penalty to use it.
The trick is to compute the target as usual. Then instead of testing against it, you subtract the target value from the current value, using the same bit-width. If the result has the topmost bit set, the loop isn’t finished yet.
Here’s an excerpt from the code (remember, it uses 32-bit):
tick=getTime()+*speed;
. . .
if (getTime()-tick<0x80000000UL) break;
I’d like to take credit for this trick, but I can’t. However, I’ve used it for so long, I can’t recall where I picked it up.
The Result
In the end, it all worked, as you can see in the video below. The real key to the project, though, is that it was very simple due to finding not just any example code to start with, but a clean piece of code that was well segregated into display and processing functions. This led to a simple plan of attack and a very fast turn around of the badge code.
Admittedly, the game of life display isn’t terribly original (we’ve seen it on clocks and even a musical version). On the other hand, instead of complaining, why not get the code from GitHub and create your own demo for the Belgrade Badge? You have until April 9th.


Well done, Commander Gametek. Your bounty has been paid :) … I hope I will get mine done in a few days. Delays, delays …
“The trick is to compute the target as usual. Then instead of testing against it, you subtract the target value from the current value, using the same bit-width. If the result has the topmost bit set, the loop isn’t finished yet.”
You can also used signed arithmetic if your rollover occurs at type sizes (e.g. 8-bit, 16-bit, 32-bit). There’s a longer explanation on the Arduino playground here, which is exactly what you’re doing.
The basic trick is what you’re saying, though: subtract, and test to see if the top bit is set, however it’s implicit here. The nice thing there is you can’t screw up and add too many or too little zeros, and on some architectures it’s faster to compare against 0 than fixed values.