Graduation cap LED display demo

Stealthy Mortar Board Unleashes Bling At Graduation Ceremony

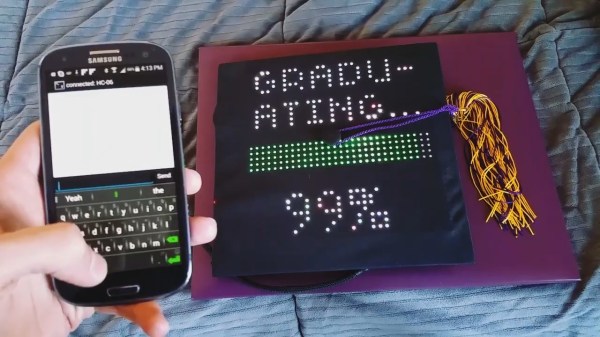
Decorating graduation caps is often frowned upon by the administration but [Dan Barkus] is challenging his school authorities to keep from smiling when they see what he has in store. His build will dazzle the audience by mounting 1024 RGB LEDs in a 32×32 matrix on top of his cap, but hidden under the cap’s black cloth. When the LEDs are off he’s indistinguishable, and when he fires up the LEDs, shine through and put on a heck of a show. He can type messages on his phone to be displayed on the cap. He can even display images and animated GIFs.
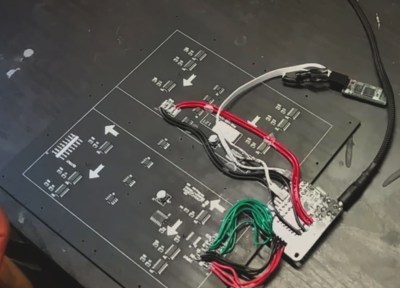
LED array control components

The LED display is an Adafruit 32×32 RGB LED matrix panel.  To control the display, [Dan] uses a Teensy, a 32 bit ARM Cortex-M4 microcontroller board. Wireless communication is done via a JBtek HC-06 Bluetooth board.

The LED display can draw up to 4 amps at full white brightness so he picked up a USB battery with two output ports, one capable of 2.1 amps and the other 2.4 amps. He then hacked together a cable that has two USB connectors on one end, connected in parallel, and a DC jack on the other end. Altogether the battery bank is capable of up to 4.5 amps output combined out those two ports, meeting the LED display’s needs. The DC jack is plugged into the Teensy and all power goes through there.

One problem [Dan] had was that the Bluetooth module was booting up before the Teensy. It didn’t see the Teensy in time, causing the Bluetooth not to work. The solution he found is shown in the 2nd video embedded below. The fix powers the Bluetooth module separately, using a current limiting resistor and a capacitor to build up the voltage, delaying just long enough for the Teensy to win.

Continue reading “Stealthy Mortar Board Unleashes Bling At Graduation Ceremony”

Unary Clock For The Binary-Challenged

If binary clocks have you confused by all the math required to figure out what time it is, we have the solution for you: a unary clock. After all, what’s simpler than summing up powers of two? Powers of one! To figure out the time, you start with the ones digit. If it’s on, you add one to the total. Then move on to the next digit. Since 12 equals one, you add another one if it’s lit. Then on to the third LED. 13 = 1, so if it’s lit, you add another one, and so on.

OK, we’re messing around. Calling this a “unary” clock is ridiculous. When it’s seven o’clock, there are seven LEDs lit. Nice and easy to read. Sixty minute LEDs is silly, so here each minute LED stands for five minutes. Good enough.

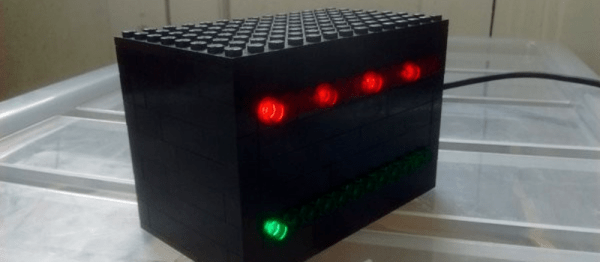
What we really like about this clock is the build. It’s intended as educational for school kids, so it has to be simple to build and easy to personalize. Building the body out of Lego bricks fits the specs nicely. Transparent Lego bricks are used to give the white LEDs some color. That was too bright, so [Shrimping It] added paper cutouts from a hole punch as diffusers.

Clock builds are a great intro to electronics because they offer so many possibilities. Whether you want to go geary, use the clock as an excuse to try out fabrication techniques, or showcase a neat display technology, your imagination has a lot of room to wander. Show us yours?

RetroFab: Machine Designed Control Of All The Things

On the Starship Enterprise, an engineer can simply tell the computer what he’d like it to do, and it will do the design work. Moments later, the replicator pops out the needed part (we assume to atomic precision). The work [Raf Ramakers] is doing seems like the Model T ford of that technology. Funded by Autodesk, and as part of his work as a PhD Researcher of Human Computer Interaction at Hasselt University it is the way of the future.

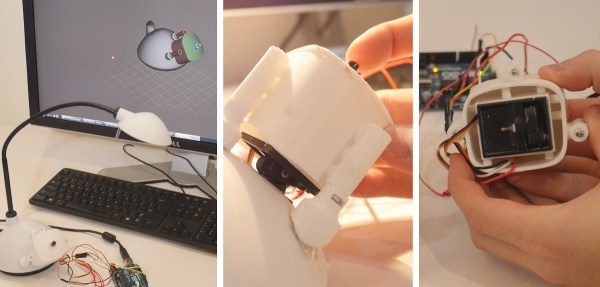
The technology is really cool. Let’s say we wanted to control a toaster from our phone. The first step is to take a 3D scan of the object. After that the user tells the computer which areas of the toaster are inputs and what kind of input they are. The user does this by painting a color on the area of the rendering, we think this technique is intuitive and has lots of applications.

The computer then looks in its library of pre-engineered modules for ones that will fit the applications. It automagically generates a casing for the modules, and fits it to the scanned surface of the toaster. It is then up to the user to follow the generated assembly instructions.

Once the case and modules are installed, the work is done! The toaster can now be controlled from an app. It’s as easy as that. It’s this kind of technology that will really bring technologies like 3D printing to mass use. It’s one thing to have a machine that can produce most geometries for practically no cost. It’s another thing to have the skills to generate those geometries. Video of it in action after the break.  Continue reading “RetroFab: Machine Designed Control Of All The Things”