
Hackaday is primarily a place for electronics hackers, but that’s not to say that we don’t see a fair number of projects where woodworking plays a key role. Magic mirror builds come to mind, as do restorations of antique radios, arcade machines built into coffee tables, and small cases for all manner of electronic and mechanical gadgets. In some of these projects, the woodworking really shines and makes the finished project pop. In others — well, let’s just say that some woodwork looks good from far, but is far from good.
Far be it from me to pass judgment on anyone else’s efforts – I can think of dozens of woodworking projects I’ve undertaken that were prosecutable as crimes against wood. But I do have a fair amount of experience with woodwork, having been in my dad’s shop and making sawdust from the time I could hold a handsaw. I’ve picked up a few things over the decades, and I thought I’d share a few tips that might help you combine your hardware hacks with woodwork that’ll make your project shine. I’ll gear this mainly to the novice woodworker, but there may be a few tips in here for the more experienced types too.
The Basics: Cutting

One of the big problems with wood as a material is the perception that you need a lot of specialized tools to work effectively with it. While having a table saw is great, it also causes problems. A good saw is expensive, requires a lot of room, is noisy and dusty, and given the fact that a wrong move can sever an appendage, they’re intimidating to use. But there really is no substitute for the table saw for dimensioning rough stock, particularly when you need to perform a rip cut with the long grain of the wood. What to do?
I can think of a few ways around this issue, one that I face regularly these days, having sold my table saw prior to moving. The first is to avoid the issue altogether by taking advantage of pre-cut material. Most home centers have a decent selection of wood in a number of species, all available in multiple thicknesses and nominal widths from 2″ to 12″ (sorry, metric world — I’m sticking with imperial measurements because I have no idea how wood is measured in your system). You may have to compromise or change your design a bit to use off-the-rack stock, but there are few projects where you can’t hide a 1/2″ difference in width. I would use this strategy even when I had a table saw — just lazy, I guess.
But most of the wood in big-box stores is sold in 6′ to 10′ lengths, so you’re not going to be able to avoid cross-cutting stock for very long. You can leverage the store for a lot of this work as almost every one of them has a radial arm saw for chopping lumber to size. Usually cuts are a nominal charge after the first couple of free cuts, but be aware that most places have a disclaimer that they won’t do precision cuts. So if you need six pieces of 1×3 oak exactly 11-3/8″ long, you may be out of luck.
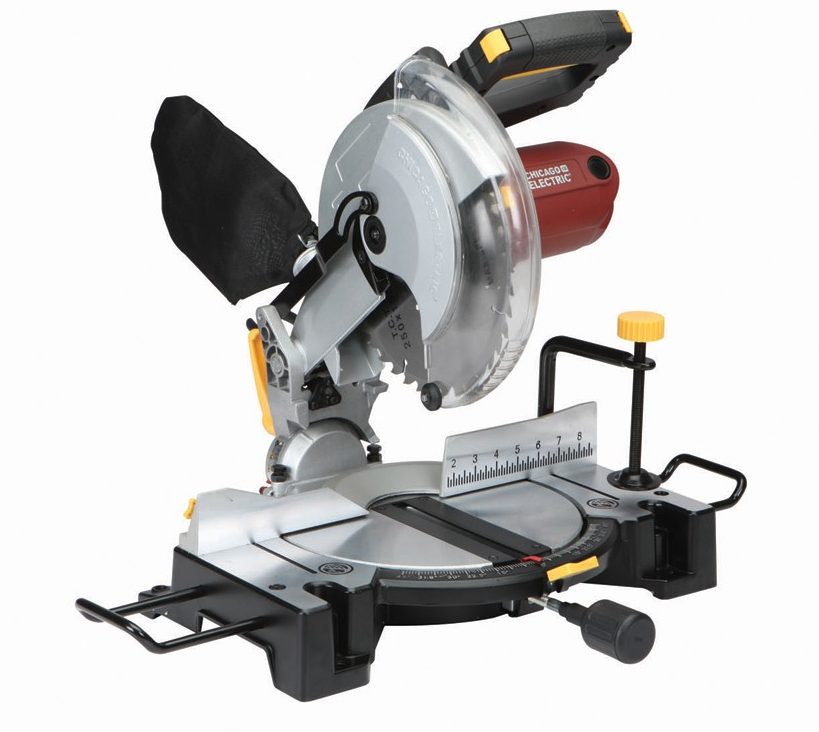
So casual woodworkers might want to look at entry level miter saws for their cross-cutting needs. Harbor Freight gets a bad rap on its offerings, but at $89 for a 10″ compound miter saw, it’s hard to pass up even for a one-time job. Granted, a tool such as this is built to a price point and is not designed to survive the rigors of everyday job site use, but you’re not asking it to do that.
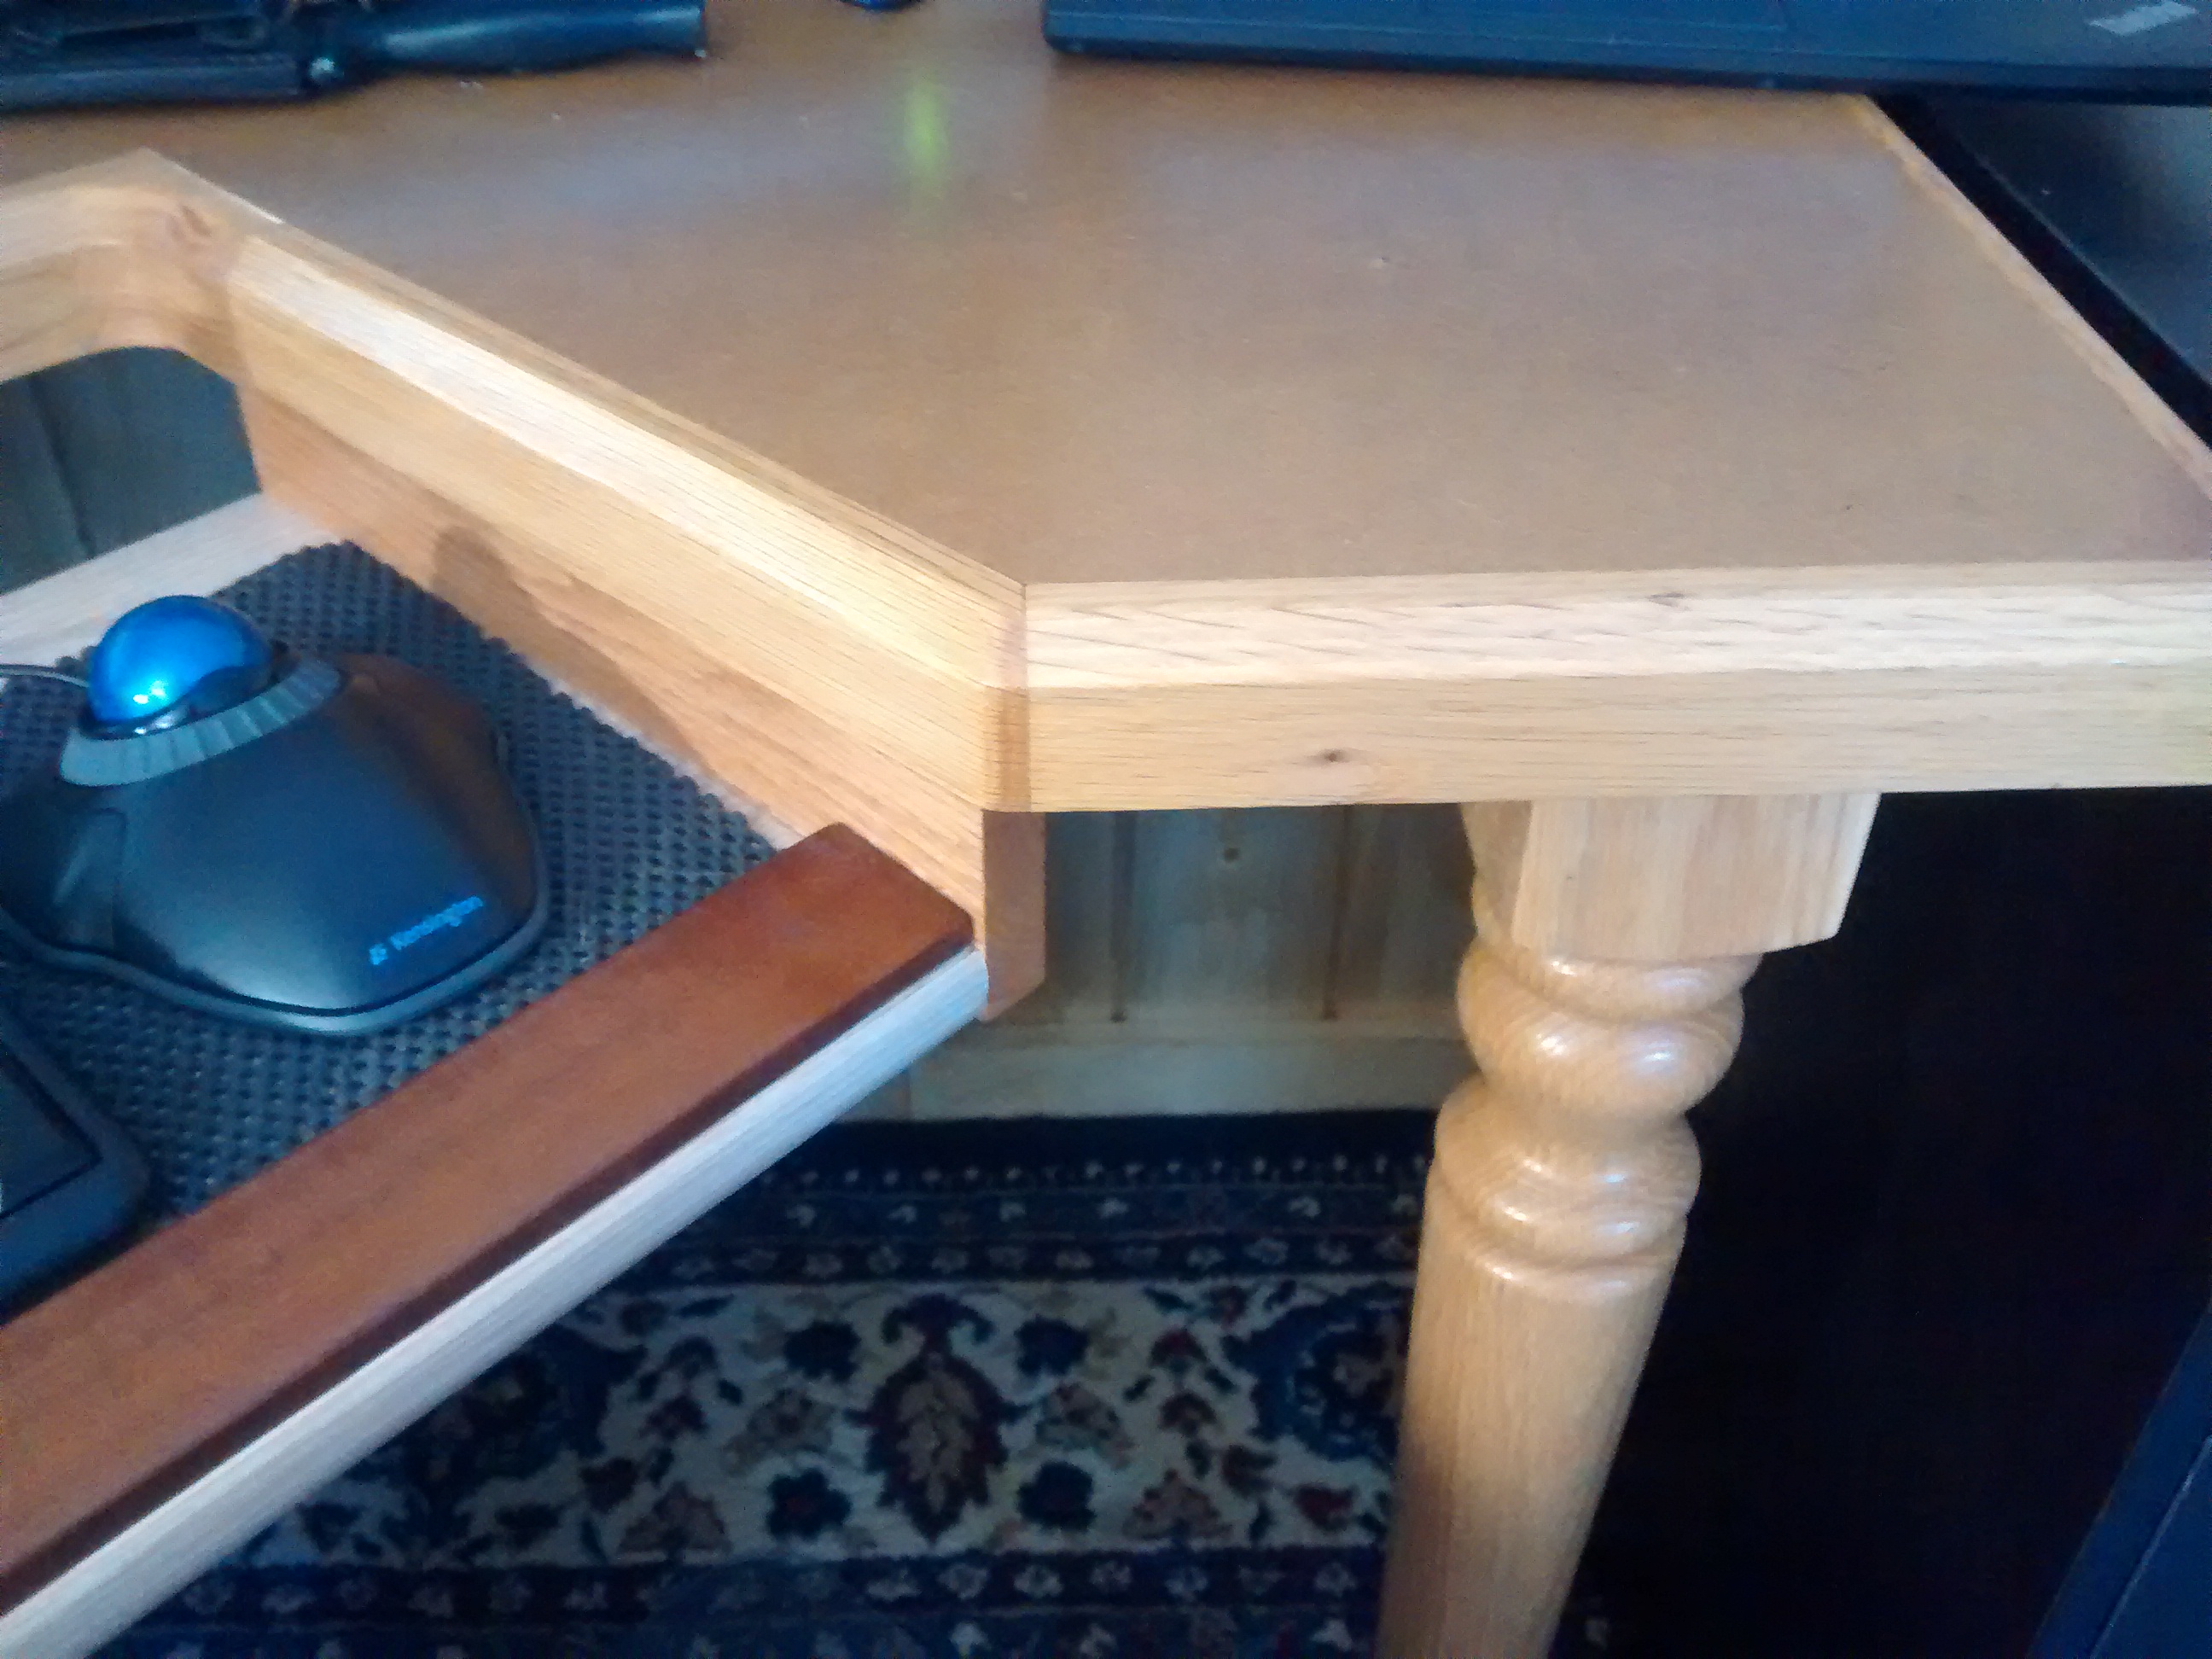
A miter saw is a game-changer for lots of small projects. Being able to cut wood to precise angles is the first step to all sorts of projects – it elevates your build beyond the simple butt joints that, while often functional, lack the visual appeal of a well-executed miter. A cheap miter saw might fight you a little there with some slop in the hard stops at 45°, but most can be adjusted for a perfect joint.
A miter saw is still a dusty, noisy beast that is best operated outdoors or in a dedicated shop, though. Don’t have the right space for one? Fear not — you can get a more than adequate miter with a manual miter saw. I’d stay away from the super-cheap wood or plastic miter boxes, though. A dedicated manual miter saw gets its precision from the frame the built-in saw rides in. They’re compact, quiet, easy to clean up after, and they can be had for $50 — not a bad tool to have even if a power miter saw already lives in your shop.
Simple Joinery
Once you’ve got your stock cut perfectly, how do you put the pieces together? This is where a lot of novice woodworkers trip up, and a few simple tools and techniques can get you past this problem. But first, you need to look at the forces the joint is going to experience in service. Many joints have almost no force on them. Picture frames are a good example – they just hang on the wall or sit on a desk. So just gluing the pieces together might be enough. But put that same miter joint into a box that needs to open and close a dozen times a day and a glued joint will fall apart in short order without some reinforcement.
There are tons of ways to reinforce a joint, starting with how the joint is cut in the first place. But if we’re not talking about fancy stuff like dovetails or mortise and tenon joinery, we’re probably going to need some sort of hardware to pull our joints together. That means brads, nails, or better still, screws.
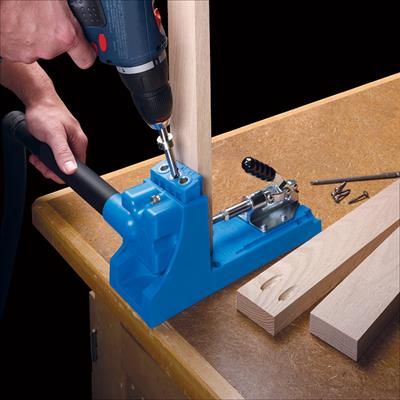
For my money, the best investment the novice woodworker can make is a good pocket hole kit. Pocket hole joinery is another game changer. A jig clamps to the workpiece and allows you to drill a steeply angled hole at the edge of the wood, usually using a special stepped drill bit. The pocket guides a screw through one piece of stock into the other, with the depth of the hole and length of the screw carefully selected to avoid punching through.
Fine joinery? Not by a long shot. Strong, fast, easy, and cheap? You bet. I’ve thrown together simple butt-jointed frames and sturdy cases with pocket screws in a matter of minutes. Miters are no problem either, and the instruction book that comes with most kits shows you all the wonderful things you can build. You have to be a little careful about hiding the pocket hole, or you can plug it afterward if you like. I just used pocket hole joinery to put a reinforcing edge band on some simple shelves for my new shop/office. Took me a few minutes (outside during a snowstorm) and it’s as good as it needs to be for the job it’ll do.
I’ve got a Kreg Jig K4 Master System which has served me well for years. At $150 retail it isn’t cheap, but the value is definitely there. If you want to start small, you can buy a simple kit with just a small jig, the stepped drill bit, and a square-head driver bit for the pocket screws for about $40. Fair warning, though: you’ll need a Vise-Grip face clamp to use the jig effectively.
Milling and Drilling
Novice woodworkers, especially those used to working with less compliant materials common in the machine shop, are often frustrated when they try to put holes in wood. Choose the wrong bit or use the wrong technique, and holes can end up looking pretty bad.
In general, the twist drills used for metalwork are not the best choice for through-holes in wood. They’re not the best choice for blind holes either, but you can get away with it if you’re careful. You’ll get better results using twist drills specifically designed for wood; these usually have a brad points in the center and spurs on the outside diameter; the brad point helps to keep the bit on target and the spurs cut the wood fibers cleanly for a smoother bore.

Larger diameter holes are best drilled with a spade bit. These also have brad points and spurs, but the cutting surface is flat and paddle-shaped, and the cutting method is more of a scraping action. A beefed up version of the spade bit, the Forstner bit, works in much the same way but can be used to drill angled holes; a spade bit has a fairly limited angle of acceptance to the stock before the flat blade starts bouncing off the wood. Think of a Forstner bit as an end mill for wood. Sort of.
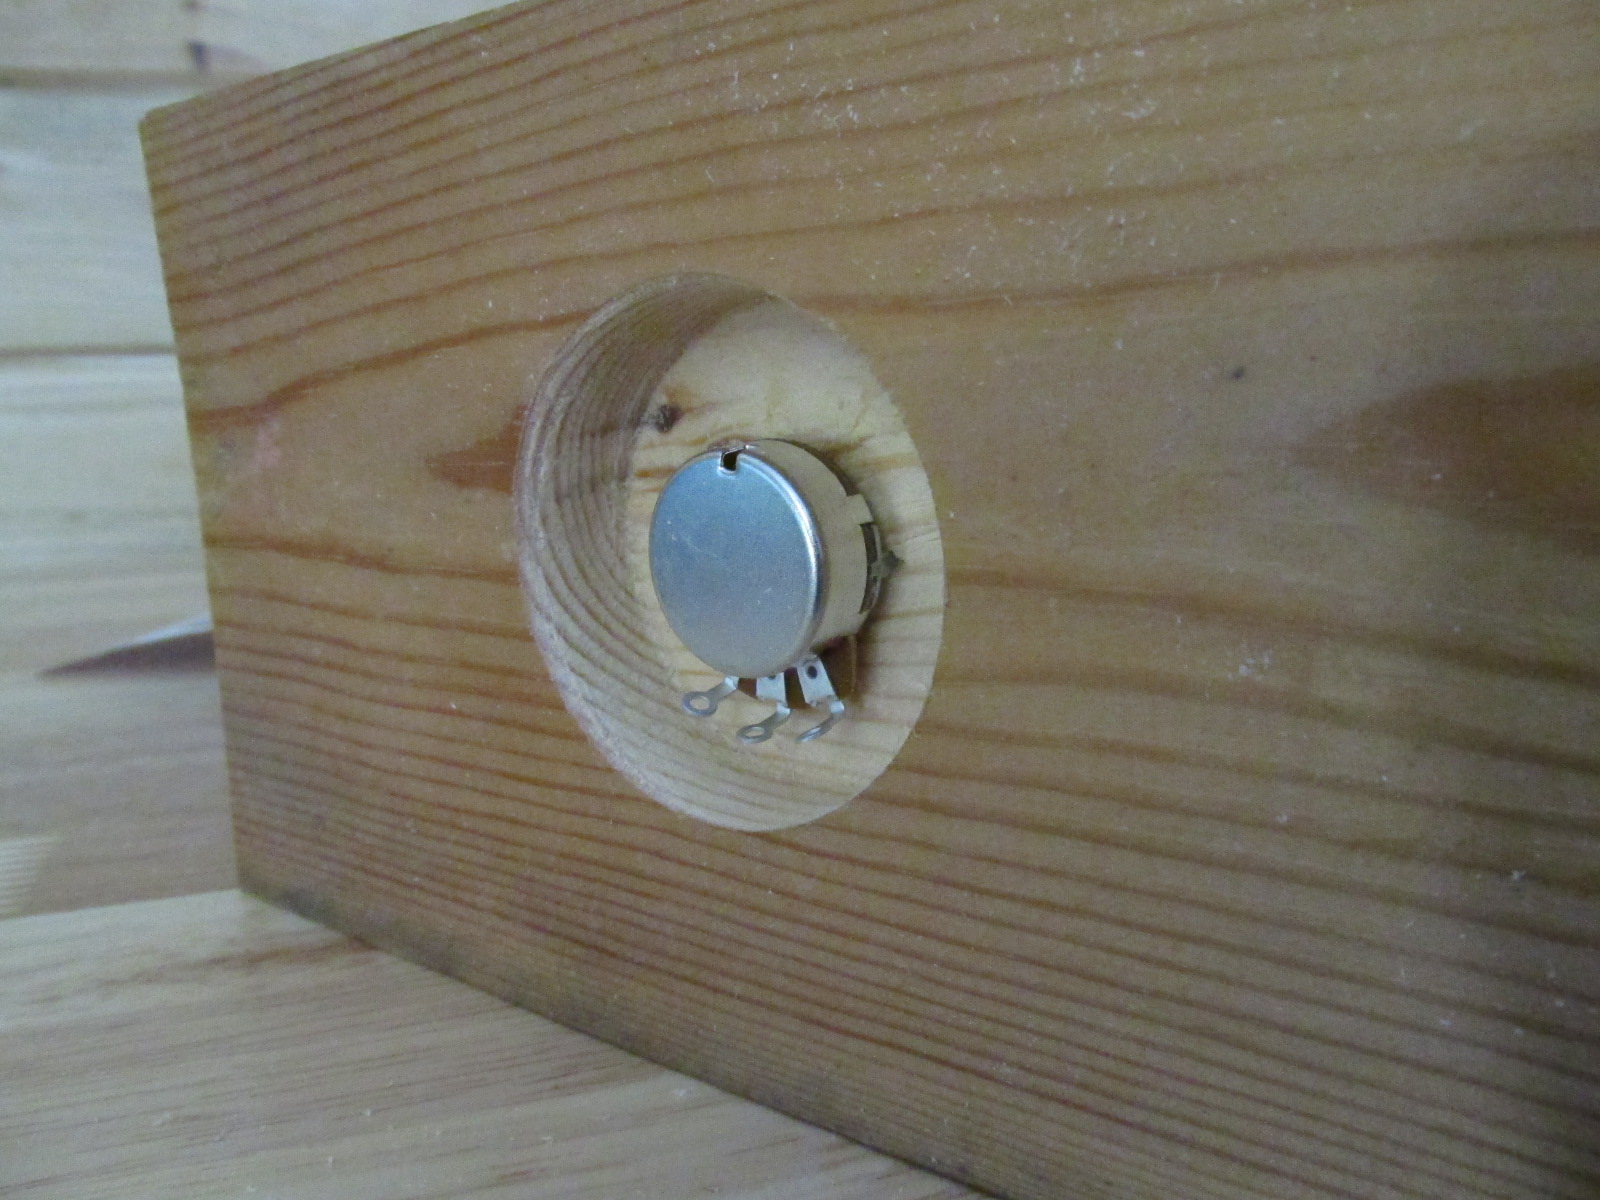
Except for the pilot hole drilled by the brad point, spade and Forstner bits can drill nearly flat-bottomed holes. But the pilot hole can be used to advantage when counterboring holes. This is especially useful for mounting switches, pots, and pilot lights in wood panels; the threaded shafts of such parts are rarely long enough to clear even a thin piece of stock. A large diameter bit is used to hog out enough space on the inside of the panel to clear the back of a control, while a clearance hole for the shaft is drilled through the first bit’s pilot. A drill press is best for such operations.
And one final drilling pro-tip: no matter what bit you use, always back up through-holes with a piece of waste wood, and clamp your stock to the waste block firmly. You won’t believe the difference that simple trick makes – holes will come out clean with no punch through to ruin your work.
I hope this encourages you to include wood in your projects. Good results only take a few basic tools, a little practice, and some guidance. And remember that all three of those and more are probably available at your local hackerspace. It might be worth a visit to see what folks are doing with wood and get some ideas.


Good article. I also suggest reading ‘Good Clean Fun’ by Nick Offerman (you know, the hirsute gentleman from ‘Parks and Recreation). Very fun read, but full of good little tips and insight.
My favorite character on that show!
Was going to post the clip of the canoe inside the office, but this one is funnier.
Wow – more money for the Kreg kit – than for the miter saw recommendation. The last power tool I bought at harbor freight didn’t last two weeks. You can get even a Sears entry level Craftsman 10in Miter Saw for $99 – most days on clearance or special. Spend the money on a quality cordless drill – and a decent chop / miter saw.
Yeah, I’m not a frequent Harbor Freight customer — my anecdotal advice is not to buy low-end tools at Menards. But even low end tools from Home Depot have left me with some regret. The $99 table saw I purchased did its job when we put in our own laminant flooring, but it has not been useful for very many other jobs. Rips are okay but the mitre gauge is awful. I wish I had spent more because now I’m left with a tool that is not broken, but is not as useful as I would have liked.
When it came time to buy a power mitre saw I splurged at $199 and have been quite happy with it. I made a similar choice with my circular saw (I had been borrow a friends for jobs for the longest time) and have been equally happy.
If you’re likely to have the tool for a long time, find a way to purchase a model that you’ll be happy with for a long time.
The problem with buying tools is that the casual user doesn’t know what’s a good tool. Lots of times you can get a used good tool for free on Craigslist, but then the novice user doesn’t know how to turn a used good tool into a great tool.
The best table saws have a cast iron table. You can find these on Craigslist, sometimes for free.
If the fundamental construction is sound, you can usually tune and adjust the tool back to its original goodness with a little effort. Replace the bearings, twist the adjustment screws, replace the power cord – and you end up with a high-quality tool that will last a long time.
My eyes were opened when I saw a YouTube video of someone reducing the blade wobble on his table saw by running the motor without a blade, and holding a whetstone up to the spinning arbor. That and some other tuning tricks and I got my table saw kerf perfectly thin and perfectly at right angles to the work. My radial arm saw is right-angle to less than a mm through the end of its travel, and cuts aluminum to almost machine precision.
I bought an older, crappy metal bandsaw for $25 at a yard sale, replaced the bearings, and now I have a professional-grade bandsaw made from cast iron.
For contrast, a younger “me” bought a brand new Sears drill press (a high-end one) thinking “Sears is quality, right?” It has excessive runout that *cannot* be fixed. The unit is well-known on the internet as “junk”.
How would the novice maker know?
Modern tools have plastic pieces that break, aluminum beds that scratch and vibrate, and cheap bearings that quickly wear out.
Get an older tool and tune it up. The extra knowledge you get will more than pay for itself in saved time.
Good points as always it’s all relative. Such as older isn’t necessarily better. I recall the ads in Popular Mechanics , Popular Science, etc. for low cost benchtop power tools available via mail order, that weren’t praised for quality, but for being a value for what you spend. Older Sears Power tools where good , but in both cases any that have live until until today to be on the used market are likely have ran their lifetime. Another thing is that older tools in good or refurbishable condition “cheap” aren’t universally available. How is a novice to know? They can’t if someone including an example of a poor quality tool doesn’t mention the model number in their comment.
Was about to say the same thing. It takes time and consistent touch to get used to with stuff, which casual users don’t know because mostly they opt to go for instant purchase to make it quick.
There’s a Youtube series on rehabilitating an old Craftsman table saw. Very instructive, particularly the part about making graphite wax to lubricate the screws that set the blade height and tilt. Graphite wax because any sort of liquid lubricant will attract sawdust and soon clog and jam the screw threads.
Horrible Freight has only sold me one thing that has lasted the test of time: my 6″ horizontal/vertical band saw. Got a replacement Lenox 14 TPI blade for it and it’s been cutting metal cleanly for the last few years without an issue. Just about everything else I’ve gotten from there has fallen apart though. That said, apparently some of their tools actually make for solid parts (brushless motors, lithium cells, etc):
http://www.etotheipiplusone.net/?p=4187
I’ve had no problem with Harbor Freight power tools. I have cordless drills, router, a miter saw, drill press, and compressor. I don’t use them heavily. The problem, I think, is that most people don’t bother to comment unless they’ve had problems. Anyway, many times I’ve seen mainstream brands that are exactly the same hardware, just painted and marked differently. Example:
http://www.harborfreight.com/horizontal-vertical-metal-cutting-bandsaw-93762.html (this one is often MUCH cheaper on sale)
http://www.grizzly.com/products/4-x-6-Metal-Cutting-Bandsaw/G0622
Even some of the name brand tools due to the need to be price competitive are also made in China and you can see the reviews of them headed downward because of the lower quality. Name brand tools are going down in price and Harbor Freight tools are, unjustifiably, going up. The deep sale prices now at Harbor Freight are what the full retail prices were at Harbor Freight not that many years ago! The Chinese yuan / US dollar exchange rate should have taken it in the other direction. I think they’re just getting greedy.
Many tools at HF come in two price ranges. The cheap and the less cheap. Currently their cheap line is DrillMaster and the less cheap is Chicago Electric.
The DM tools come with cheaper batteries and chargers without any charge monitoring. Just a plain pair of contacts and the charger keeps going at full steam so if you leave it on too long it’ll ruin the battery.
The CE tools have somewhat smart chargers and batteries with extra contacts that monitor the charge state and either shut down or switch to a maintenance charge.
Harbor Freight has very recently started having some Lithium Ion cordless tools.
Or you could look on Craigslist for some Ryobi ONE+ tools. They’ve made this line of 18V tools for many years and the cool thing is ALL of them take the same batteries. You can use an old NiCd ONE+ battery on the newest ONE+ tool and a new Lithium battery on the oldest ONE+ tool. They’ve been around so long that there are clones of the batteries available. There are regular and “extreme use” Lithium batteries. They come in two thicknesses, the thicker ones are the only ones you want to use on the saws. The “extreme” batteries use cells that will work in a wider temperature range than the regular type, and they have built in LED bar graph power meters.
So if you can pick up a cheap ONE+ set with dead old NiCd batteries, invest in a new Lithium battery pair and charger and the old tools are as good as the new ones – except the newer flashlight is LED and much brighter and will run longer.
I’m gonna have to disagree here.
Having watched [Matthias]’ video on pocket screws, they’re just about the worst way to join (and I use that term loosely) wood in 95% of circumstances. A flat glue joint is often times stronger than pocket screws. A simple half lap joint is pretty easy and with glue, well stronger than the wood.
Secondly $150 for a jig is absolutely insane. Even the single hole ‘Mini-jig’ is $20. A hole drilled through (exotic) hardwood & cut at an angle will do the same job for a fraction of the price.
Handsaw miter boxes aren’t actually meant to cut exact angles. They’re meant to get you pretty close, then you take your work to a shooting board and true up the angles with a hand plane. You may get lucky and have an exceptionally accurate miter box, but even if you build it yourself (and you should, they’re not hard) the accuracy won’t last.
Totally agree. Get a mid-priced dowelling jig. The dowels DO add strength in constructions of the “frame” type (chairs, benches, tables etc.) and make glue-up a lot easier. Yes, you will need clamps but “Pony” type pipe clamps will do.
Yeah, I did mean to mention this as well. If the glue-up is done with the right glue (carpenter’s glue for porous woods, epoxy for oily woods) and the right clamps, it can be incredibly strong and last forever (assuming you pay attention to grain).
I spent about $150 for a lightly used biscuit joiner after considering the options.
Biscuits don’t add much strength over a well planed flat edge glue up. They do however make alignment of large flat surfaces (eg; table tops) much easier to do.
There are several of these out there. http://www.thingiverse.com/thing:1655922
Certainly lacking in durability, but might be good for simple tasks.
A GOOD miter box with a high quality back saw will cut excellent miter joints. Like these. http://oldtoolheaven.com/miter-boxes/langdon-millers-falls.html
Those things with slots for the saw to run in are just cheap guides, no matter how much they cost.
I have to agree here too. Pocket screws are OK for things like trim and face frames that don’t see much stress, but they don’t hold up well under a load.
I challenge you to try a butt-joint with glue alone. Glue just will not stick to end grain. I guess that falls in your 5%. I loathe pocket screw joinery, but I’m not above a biscuit joint in such cases. Especially when I use MDF for shop projects like jigs or my disk sander. It’s quite sturdy with biscuited butt joints.
Apologies, That’s sort of what I meant by ‘flat glue joint’, as in flat grain aka long grain.
As you pointed out end grain to long grain will fail no matter how you join it just by looking at it cross-eyed. In these cases a half-lap or bridle joint are probably the easiest joints to make with minimum tools. Dowels would be a step up from those If you have a table saw or pantorouter a box/finger joint will vastly improve the strength, with mortise and tenon being the rough gold standard. But those take increasing amounts of time, skill and/or tooling to make.
For carcasses, pocket screws are acceptable since the flat sheet skin will provide the rigidity but for anything that expects to see any strain they’re gonna fail. I would rank biscuits as on-par with pocket hole screws. As I said elsewhere, they’re great for alignment of doors/table tops but they don’t offer much in the way for strength. The biggest only go 0.5″ into the wood so they just aren’t able to distribute the strain. From a minimal tool and skill standpoint, half lap or appropriately sized/spaced dowels would be the preferred method.
The author mentions purchasing the $150 Kreg Master System — not a single jig! Kreg’s pocket jig is only around $20, but doesn’t offer the precision and repeatability of the $40 jig. Using said $40 Kreg jig and a chop saw, I repaired a free bunk bed — replacing two missing side rails and building a ladder from scratch — in under two hours. Everything came out incredibly sturdy — the ladder supported my #190 without a hint of strain.
If the situation calls for quick & dirty, Kreg is absolutely the go-to solution. It enables even a novice to assemble incredibly strong joints with minimum fuss, spending zero time on clamping/gluing/cleanup. Just like dowel and biscuit joinery, pocket hole joinery isn’t always suitable for a given construction problem, but for hackers with little woodworking skills, I’ll recommend it as the quickest, easiest way of building a box that is square and sturdy. Beyond that, YMMV.
In any case, I’m quite satisfied with the quality of the Kreg products that I own. I don’t use them for everything, all the time, but they definitely fill an important niche in my toolbox.
More of this!
You’re doing everyone a disservice by even ???????????????????????????????????????? Harbor Fraud.
What is the problem with Harbor Freight. Yes their tools are cheap in every sense of the word, but if you only need the tool occasionally, and/or need a disposable tool, they are the place to go. If you are planing on using the tool professionally or regularly, then go elsewhere.
I’ll take it one step further: if it is Sunday afternoon and you absolutely need a specific tool for a one shot effort, then go Harbor freight. Don’t expect to have it work more than once.
Amazon same/next day delivery FTW. Even if more expensive upfront, better than a one-use throwaway. If you truly only need it once, then sell or donate it. But don’t be cruel enough to do that with something from that Harbor place—it should be smashed to keep any other poor soul from even trying to use it.
Okay, maybe there’s a ???????????????????????? exaggeration in my reaction to HF. But in my younger, more foolish days when I shopped there I bought some of their “higher end” stuff only to be severely disappointed. Never, ever again! Overall, I’ve had better luck buying stuff from AliExpress, and that’s saying something considering how dismal ???????????????? experience can be.
Harbor Freight is like the Radioshack of tools. Yeah, you can get it online for cheaper and it’ll be a higher quality, but I need it RIGHT. NOW.
Not a good comparison. RS sold (mostly) good stuff at high prices. HF sells (mostly) crap stuff at low prices (but still higher than it’s worth).
Most people who complain about the poor quality of cheap tools are abusing them in the first place.
I really just want Harbor Freight to go out of business so that my idiot brother-in-law will stop buying stuff there then bragging to everyone about how much more savvy a shopper he is than the rest of us. Also, my sister is frustrated by the pile of HF purchases that he has given up trying to use but is too proud to throw away.
Don’t throw it away. Put it all in boxes and take it to the local consignment auction. May not get much for it, but it’s more than one would get for throwing it way.
But you’re doing a public service by throwing it away instead of putting it into naïve hands.
I’d never buy a HF power tool, but some of their hand tools are pretty good. I love their bar clamps.
lol
My entire auto shop is run off Harbor Freight and the student fab/machine shop I was the manager of at a large private tech/ university was basically all HF and HF-grade tools.
Your experience is definitely not universal.
My HF bench vise is holding up well. I’d probably trust an anvil from them also.
If the tool is more than just a lump if iron, it’s generally not very good.
Actually, their anvils are well-known in the blacksmithing community to be crap. It hasn’t bothered me though, for the little bit of metal-banging that I do.
You sure that’s not just a bunch of “professinals” boosting their own cred by crapping on a known brand?
Yes.
It’s less to do with the brand and more to do with the construction. HF and many other ‘modern’ anvils are just cast iron. This is simply not not a good construction. A great anvil should be steel bodied. A usable anvil will at least have a hardened steel face. Cast iron & mild steel don’t offer the wear resistance needed to stand up to use above setting rivets. Anything less is just an anvil shaped object.
Woodworking basics for the hardware hacker:
Step 1: Build a CNC router
Step 2: Learn how to use a CNC router
Step 3: Throw away all other cutting tools so you won’t be tempted to cheat and compromise your CNC education.
Step 4: Convert all cutting tasks, no matter how mundane, into CNC ones. Need a 24″ length from a 2×4? Into the router it goes!
All cuts that are not 2.5D are promoted to “not basic”.
WTF: “sorry, metric world — I’m sticking with imperial measurements because I have no idea how wood is measured in your system”. Easy. In cm. Or mm if you want. Can’t HaD find writers that aren’t this dumb?
Cut him some slack. Major HaD audience is in USA.
He is not dumb, wood in N. America is sold in nominal feet and/or inches only. But get this idiocy: 2×4 is not 2 inches by 4 inches, but 1.5 inches by 3.5 inches. And it just goes downhill from there. It is hilarious that any carpentry here gets properly done at all :)
That’s because most carpentery is done by relative size or location. It doesn’t matter how big a stud is so long as it’s center is at the right place. Decorative carpentry lumber is bought rough sawn by the quarter inch (eg; 2 inch is 8/4 lumber) & resawn or planed to size,though you’d want already another quarter to allow for waste. Sure “dimensional lumber” isn’t the dimensions on the sticker but it doesn’t really matter.
Contrary to popular opinion, lumber is still commonly sold by inch in the UK, but it’s a four by two instead of two by four.
This is also a hold over from when lumber was cut to the specified nominal size while green resulting in a random amount of shrink depending on wood species & growth conditions.
If you actually need 2″ x4″ of wood & don’t have a saw big enough to mill your own, but “nominal ” stock instead of “dimension”.
All our panel and sheet sizes in my country (Oz) are metric.
For example the most common sheet size is 2438mm x 1219mm so we just call it a 2.4m x 1.2m
UK sizes as sold are typically 2440mm x 1220mm
So I googled your measurements and found a lot of UK suppliers selling to that spec as wel! ?!
In Imperial its 96″x48″ and is closer to the Oz spec than the UK.
So I guess we round up for the purpose of displaying the size in your common UK DIY store but maybe it’s actually cut slightly smaller?
Off to measure some stock to find out.
2438mm x 1219mm converts almost exactly to 8 feet x 4 feet, which is the standard size in the USA. Looks like Australia just kept the same standard sizes and converted the measurements.
You nailed it right there.
Younger people that didn’t live in the imperial era (Pre 1972 for us) would swear that the sheets are metric.
My favourite is older texts that are converted …
“now place a second hole approximately an 2.54mm to the left”
They should use the A system, like paper, so two A5 sheets is an A4 sheet (similar to 8 1/2 by 11″ paper), and so on. and A-1 and A-2 (they call it 2A0 and 4A0, wimps) are 1189 x 1682 mm= 46.8 x 66.2 in and 1682 x 2378 mm = 66.2 x 93.6 in which would be convenient plywood sizes.
WHA? Is no longer 1.75 x 3.75″
Dang! The years pass with hardly a notice!
Even worse, I’m doing a major remodeling project on my 100-year-old house (in the U.S.) and the original studs really ???????????? 2×4 (so, Americans haven’t always been losers). Lots of extra work to get modern studs lined up with them. It doesn’t help that they weren’t planed flat since they were intended to be covered by forgiving lath & plaster rather than drywall.
It’s 1.5×3.5 because at some point in the dim and murky past it became convention to plane away a massive amount of the wood to make it pretty. In houses built before then it is a PITA doing repairs or modifications to walls that have rough cut studs that actually are 2×4 inches.
Mills still rough cut to 2×4 then plane to 1.5×3.5. The shavings used to be fed along with the sawdust into furnaces to fire the boilers that powered the equipment, or heating the drying kilns. Nowadays the shavings may go into making wood pellets.
It is still possible to buy full dimension rough cut lumber. I just discovered that there’s a Nerf dart blaster called the Rough Cut 2×4. A Google search for rough cut 2×4 turns up only that toy on the first 4 pages. To find the wood one must add lumber to the search. :P
Even in Europe, wood is sold in a mix of metric and imperial.
In my carpentry school’s woodshop I just bought a piece of beech of 700mm, 210mm wide and “two thumbs” thick (which is this case was 48mm but it was already planed, last oak I bought was 56mm). I’m going to resaw it to three 10mm thick pieces though.
Of course that was an ill-advised way to attempt to avert complaints for using imperial units of measurement. However most understood that to mean the author doesn’t know the common sizes of lumber used for construction in other places in the world.
Oh, come on… does not matter. Any construction project, no matter what size you buy your wood you will have to do cuts. Sounds OBVIOUS, no? Yes it is. This looks like it was written by a 10 year old on a school assignment. And, no… the fact you are from one of the 3 countries in the world still using inches does not justify anything. Want to use inches, fine, use them, don[‘t make silly excuses.
Though it was a cheap saw, my $99 sears table saw has made a lot of dust. I just had to pull the motor and clean all the carbon dust from the brushes out of the rear bearing and the motor was made in March 2000.
My latest act of wood butchering involved taking a log from may parents firewood pile and cutting it into lumber using parts of a treadmill found by the curb to extend the table saw into a sawmill.
http://i306.photobucket.com/albums/nn275/eugenenine/2016%20woodworking/IMG_20161112_1531411.jpg
Where is the trailing (kick) guide?
This saw has a design issue in that the anti kick, splitter and blade guard are all mounted at the rear of the table rather than at the blade, they are useless since they might as well be a mile from the blade. I’m going to figure out a way to extend the back of the blade openin and mount them there like a decent one.
You need a kick guide they’re not optional.
If you’re forcing the work into the blade and it kicks then you wont ever need to buy condoms.
If you’re going with the blade and it kicks and disappears your reflex response would likely see you put your hand right into the blade because of a loss of balance. All the people that do this don’t believe they would until they DO! You have no conscious control over reflex responses so you need to consider them in advance.
Also it could be be much higher so that your lot leaning over it and partially off balance to start with.
Saw tables are very rare in my country as their not considered safe. I don’t use one, instead I have a table with complex fences and guides that allow me to use a hand held circular saw with full guards and guides.
Just like a gun, I like the dangerous end pointing the other way.
HAD seems to have ate my reply. I’m not saying the safety gear is useless in general just on this particular saw. Also the way I’m using it there isn’t typical, its only down that low because the log I was cutting was too big and heavy to safely lift up to bench height.
The anti-kick would still have to be removed as you can see the wood is taller than the blade so the log had to be flipped end for end and cut from both sides.
That wood isn’t going to kick in this instance, its much too heavy.
I won’t use a table top saw ever but to use one without a kick guide ???
In this video there’s one other thing – don’t use these little pads, instead use the push sticks made for this purpose because it can all come down to how close your hands are *before* things go wrong.
https://www.youtube.com/watch?v=u7sRrC2Jpp4
See how the splitter comes out of the blade slot on that saw. Mine is mounted behind the table so its no where near the blade, its a pretty bad design and the way its designed I couldn’t make the cut I’m making with it in place. I need to make a new splitter and mount it to the blade mechanism like it should be.
You can also use one of these http://www.acehardware.com/product/index.jsp?productId=1286395 if you don’t want to invest in power tools. I did a few projects with one (mine is older and wood not plastic).
I prefer wood to plastic or metal in just about every project I build. I am much more adept at working with wood than I am other materials. I have scratch built project boxes, clock cases, shelves, cabinets, tables using every tool I could get my hands on – router, table saw, jig saw, band saw, scroll saw, drill press, lathe… I even built a project into a cut-in-half hollowed-out 2×4 once! Wood just looks better in my opinion…
Thanks for this! Keep adding more tips, and more used brands to look for! (Minus harbor freight)
Quote: “prosecutable as crimes against wood”
Big belly laugh :)
Craigslist is a good place to find gently used tools. Spending $89 on a CL miter saw will get you something much nicer. Just be sure to test before you buy.
I have a great router, a sliding miter saw, table saw, pocket hole jig, handsaw, planer, drill press and some hangs told from CL. Almost no one can wear out ones of these things. Some needed a little TLC, and I plan on buying a brand new table saw. But they have served me well while I wait for my dream tools.
You can’t be an idiot though. These things can kill you.
Hacking. Hack-A-Day.
Woodworking began with handtools… and we all know the good, reliable, sturdy, simple, functional, utilitarian works are those from the ancient craftsmen. They had all the slickest tricks! Which of us would NOT want an antique grandfather clock in the hall? (I do have a cuckoo clock I’m looking to get rid of.) Yet these were not the first hackers. Man with flint and stone… clovis points… The man-ape-man just glanced down, saw a really sharp shard of stone, and questioned if he could make that work for his needs… it did… …so how to make more… and made better! Then the oxlatel! (sp?) Prospered! Before that, soft stone, rubbing, Venus! New hobby? Whupps! More mouths to feed!
Achimedes. Leonardo. Galileo. All hacked their own tools and devices.
Welcome to the club. Suggest folks stop thinking it’s just electronics. Too Many Beautiful Minds to Waste.
This !
Perhaps a more basic series on wood working? For example using readily available inexpensive hand tools. The majority of projects aren’t large projects, but you can build a home using inexpensive hand tools. A handheld power circular saw is handy for building a home, but often not that that usable (safely) on smaller projects. However a power hand hand held drill is the most versatile power hand tool.
Anyone also looking for basics (and advanced) should check out Matthias at http://www.woodgears.ca. you can build very functional furniture with only a few tools ( ie skilsaw and drill).
reference Dan’s article on macduff’s circular saw to table saw conversion, the conversion is actually a Jimmy jig that has most of the answers for the table saw short comings, first and foremost it has a stationary fence attached to a sliding table left and right to bypass the the blade for a distance of 49 1/2in, all safety devices are placed up fort and over head of the blade or cutting tool, the unique aperture takes a router or other tools on the same support platform with only 12.5 sq. ft. that is small and very portable, cuts to 4 ft on centre. Aye safety first
Just say no to the manual mitre saw.
I bought one some years ago for a couple of household projects. I thought it was the greatest thing since sliced bread. All those perfectly straight cuts at any given angle… previously only ever having owned a plain handsaw it was a capability I had never had before.
Except that a project of any size took bloody forever! And… straight wasn’t really straight. When cutting long pieces, no matter how well I clamped the piece to the saw, no matter how well I propped up the far end of the piece my cuts always ended up at a bit of an angle. I think the weight of the wood causes the fibers to flex or something and then they go back once the cut is finished and the pressure is released.
Anyway… I was a huge fan of the manual mitre saw despite those faults because it was the best thing I had known. Then I got ahold of a powered mitre saw…. OMG that is SOOOOO much better! If you have to rent one… rent one! Whatever. They aren’t that expensive used though, the only reason I would rent one is if I lived in a studio apartment and had no car to drive back and forth to a storage unit.
Oh, and those cheap mitre blocks…. Forget about it! Pure garbage!
This article makes some great points! I really think the miter saw vs table saw is one of those age old debates. There is not one answer it just depends on the project you are working on.
If you have been doing woodworking for some time now you may want to think about using your skills to make your own furniture. If you already have all that you need you could even do this as a service to those that are less fortunate than you. It is a great way to share your passion with others.
This is a very great suggestion particularly to those new to blogosphere, short and accurate information. Thanks for sharing this one. A must read the article.