Denim Epoxy Table Is A Work Of Art

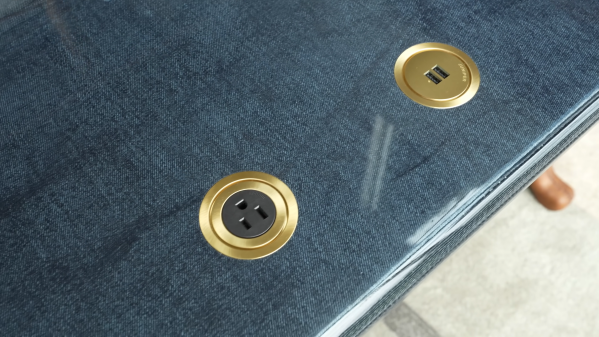
Epoxy has become a hugely popular material in the woodworking and furniture worlds. Who doesn’t love glossy, translucent finishes, after all? [Cam] recently spotted some neat combinations of epoxy with denim, and decided to see if he could replicate the technique to create a very unique desk. We’d say he succeeded.

A significant amount of material was involved, with [Cam] claiming he used 1,000 square feet of denim and 20 gallons of epoxy. The denim was sourced as a bulk roll, making it easy to cut to the proper size to make the desk. Liquid Glass epoxy was used for its visual qualities and its hard-wearing nature.

Combining the two materials was a challenging task. The 50 layers of denim had to be squeegeed one at a time to remove excess epoxy, a process made harder by the thickness of the material. Once all laid up, the stack of denim was compressed between sheets of wood, leading to an epoxy spill of monumental proportions.

Regardless, when the final desk was cleaned up and polished, the results were well worth the trouble. It looks like some kind of crazy denim gem thanks to the rich shine and perfect grain. It’s a material we’d like to play with ourselves.

Continue reading “Denim Epoxy Table Is A Work Of Art”

Workshop Dust Manifold Spreads The Suction Around

Let’s say you’re doing lots of woodwork now, and you’ve expanded your workshop with a few big tools. You’re probably noticing the sawdust piling up awfully quick. It would be ideal to have some kind of collection system, but you don’t want to buy a shop vac for every tool. This simple manifold from [Well Done Tips] is the perfect solution for you.

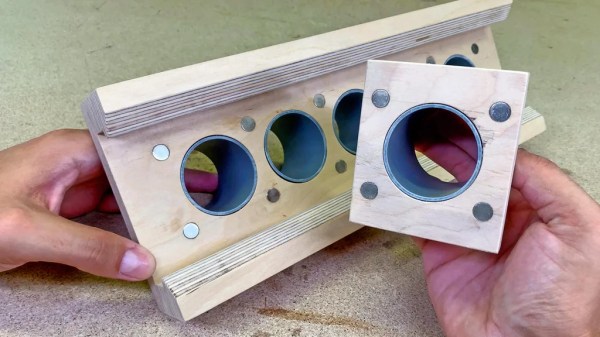
It’s a basic rig at heart, but nonetheless a useful one. It consists of a plywood frame with a shuttle that slides back and forth. The suction hose of your shop vac attaches to the shuttle. Meanwhile, the frame has a series of pipes leading to the dust extraction ports of your various tools around the shop. When you power up a tool, simply slide the manifold to the right position, and you’re good to go. Magnets will hold it in place so it doesn’t get jostled around while you work.

It’s a much cheaper solution than buying a huge dust extraction system that can draw from all your tools at once. If you’re just one person, that’s overkill anyway. This solution is just about sized perfectly for small home operators. Give it a go if you’re tired of sweeping up the mess and coughing your lungs out on the regular. Video after the break.

Continue reading “Workshop Dust Manifold Spreads The Suction Around”

Chevron Desk Takes Advantage Of Plywood For Patterning

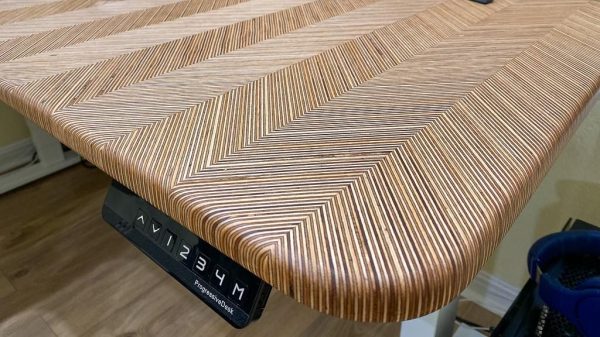
Buying a desk is all well and good, but [WoodCraftly] found that the options they found online were too pricey for what was being offered. Buying the table frame from scratch was much cheaper, and just required crafting a top to match. That provided the opportunity to create this beautiful herringbone-finish desk created with some simple woodworking techniques.

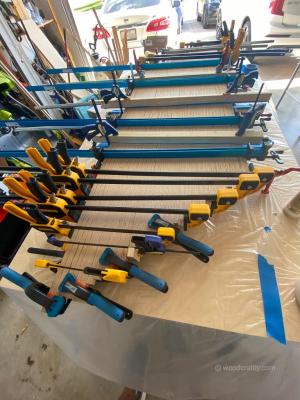
Plenty of clamps were needed for the glue-up.

The build starts with a motorized corner desk frame that can be bought from amazon for just $550. To create the chevron-finish top, [WoodCraftly] grabbed some plywood sheets, and cut them into a series of 1-inch strips. These were then flipped 90-degrees onto their side, and glued together to create a panel that showed off the individual layers of the plywood. This panel was then cut into 3-inch wide strips at a 45-degree angle, and these strips were then placed back to back and once again glued up to create the attractive herringbone design.

From there, it was a simple matter of gluing up panels into the L-shape required for the desk, adding mounting holes, and rounding off the corners for a nice finish. The desk was also given a thick coat of epoxy on the bottom which soaked into the wood and helped give the desk some strength, and a top coat that was sanded back to a natural-look finish.

Overall, the final desk is just the product of some smart cutting and gluing steps combined to create a fun pattern in the end. It’s always fun to build your own furniture because you can express your own style in your creations. Video after the break.

Continue reading “Chevron Desk Takes Advantage Of Plywood For Patterning”

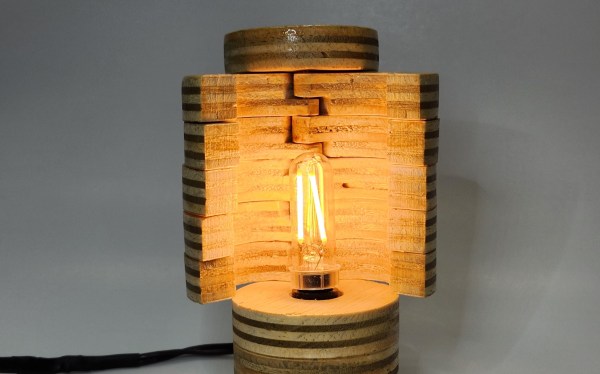
A segmented lamp made of circular slices of plywood. They are arranged as shutters around a long, skinny LED bulb in the center that gives off an incadescent-looking glow. A cord trails off to the left against the grey background.

Plywood Lamp Has Customizable Light Output

There’s something about light fixtures that attracts makers like moths to a flame. [danthemakerman] wanted something with a more configurable light output and built this Sculptural and Customizable Plywood Lamp.

In his detailed build log, [danthemakerman] describes how he wanted something “sort of like an analog dimmable light.” By using a stack of split plywood donuts hinged on a brass rod, he can vary the output and shape of the lamp. These shutters allow the lamp to go from bright to nightlight without using any electrical dimming components.

The plywood was rough cut on a bandsaw before being turned on a lathe. The light cover sections were then hollowed out with a Forstner bit and split in half. The tricky bit is the overlap of the cut on the hinge side of the shutters. Cutting the piece exactly in half would’ve required a lot more hardware to make this lamp work than what was achieved by patient woodworking.

If you’d like to see more ways to make light fixtures with plywood, check out this Hexagonal Lamp, these Upcycled Plywood and Glass Lamps, or this Laser-cut Sphere Lampshade that Packs Flat.

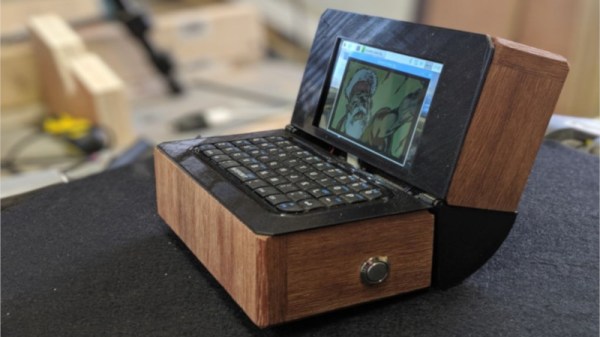
Tiny Wooden Laptop Packs Raspberry Pi

Building a handheld Raspberry Pi rig is practically a hacker rite of passage these days. Off-the-shelf parts keep getting better, and we’re now starting to see affordable compact LCD screens with decent resolution become common. [MakeFailRepeat] got his hands on a HyperPixel screen, and decided to whip up a neat project with it.

The result is a charming little laptop, packing a 4″ screen with 800×480 resolution. Input is via multi-touch, as well as an integrated keyboard. The frame of the laptop is wooden, with a 3D printer supplying parts for the hinge mechanism. To round out the aesthetics, the top of the device was given a decorative copper inlay. Power management is via a UPS hat, which allows the device to switch seamlessly between battery and mains power.

A project like this is a great way to learn a wide range of valuable skills. It involves woodworking and 3D design, as well as the basic configuration of a single board computer. They come in all shapes and sizes, like this tiny RetroPie handheld, or this slick laptop build. Video after the break.

Continue reading “Tiny Wooden Laptop Packs Raspberry Pi”

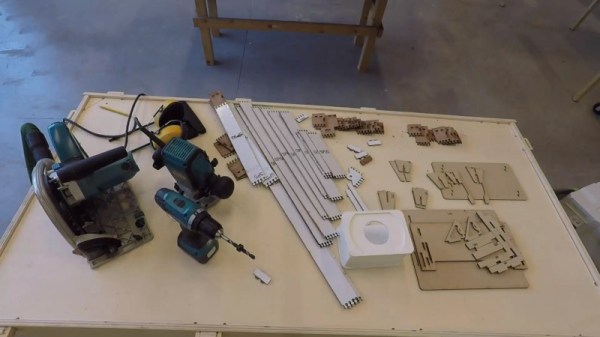
JigFab Makes Woodworking Easier

Woodworking is an age-old craft that requires creativity and skill to get the best results. Experienced hands get the best results, while the new builder may struggle to confidently produce even basic pieces. JigFab is here to level the playing field somewhat.

Much of the skill in woodworking comes with mastering the various joints and techniques required to hold a piece together. Cutting these joints often requires specialized tools and equipment – ideally, some sort of jig. These jigs can be difficult to build in themselves, and that’s where JigFab shines.

The workflow is straightforward and quite modern. A piece is designed in Autodesk Fusion 360. Various joints can then be defined in the model between individual parts. JigFab then generates a series of laser cut constraints that can be used with power tools to easily and accurately cut the necessary parts to build the final piece.

It’s an impressive technology which could rapidly speed the workflow of anyone experimenting with woodwork and design. There’s even smart choices, like having a toolkit of standard predefined elements that reduce laser cutting time when producing new constraints. If you’re eager to get stuck in to woodwork, but don’t know where to start, don’t worry – we’ve got a primer for that. Video after the break.

Continue reading “JigFab Makes Woodworking Easier”

Hexagonal Lamp Is A Stylish Application Of Plywood

Lamps are useful things, and can be a great way to add style and lighting options to a room. Where overhead lights have to provide enough illumination for all manner of tasks, a subtle table lamp can add a nice moody glow to a room when it’s time to kick back and relax. Oftentimes, a stylish lamp can be let down by having a run of the mill plastic switch hanging off the power lead, but it doesn’t always have to be the case. [Emiel] designed this hexagonal lamp with a hidden switch, which works remarkably well.

[Emiel] starts by laying out hexagonal paper templates on plywood and perspex sheet. The plywood is cut on the bandsaw, while the interior cuts on the perspex are made on a scroll saw to avoid unsightly cut entry lines. The outer half of the lamp slides up and down on a pair of steel rods. Springs hold the outer half up, and it can be pressed down to activate a switch inside to turn the lamp on and off.

The build has a clean and attractive aesthetic, with the LEDs hidden inside, glowing through the perspex slices built into the body. It looks like something you’d find in the rooms at the Tranquility Base Hotel & Casino. If regular lamps aren’t enough for you, however, you could always consider building something interactive. Video after the break.

Continue reading “Hexagonal Lamp Is A Stylish Application Of Plywood”