Seems like the first thing the new GoPro owner wants to do is a time-lapse sequence. And with good reason – time-lapses are cool. But they can be a bit bland without a little camera motion, like that provided by a dirt-cheap all-mechanical panning rig.
Let’s hope [JackmanWorks]’ time-lapse shots are under an hour, since he based his build on a simple wind-up kitchen timer, the likes of which can be had for a buck or two at just about any store. The timer’s guts were liberated from the case and a simple wooden disc base with a 1/4″-20 threaded insert for a tripod screw was added. The knob, wisely left intact so the amount of time left in the shot is evident, has a matching bolt for the camera’s tripod socket. Set up the shot, wind up the timer, and let it rip at 1/60 of an RPM. Some sample time-lapse shots are in the video below.
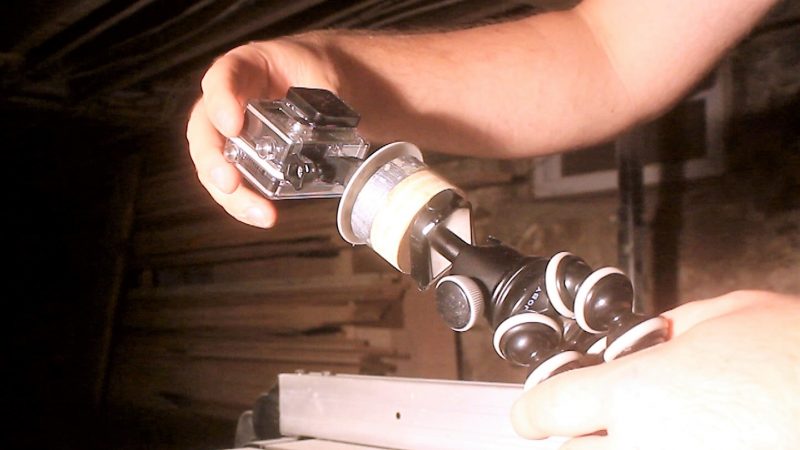
Turning this into a super-simple powered slider for dollying during a time-lapse wouldn’t be too tough — if you’ve already got a nice pantograph slide rig built.
[via r/DIY]


Very, very cool.
Nice simple device.
Interesting at 2:27 the tower “leans” as the camera rotates.
I was wondering if that was an artifact of the go pro lens or perhaps the base was not stable?
Yeah, that’s just the excessive fisheye of the go pro lens, so everything looks EXTREEEEMEEE!!!!!!
Basically a distortion like…
\ | /
/ | \
If those were 3 straight poles.
Thanks –
It this the announcement that we are at the post-Arduino / post cheap servo era where we rediscover the simple mechanisms that sometimes do a much better job than super-sophisticated overkill electronic contraptions?
Post 3D printing too, he used actual tools and glue :-D
shocker i know, but some of us never got into the programming stuff. some of us have always been mechanical problem solvers.
This is soooo oooold. Old as in not fresh.
I could have been on Hackaday, and not as a nagging old sock this time. Oh well.
It’s good to note that these mechanisms are simple, but not perfect. I’ve found that the speed can vary, probably due to wind interacting with the camera. This is unfortunately visible in the resulting time-lapse.
Well, it’s been four years, so three time’s a charm!
https://hackaday.com/tag/panning/ –>
https://hackaday.com/2013/06/04/gopro-panning-time-lapse-with-ikea-egg-timer/
https://hackaday.com/2013/07/18/magnetic-panning-time-lapse-camera-mount-couldnt-be-easier/
A nice reminder for people with gopros who have not seen this concept which has been around quite long. I have almost the identical timer for a gopro pan rig with a magnetic base. Had it for years now.
this type of timer predates the 555 in design…
How about changing the gearing in the actual timer to allow you to take longer/shorter pans, like a pan for a whole day to catch the Sun.
Well if you wanna lock it to the sun, then one of those 24 hour timers that runs off AC might work better… they use minimal current so amenable to running off small battery plus inverter, but you gotta make sure it’s a stable 60hz….. though if you make an inverter with adjustable frequency, you can prolly run them from 10 hz to 200 for different tracking speeds.
3rd time, how funny. Interesting build. More interesting was the obvious staging of the lighting and panning while building a relatively simple hack. Not knocking it, really liked it…just wouldn’t have spent that much time planning and editing had I done it. What I found the more interesting though was the follow-up video YouTube offered showing an even simpler design using an IKEA timer. Not 100% the same but much simpler if you don’t have the tools shown in this hack.
Forgot the link for the one I meant. https://youtu.be/nWQGGEBqxio
I suppose I’ll never get it. Any chance to hate against the arduino, and modern tools will do, it would seem. I’m often surprised at will trigger hate for something that’s light years away from the current topic. Didn’t are much for the video presentation style, but that it what is is, and the video may give some an idea to repurpose an inexpensive and simple item to fit their needs.
Arduinos and 3D printers are awesome, what the hate is for is when they are used for the metaphorical equivalent of this…
http://all.blogs.com/photos/uncategorized/2007/04/03/fat_american_walking_dog_from_car.jpg
The problem with that picture is that the dog should be in front of the car pulling it ;-)
There is some kitchen timer in everbodys most loved Swedish store which is cylindrical and goes almost 360° degree per hour. Just put either a tripod screw or one of those GoPro pad on top of it and your done.
Yah, I got an apple shaped one, from the dollar store that would take very minimal modification, yank the plastic stalk out, glob a stub of 1/4″ bolt in…
Dang! All my kitchen timers are digital…