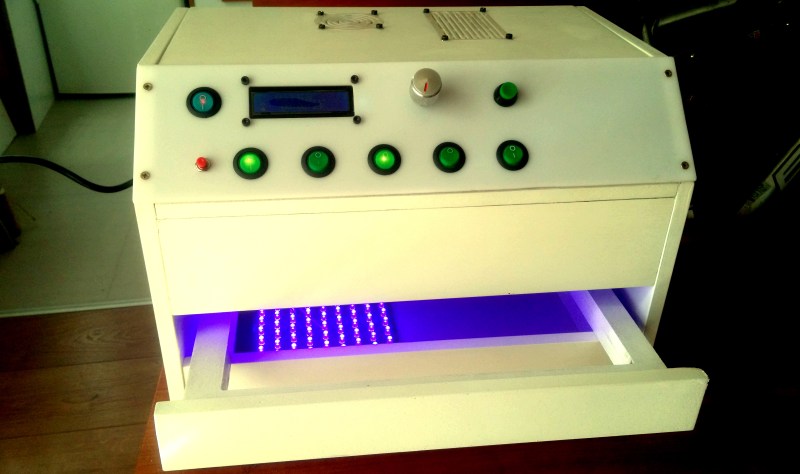
[GiorgiQ] needed a UV light to cure the etch resist on his printed circuit boards, and what better way to accomplish this than to build the perfect UV light box himself? The box consists of a custom PCB (of course) featuring a pair of 12V relays tripping quad 9×12 matrices of 400nm UV LEDs, with a total of 432 diodes in use — not to mention resistors to protect the LEDs. All of it is run by an Arduino Nano.
The enclosure is made out of 12mm MDF and 3mm cast acrylic, and the circuit board fits into a tray sliding on drawer sliders, allowing a resist-covered board to be placed in a carrier and slid back in.
DIY light boxes mostly don’t look as slick as [GiorgiQ]’s, but they’re a fairly common project. This one also uses 9×12 matrices of UV LEDs, while a distinctly simpler project involves making a UV exposure box out of fluorescent lights.


Wow that’s a serious exposure box – makes mine look rather pitiful!
that is a pretty looking unit, never realized that UV LED’s were suited for this job, can’t see any diffuser for equaling out the light across the PCB, but this does not appear to be a problem, I guess. Nice build.
We also have UV LED light box, diffuser is not needed. What is missing is collimator. This is why PCBs made in these boxes have thinner traces (or thicker, depending on whether positive or negative photoresist is used) than what is printed on the film.
From my own experiments with timing on Riston, exposure is pretty flexible. Between the exposed and no exposed you could easily double or quad the amount of light exposed to the PCB and with 2 layers of transparency on a partially okay laser printer you’ll still be fine.
I’m impressed at the lengths this guy when to. I just slide my PCB under a $10 ebay nail curing light. I sit it on a box about 200mm from the PCB, and get fantastic results even without a collimator.
I made a big one about that size once, although only single sided. It went through a couple of iterations, first using a matrix of 5mm leds, then a handful of 1W leds.
But I found that it’s size was a detriment more than a help, finding somewhere to put it, and needing to drag it out and plug it in to actually use it just made it too easy to procrastinate.
So I made a new one, much much smaller and battery powered (but I can plug it in if need be to a 12v supply). It uses just 4 1W UV leds (and has 4 white ones for lightbox mode) and exposes dry film resist in just 22 seconds.
https://imgur.com/puNteH4
I’d be curious to see that build if you have a URL. Thanks for the pic.