Servers are most often found in climate controlled data centers. This means they aren’t exactly built for creature comforts like quiet operation. Quite the contrary — many server chassis include fans which absolutely scream when the machine is under load. [Whiskykilo] needed to set up a 12 U rack in his basement for working from home. He knew the sound would get on anyone’s nerves, but especially on those of his wife.
To solve this problem, he built a sound isolated rack. The build started with a standard 12 U metal rack frame. This is wrapped in 1/2″ MDF coated with automotive sound deadening material. An outer frame built of 1×4 lumber and another layer of 1/2″ MDF. Isolating the inner and outer boxes made the biggest contribution to quieting down the noisy servers.
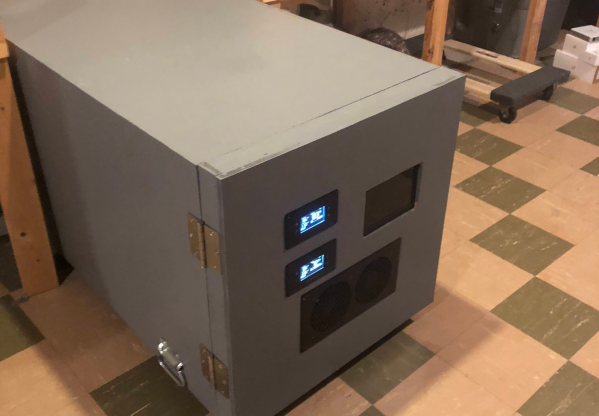
Computers need to breathe, so the front and back doors of the rack enclosure include banks of intake and exhaust fans to keep air flowing through the servers. Two AC Infinity controllers keep the fans operating and monitor temperature. These machines do generate some heat – so 64 °F (18C) intake and 81 °F (27C) exhaust is not unheard of. The servers don’t seem to mind running at these temperatures. A Raspberry Pi 3 keeps an eye on UPS operation and displays the data on a 7″ HDMI LCD.
Interested in running a server at home? You don’t have to go to the lumberyard – check out this server made with Ikea components, or this server built from 96 MacBook Pros.


