Clever Mechanism Powers This All-Mechanical Filament Respooler

No matter how far down the 3D printing rabbit hole we descend, chances are pretty good that most of us won’t ever need to move filament from one spool to another. But even so, you’ve got to respect this purely mechanical filament respooler design, and you may want to build one for yourself just because.

We were tipped off to [Miklos Kiszely]’s respooler via the very enthusiastic video below from [Bryan Vines] at the BV3D YouTube channel. He explains the need for transferring filament to another spool as stemming from the switch by some filament manufacturers to cardboard spools for environmental reasons. Sadly, these spools tend to shed fibrous debris that can clog mechanisms; transferring filament to a plastic spool can help mitigate that problem.

The engineering that [Miklos] put into his respooler design is pretty amazing. Bearings excepted, the whole thing is 3D printed. A transmission made of herringbone gears powers both the take-up spool and the filament guide, which moves the incoming filament across the width of the spool for even layers. The mechanism to do this is fascinating, consisting of a sector gear with racks on either side. The racks are alternately engaged by the sector gear, moving a PTFE filament guide tube back and forth to create even layers on the takeup spool. Genius!

Hats off to [Miklos] on this clever design, and for the extremely detailed instructions for printing and building one of your own. Even if you don’t have the cardboard problem, maybe this would help if you buy filament on really big spools and need to rewind for printing. Continue reading “Clever Mechanism Powers This All-Mechanical Filament Respooler”


Modular Z80 Really Racks Up The Retrocomputer Cred

Very few retrocomputing projects are anything other than a labor of love. There’s really no practical reason to build a computer that is woefully inadequate for just about any task compared to even an entry-level PC today. But the lack of a practical reason to do something rarely stops a hacker, as with this nifty modular Z80-based rack computer.

Actually, there’s at least one area where retrocomputers excel compared to their modern multi-core gigahertz counterparts — and that’s nostalgia. That’s what [Ricardo Kaltchuk] was going for with his build, which started by finding a Z80 and an Intel 8251 USART in his parts bin. Those formed the core of what would become the “Proton” computer, a modular beauty built around 7 cm by 10 cm PCBs that plug into a backplane inside a rack made from aluminum angle. Aside from the power supply and the Z80 CPU, other modules include a RAM card with a zero insertion force socket for an EPROM, a mass-storage module sporting a 128 MB Compact Flash card, plus modules for standard serial and I2C comms.

The fit and finish are excellent, and the performance is impressive. The Proton runs CP/M and boasts a ton of old applications that will bring back some memories, like SuperCalc and dBase. We’d venture a bet that WordStar is in there someplace, or easily could be. The video below is a little rough, but shows everything off really well.

In some ways, the Proton reminds us of the RC2014, but its fit and finish are what bring this build home. That’s not to take away from the work [Ricardo] obviously put into documentation, though. The 62-page manual has every detail of every module, plus instructions for building one of your own.

Continue reading “Modular Z80 Really Racks Up The Retrocomputer Cred”

Mechanisms: Gears

Even before the Industrial Revolution, gears of one kind or another have been put to work both for and against us. From ancient water wheels and windmills that ground grain and pounded flax, to the drive trains that power machines of war from siege engines to main battle tanks, gears have been essential parts of almost every mechanical device ever built. The next installment of our series on Mechanisms will take a brief look at gears and their applications.

Continue reading “Mechanisms: Gears”

Sound Isolated Server Rack

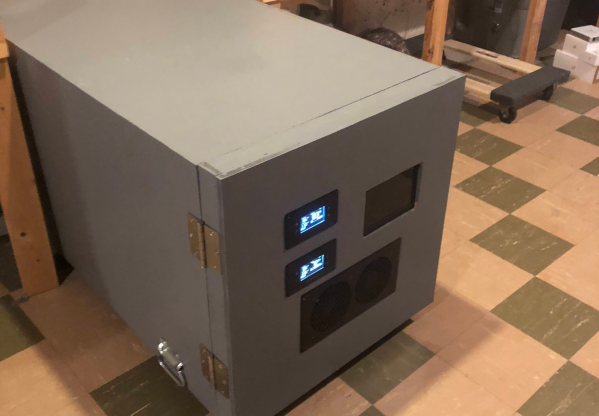
Servers are most often found in climate controlled data centers. This means they aren’t exactly built for creature comforts like quiet operation. Quite the contrary — many server chassis include fans which absolutely scream when the machine is under load. [Whiskykilo] needed to set up a 12 U rack in his basement for working from home. He knew the sound would get on anyone’s nerves, but especially on those of his wife.

To solve this problem, he built a sound isolated rack. The build started with a standard 12 U metal rack frame. This is wrapped in 1/2″ MDF coated with automotive sound deadening material. An outer frame built of 1×4 lumber and another layer of 1/2″ MDF. Isolating the inner and outer boxes made the biggest contribution to quieting down the noisy servers.

Computers need to breathe, so the front and back doors of the rack enclosure include banks of intake and exhaust fans to keep air flowing through the servers. Two AC Infinity controllers keep the fans operating and monitor temperature. These machines do generate some heat – so 64 °F (18C) intake and 81 °F (27C) exhaust is not unheard of. The servers don’t seem to mind running at these temperatures. A Raspberry Pi 3 keeps an eye on UPS operation and displays the data on a 7″ HDMI LCD.

Interested in running a server at home? You don’t have to go to the lumberyard – check out this server made with Ikea components, or this server built from 96 MacBook Pros.

Linear Clock Slows The Fugit Of The Tempus

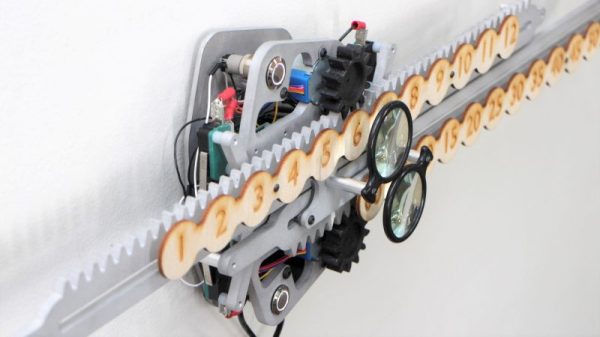
We feature a lot of clocks here on Hackaday, and lately most of them seem to be Nixie clocks. Not that there’s anything wrong with that, but every once in a while it’s nice to see something different. And this electromechanical rack and pinion clock is certainly different.

[JON-A-TRON] calls his clock a “perpetual clock,” perhaps in a nod to perpetual calendars. But in our opinion, all clocks are perpetual, so we’ll stick with “linear clock.” Whatever you call it, it’s pretty neat. The hour and minute indicators are laser cut and engraved plywood, each riding on a rack and pinion. Two steppers advance each rack incrementally, so the resolution of the clock is five minutes. [JON-A-TRON] hints that this was a design decision, in part to slow the perceived pace of time, an idea we can get behind. But as a practical matter, it greatly simplified the gear train; it would have taken a horologist like [Chris] at ClickSpring to figure out how to gear this with only one prime mover.

In the end, we really like the look of this clock, and the selection of materials adds to the aesthetic. And if you’re going to do a Nixie clock build, do us a favor and at least make it levitate.

Continue reading “Linear Clock Slows The Fugit Of The Tempus”

MIDI Guitar Pedals

Ever since Jimi Hendrix brought guitar distortion to the forefront of rock and roll, pedals to control the distortion have been a standard piece of equipment for almost every guitarist. Now, there are individual analog pedals for each effect or even digital pedals that have banks of effects programmed in. Distortion is just one of many effects, and if you’ve built your own set of pedals for each of these, you might end up with something like [Brian]: a modular guitar pedal rack.

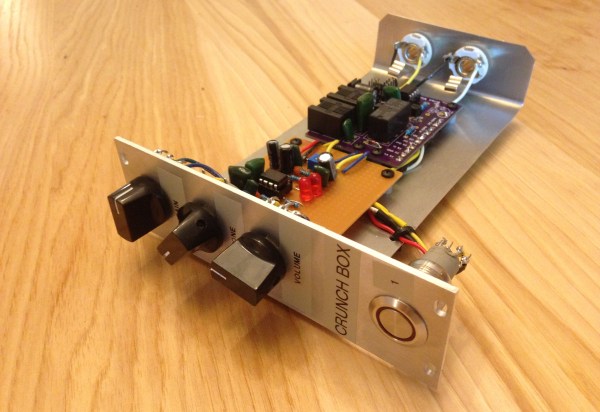
ae0fmjxTaking inspiration from modular synthesizers, [Brian] built a rack out of wood to house the pedal modules. The rack uses 16U rack rails as a standard, with 3U Eurorack brackets. It looks like there’s space for 16 custom-built effects pedals to fit into the rack, and [Brian] can switch them out at will with a foot switch. Everything is tied together with MIDI and is programmed in Helix. The end result looks very polished, and helped [Brian] eliminate his rat’s nest of cables that was lying around before he built his effects rack.

MIDI is an extremely useful protocol for musicians and, despite being around since the ’80s, doesn’t show any signs of slowing down. If you want to get into it yourself, there are all kinds of ways that you can explore the studio space, even if you play an instrument that doesn’t typically use MIDI.

Weather-aware Shoe Rack Helps You Get Ready For The Day

If you’re anything like us, your complete shoe collection consists of a pair of work boots and a pair of ratty sneakers that need to wait until the next household haz-mat day to be retired. But some people have a thing for shoes, and knowing which pair is suitable for the weather on any given day is such a bother. And that’s the rationale behind this Raspberry Pi-driven weather-enabled shoe rack.

The rack itself is [zealen]’s first woodworking project, and for a serious shoeaholic it’s probably too small by an order of magnitude. But for proof of principle it does just fine. The rack holds six pairs, each with an LED to light it up. A PIR sensor on the top triggers the Raspberry Pi to light up a particular pair based on the weather, which we assume is scraped off the web somehow. [zealen] admits that the fit and finish leave a bit to be desired, but for a first Rasp Pi project, it’s pretty accomplished. There’s plenty of room for improvement, of course – RFID tags in the shoes to allow them to be placed anywhere in the rack springs to mind.

[via r/raspberry_pi]