Smoothing the layer lines out of filament-based 3D prints is a common desire, and there are various methods for doing it. Besides good old sanding, another method is to apply a liquid coating of some kind that fills in irregularities and creates a smooth surface. There’s even a product specifically for this purpose: XTC-3D by Smooth-on. However, I happened to have access to the syrup-thick UV resin from an SLA printer and it occurred to me to see whether I could smooth a 3D print by brushing the resin on, then curing it. I didn’t see any reason it shouldn’t work, and it might even bring its own advantages. Filament printers and resin-based printers don’t normally have anything to do with one another, but since I had access to both I decided to cross the streams a little.
The UV-curable resin I tested is Clear Standard resin from a Formlabs printer. Other UV resins should work similarly from what I understand, but I haven’t tested them.
Current Smoothing Methods
There are several ways to smooth prints, including:
- Sanding, usually along with using fillers like Bondo
- Smoothing with solvents (e.g. acetone vapor bath for ABS)
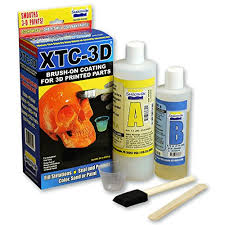
- XTC-3D (a gap-filling liquid conformal coating that hardens)
- Spraying with filler primer (not very good for smoothing layer lines, but included regardless.)
Each of these methods is very different. Sanding, usually in combination with gap filling materials like Bondo, is easy to do, offers the most control, and gives reliable results. The downsides are that it is time-consuming and messy.
Smoothing ABS prints with acetone vapors can look amazing but results depend heavily on applying the process just right, and mistakes generally cannot be salvaged. Also, open flame and acetone do not mix (or rather they mix too easily, and undesirably.)
XTC-3D is a thin, two-part liquid that is mixed and then painted onto a model in a thin coat. According to the manufacturer, working time for a batch is about 10 minutes and cure time is four hours. Results are supposed to be very good if one has the time and patience to mix and apply multiple coats.
Spraying with filler primer is, in my experience, suitable for smoothing out scratches and other minor surface imperfections only. I’ve never observed it to have any real effect on removing something like layer lines.
Why Bother with UV Resin?
On the surface, using UV resin doesn’t seem to offer much over XTC-3D. They are both specialty products, both require special handling and application, and both will smooth 3D prints by applying one or more thin layers of goop that hardens. But for those people who may already have access to UV resin, it does offer several potential benefits:
- No mixing required. The UV resin can be used as-is.
- Less wasteful; use only what is needed. (With XTC-3D the unused portion of a batch is garbage, as well as the receptacle and brush.)
- Indefinite working time. The resin cures when exposed to UV but premature curing isn’t a worry under something like normal workbench lighting.
- Viscosity can be changed by thinning the resin with isopropyl alcohol.
- If one has access to SLA or DLP printers, there’s no need to buy a separate product. Just use the dregs from old containers or build platforms, or skim some from a fresh supply. A little goes a long way.
Of course, none of this matters much unless UV resin can actually smooth 3D prints in an effective and reliable way. I did some work to find out how well it performs, what affects the results, and what other practical issues are involved.
Working with UV Resin
Wear gloves, make sure you protect your work surface from spills, and avoid any potential contamination of resin intended for working printers. If you take some resin to use for 3D print smoothing, do not return it to a printer’s reservoir or container.
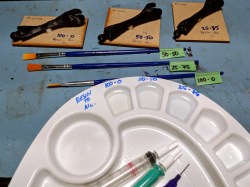
Uncured resin can be cleaned up with isopropyl alcohol; it can also be used to dilute the syrupy resin prior to application. I tested a few different ratios of resin to alcohol to measure the results. In short, just as with paint, it’s possible to thin it out too much to be useful. Application of the resin was with cheap and unremarkable bristle brushes.
Curing the resin is by UV, ideally 405 nm in the case of the Formlabs resin I used. I have a UV cure box I constructed, but I found that it was easiest to simply place the coated object in direct outdoor sunlight. Most windows will block UV, so outdoors was best.
The Test Objects and Mixtures
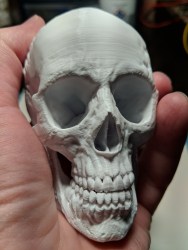
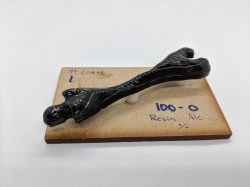
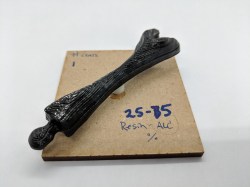
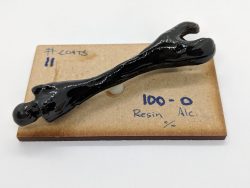
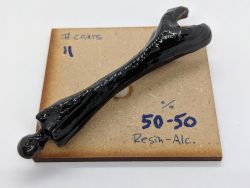
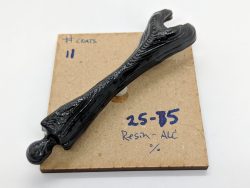
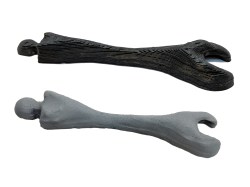
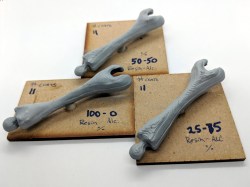
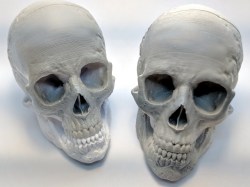
Three identical bone-shaped scrap prints were selected as test objects. They were all printed with a 0.8 mm nozzle and a 0.30 mm layer height. They look something like a topological map, so they were excellent test pieces. In addition, two small skulls were used. The skull model is by Makerbot, downloaded from Thingiverse.
I used three different mixtures:
- 100% UV resin, straight from the container. It has a corn syrup-like viscosity.
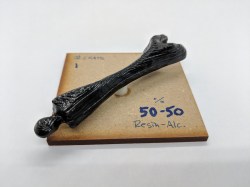
- 50% – 50% mixture (by volume) of UV resin to isopropyl alcohol. Viscosity resembles maple syrup.
- 25% – 75% mixture (by volume) of UV resin to isopropyl alcohol. Viscosity resembles paint from a can.
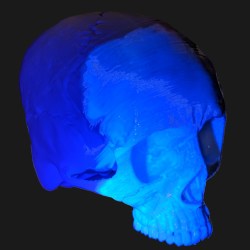
The resin mixtures all glow under UV light, so I used this effect to observe how the mixtures flowed and settled in the models. I did so with a small handheld UV LED light to visualize the deposited resin. It had no immediate effect on curing the resin when used in this way, but I still kept the UV away from the brushes and unused resin.
Results

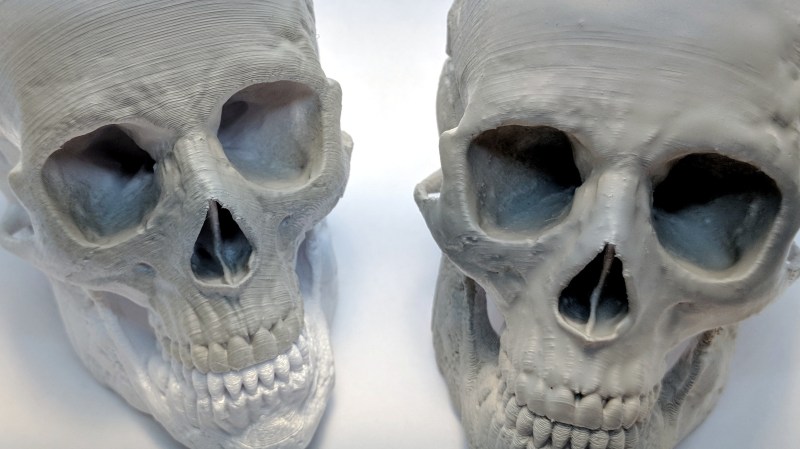
I applied two coats in total to each object, taking pictures after each coat. After the second coat, I sprayed a light coating of grey primer to highlight the surface texture.
Resin diluted with isopropyl alcohol in a 50:50 ratio flowed better and still pooled well between layers, but overall deposited less resin. This meant that the smoothing effect was less pronounced than using pure resin. Curing also seemed to take somewhat longer.
The resin in a 25:75 ratio with alcohol was quite thin and had very little smoothing effect. It’s a bit misleading to use, because applying it seems to coat the test object just fine, but most of the mixture’s volume disappears as the alcohol evaporates and leaves behind only a small amount of resin to cure, relative to the volume that was originally applied.
After observing the results, two fairly typical prints (0.4 mm nozzle, 0.1 mm layer height) of a skull were coated to get a feel for the practical results of using UV resin for smoothing. Only the upper face was coated, so that the contrast with surrounding uncoated areas was clear.
One coating of undiluted resin was enough to noticeably (but not completely) smooth most areas, but a second coat overwhelmed finer details like the teeth of the skull. Two coats of the thinnest mixture (25:75 of resin to alcohol) had very little smoothing effect on the test object, and virtually no smoothing effect at all on the skull.
Best results will probably come from either multiple coats of slightly diluted resin, or pure resin followed by additional coats of slightly diluted resin. Sanding (which I did not perform) may have a place, as well.
Lessons Learned
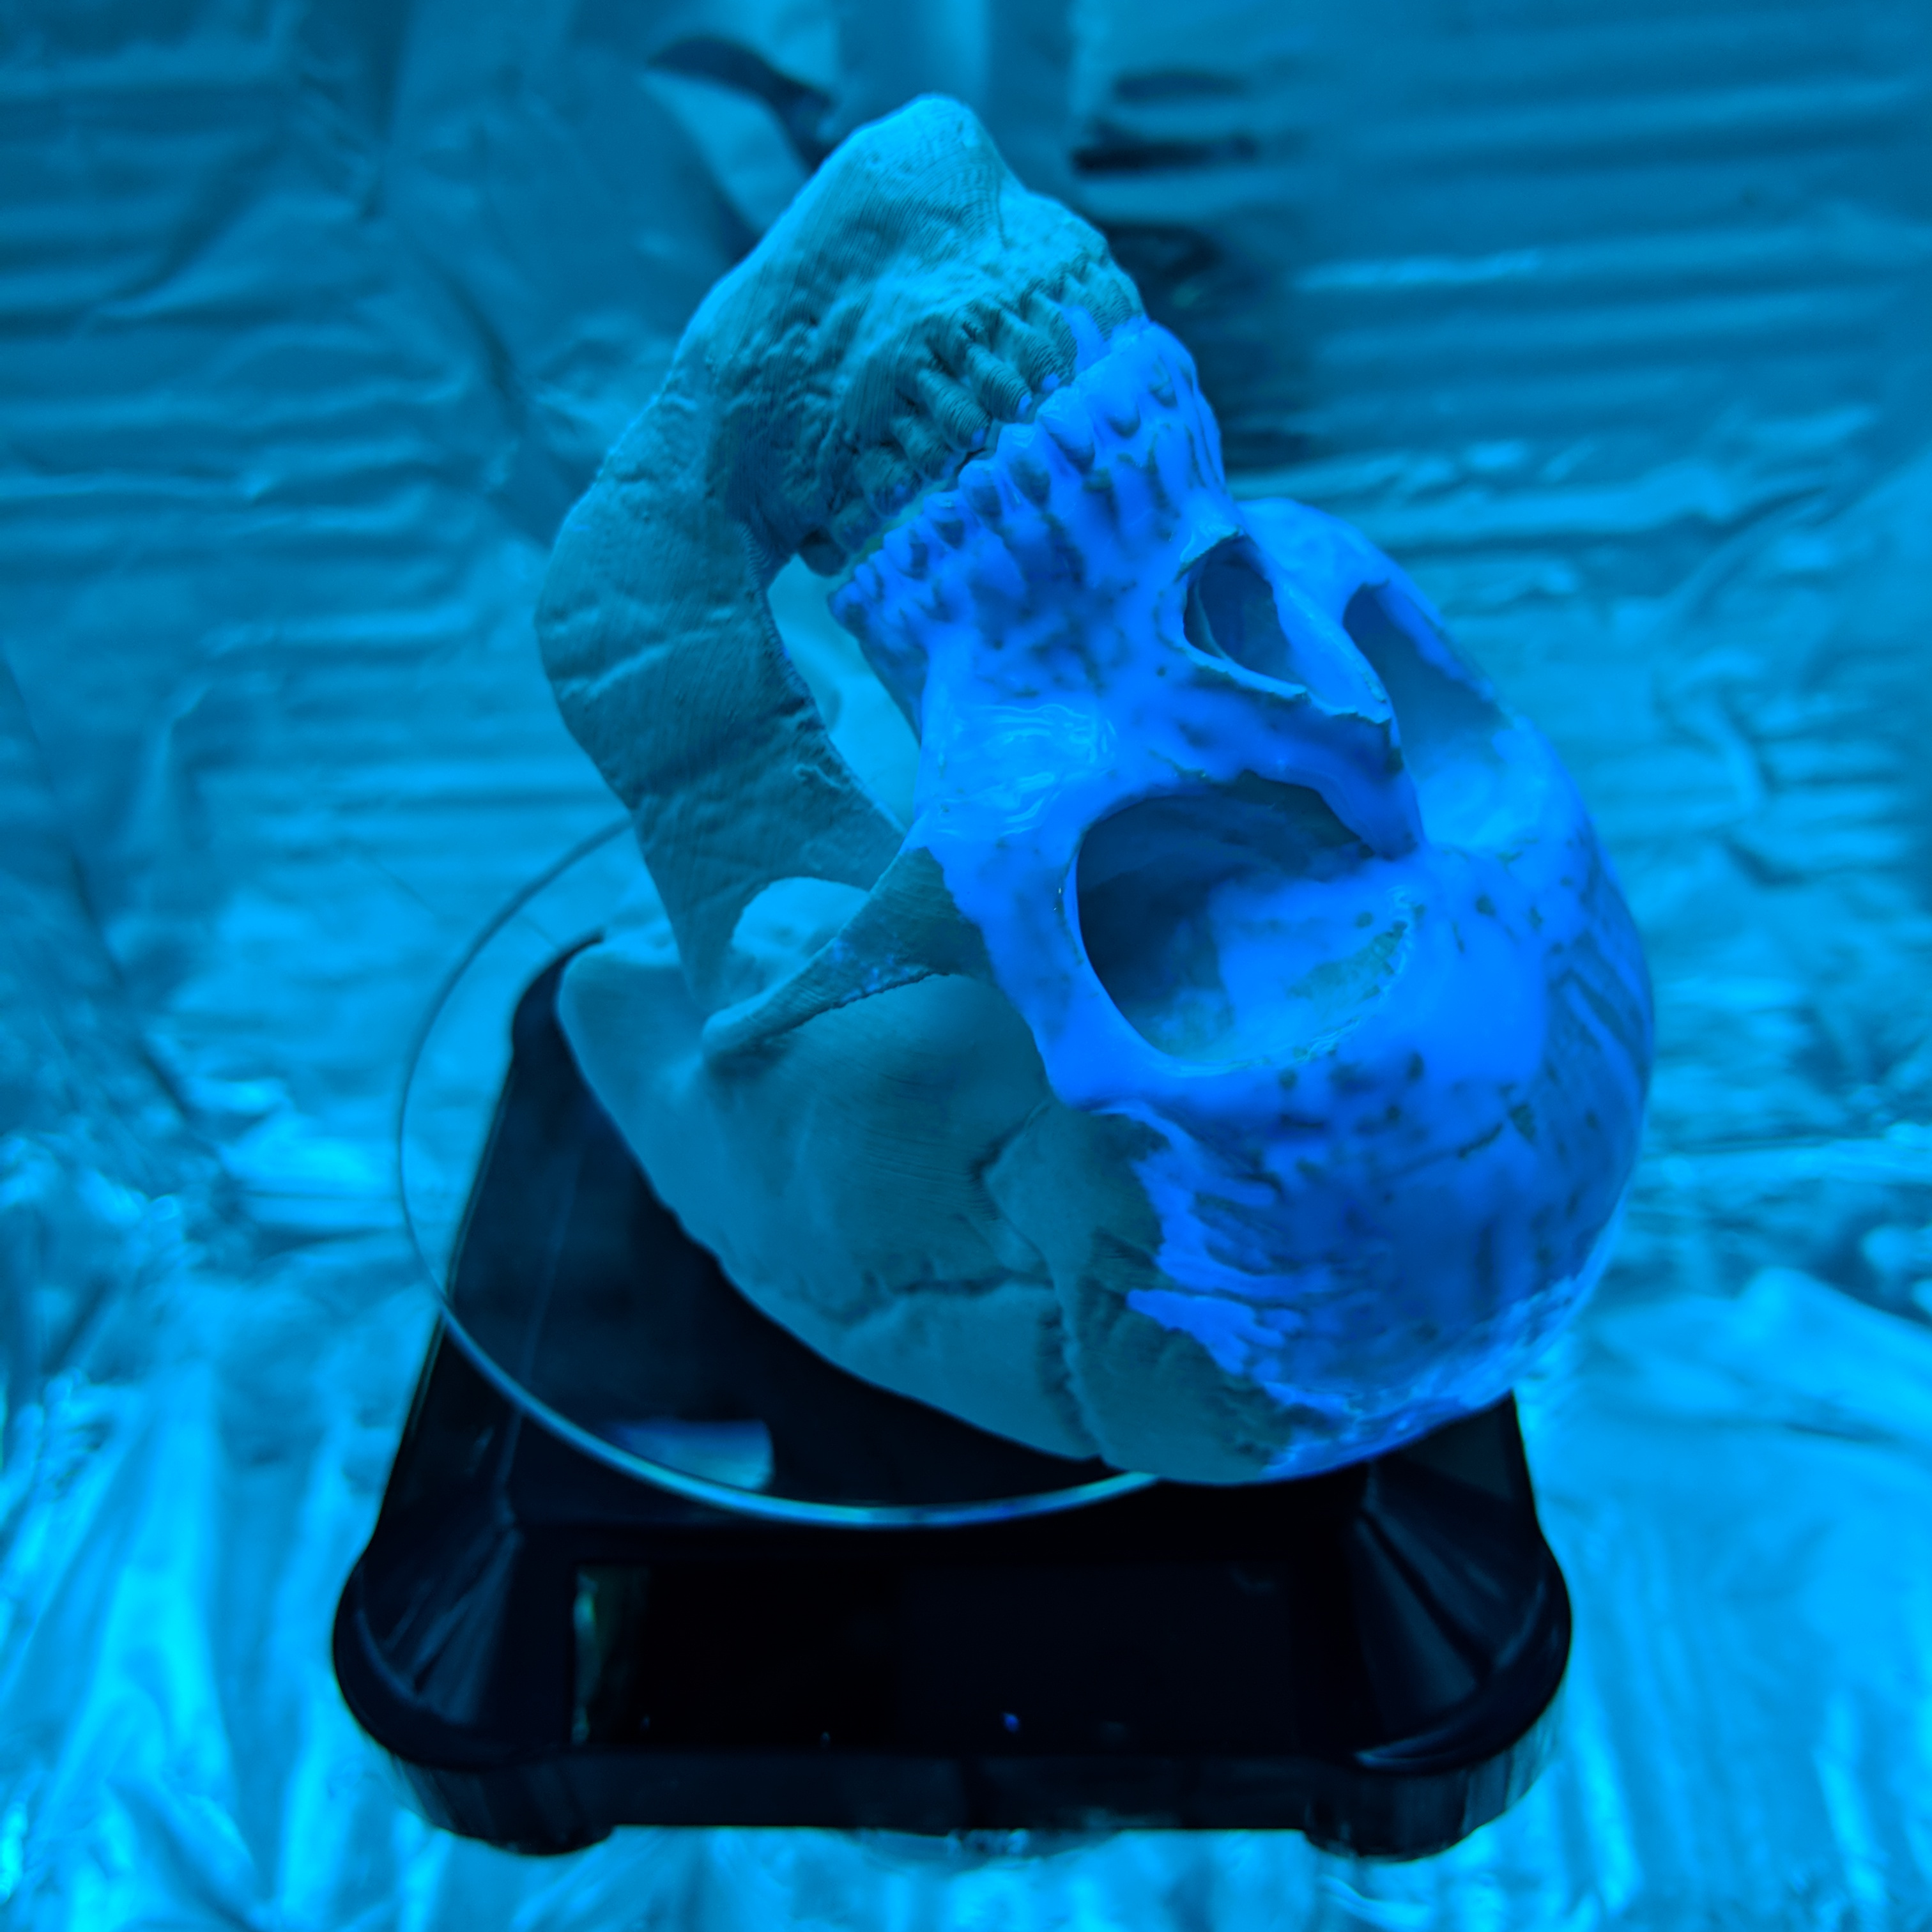
Curing the resin is easiest done in direct sunlight, although a home-made cure box can be used as well. A solar-powered display turntable is useful for rotating small objects for even exposure. Outdoor curing consists of simply leaving the resin-coated object out in the sun until it’s no longer tacky. In the winter sunlight I had to work with during testing, a couple or three hours seemed enough to do the trick.
Undiluted resin provides aggressive but useful smoothing. A second coat was too aggressive for small details.
As for thinning the resin with alcohol, a 50:50 mixture by volume of the Formlabs clear resin I tested (resulting in a mixture about as thick as maple syrup or custard sauce) is the thinnest I would consider for general use. The thinner the resin mixture, the less resin the mixture contains. Also, the more it pools in low areas and the less it stays on high areas. Because 3D prints have layer lines evenly distributed across both high and low points of a model, a coating that is too thin and flows too readily won’t adhere evenly enough, and layer lines will still be visible.
Best results will require some trial and error. Happily, 3D printed test objects are not hard to come by, and applying resin then placing the object in sunlight for a time is not a particularly troublesome process.
Next Steps
With the results I obtained, here’s how I’d improve my next attempts:
- Undiluted resin might be a bit too thick for general use, and may be best reserved for particularly nasty spots.
- A resin to alcohol mixture of perhaps 3:1 might be better for general use.
- Spot curing some areas with a handheld UV emitter (and appropriate eye protection) might be a useful technique.
- Sanding is troublesome and a bit messy, but it might be worth sanding a print a little before coating with resin just to take the edge off the highest and worst spots on a model. Sanded PLA looks awful, but once the resin is on that shouldn’t matter.
Is It Worth It?
Using UV resin does offer some advantages. Compared to XTC-3D, the ability to use only as much as is needed reduces waste. Also, there is no mixing required, the viscosity can be altered to match needs, and curing can be as simple as leaving in direct sunlight. On the other hand, the end results aren’t really any better than other methods. It’s just a different way of getting there.
If one has access to UV resin, it is definitely worth a try. A little goes a long way and resin is expensive, so expired resin, leftovers, or skimming some from a printer is the way to go. With a bit of experimentation, smoothing prints with UV resin can be effective and easily done as long as the resin is available.


I have been using this method for some time. The results are in fact much better than most other methods. Its easier to do overall than any other method. The type of resin matters however. Your print there is just seriously poor quality and there isnt much you can do about it other than fix your printer, or get a new one.
What resin have you tried and what worked & didn’t work well with it? How much did you find the viscosity mattered? I have a feeling that while each resin is essentially the same (liquid that cures hard with UV) the different ones probably each have their own quirks.
There are also thermal based systems that sort of selectively “melt” the outside of the ABS material enough to “smooth” it. It looks pretty much like what you would expect. Slightly melted and with lost resolution but it is certainly smoother.
I’ve never heard of a system like that, how interesting! Do you have any links or maybe recall a name I could look up?
Probably called a heat gun. :-)
Pledge klear multi surface wax, is not wax but clear acrylic and is good for sla parts, dip or paint on, improves finish and forms a uv barrier.
This is a good reuse of existing components and if you were going to prime/paint it then more power to you. Doubly so if you are using leftover “waste” resin. :)
To answer the question why you MIGHT not use it though:
1)
UV resins can over-cure in daylight. If the point is a clear resin to “optically” smooth (as oppose to physically: e.g. sanding/filler primer) then many clear resins will yellow with excessive UV exposure. Cheaper ones can yellow regardless…
A bit of yellowing might work for a skull. :)
2)
Most epoxy will degrade over time in UV but there are special UV-resistant epoxies and even specialised top coat products also. Just read up on fibre glassing techniques for marine/outdoor use.
Since you are only painting it on the surface the costs are minimal.
3)
The basic material properties of UV resins (scratch resistance etc) are often not as good as other non-UV counterparts. Nuff said.
Standard Disclaimer:
When it comes to materials, there is rarely a “best” product and these product can vary wildly due to chemical composition, mix ratios, application methods, etc. Cheapest/Easiest option that is Fit for purpose is what I always aim for
I appreciate the detail and work that went into this, though I can’t help but feel the research would have been easier to evaluate if you had used more common print parameters. .2mm layers with a .4mm nozzle is pretty much the standard, if not smaller on some new machines.
As it is we’re looking at something of a worst-case scenario for a piece this small.
You’re absolutely right about the results and test pieces not representing practical everyday smoothing needs very well at all. You’re right on the nose – even with the skull I only selectively coated some areas.
I felt that it was more important to learn some basics first; how well does it stick, how does it coat, how does it flow and where, and what changes those things? When I started, I had some guesses but I really didn’t know how well it would or wouldn’t work to use the UV resin for something entirely different than it was designed for. But now, I’m pretty eager to try more practical tests now that some of the basics are out of the way.
I use XTC-3D and clean my brush in Acetone – can reuse forever.
That’s a really good tip – thanks for sharing!
I foolishly once dipped a cheap plastic and foam brush into acetone (when I was playing with applying acetone by brush to ABS) and it didn’t survive. I think the glue holding the foam to the handle was the first thing to go which put a pretty big damper on things. Oops.
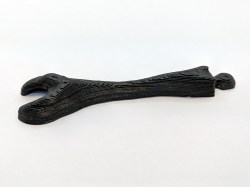
I see and applaud your Facehugger leg test piece.
Hah, you spotted that, eh? ;)
Sharp eyes you have there!
How is the ultra expensive 3D printing resin a better coating than nail polish or a clear polyurethane at a few buck a quart?
Alas, poor Gygax, I knew him well.
A man of infinite D20’s, though his rolls were often quite low.
Is XTC-3D different than epoxy? I have seen it used once, a few years ago, and I recall it appearing to work and look a lot like epoxy. I also coated some 3d printed PLA stuff with some West System epoxy one time with pretty good results. Epoxy is generally a lot cheaper than UV curing resin (~$100 a gallon vs. ~$100 a liter, last time I looked at prices, which was a few years ago.)