
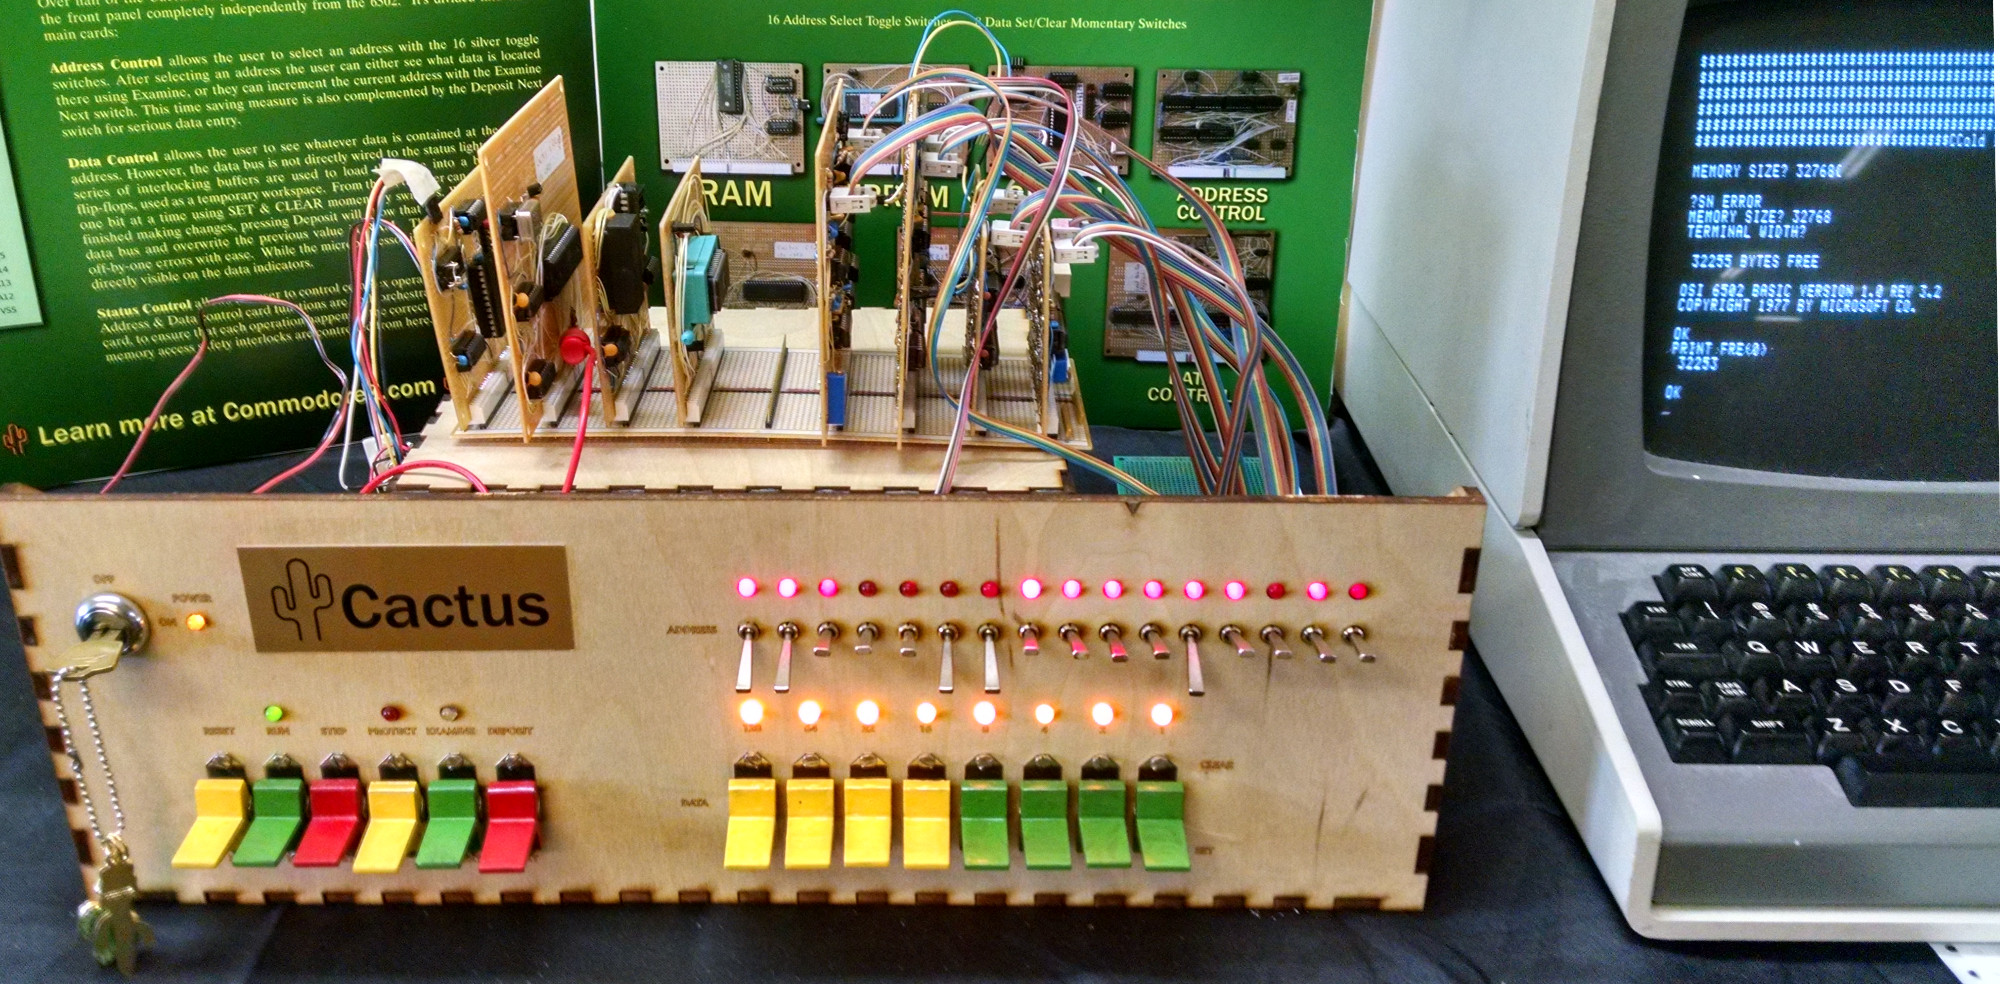
Among the rows of digital dinosaurs, one blinking front panel stood out. It certainly looked the part of a retro computer; with banks of blinking LEDs and multicolored paddle switches. But upon closer inspection, the laser cut wooden front panel betrays the fact that this machine is an impostor. It may have the appearance of a machine from the heady days where home computers looked like they could have doubled as a prop on the bridge of Kirk’s Enterprise, but it’s actually a product of much more modern provenance.
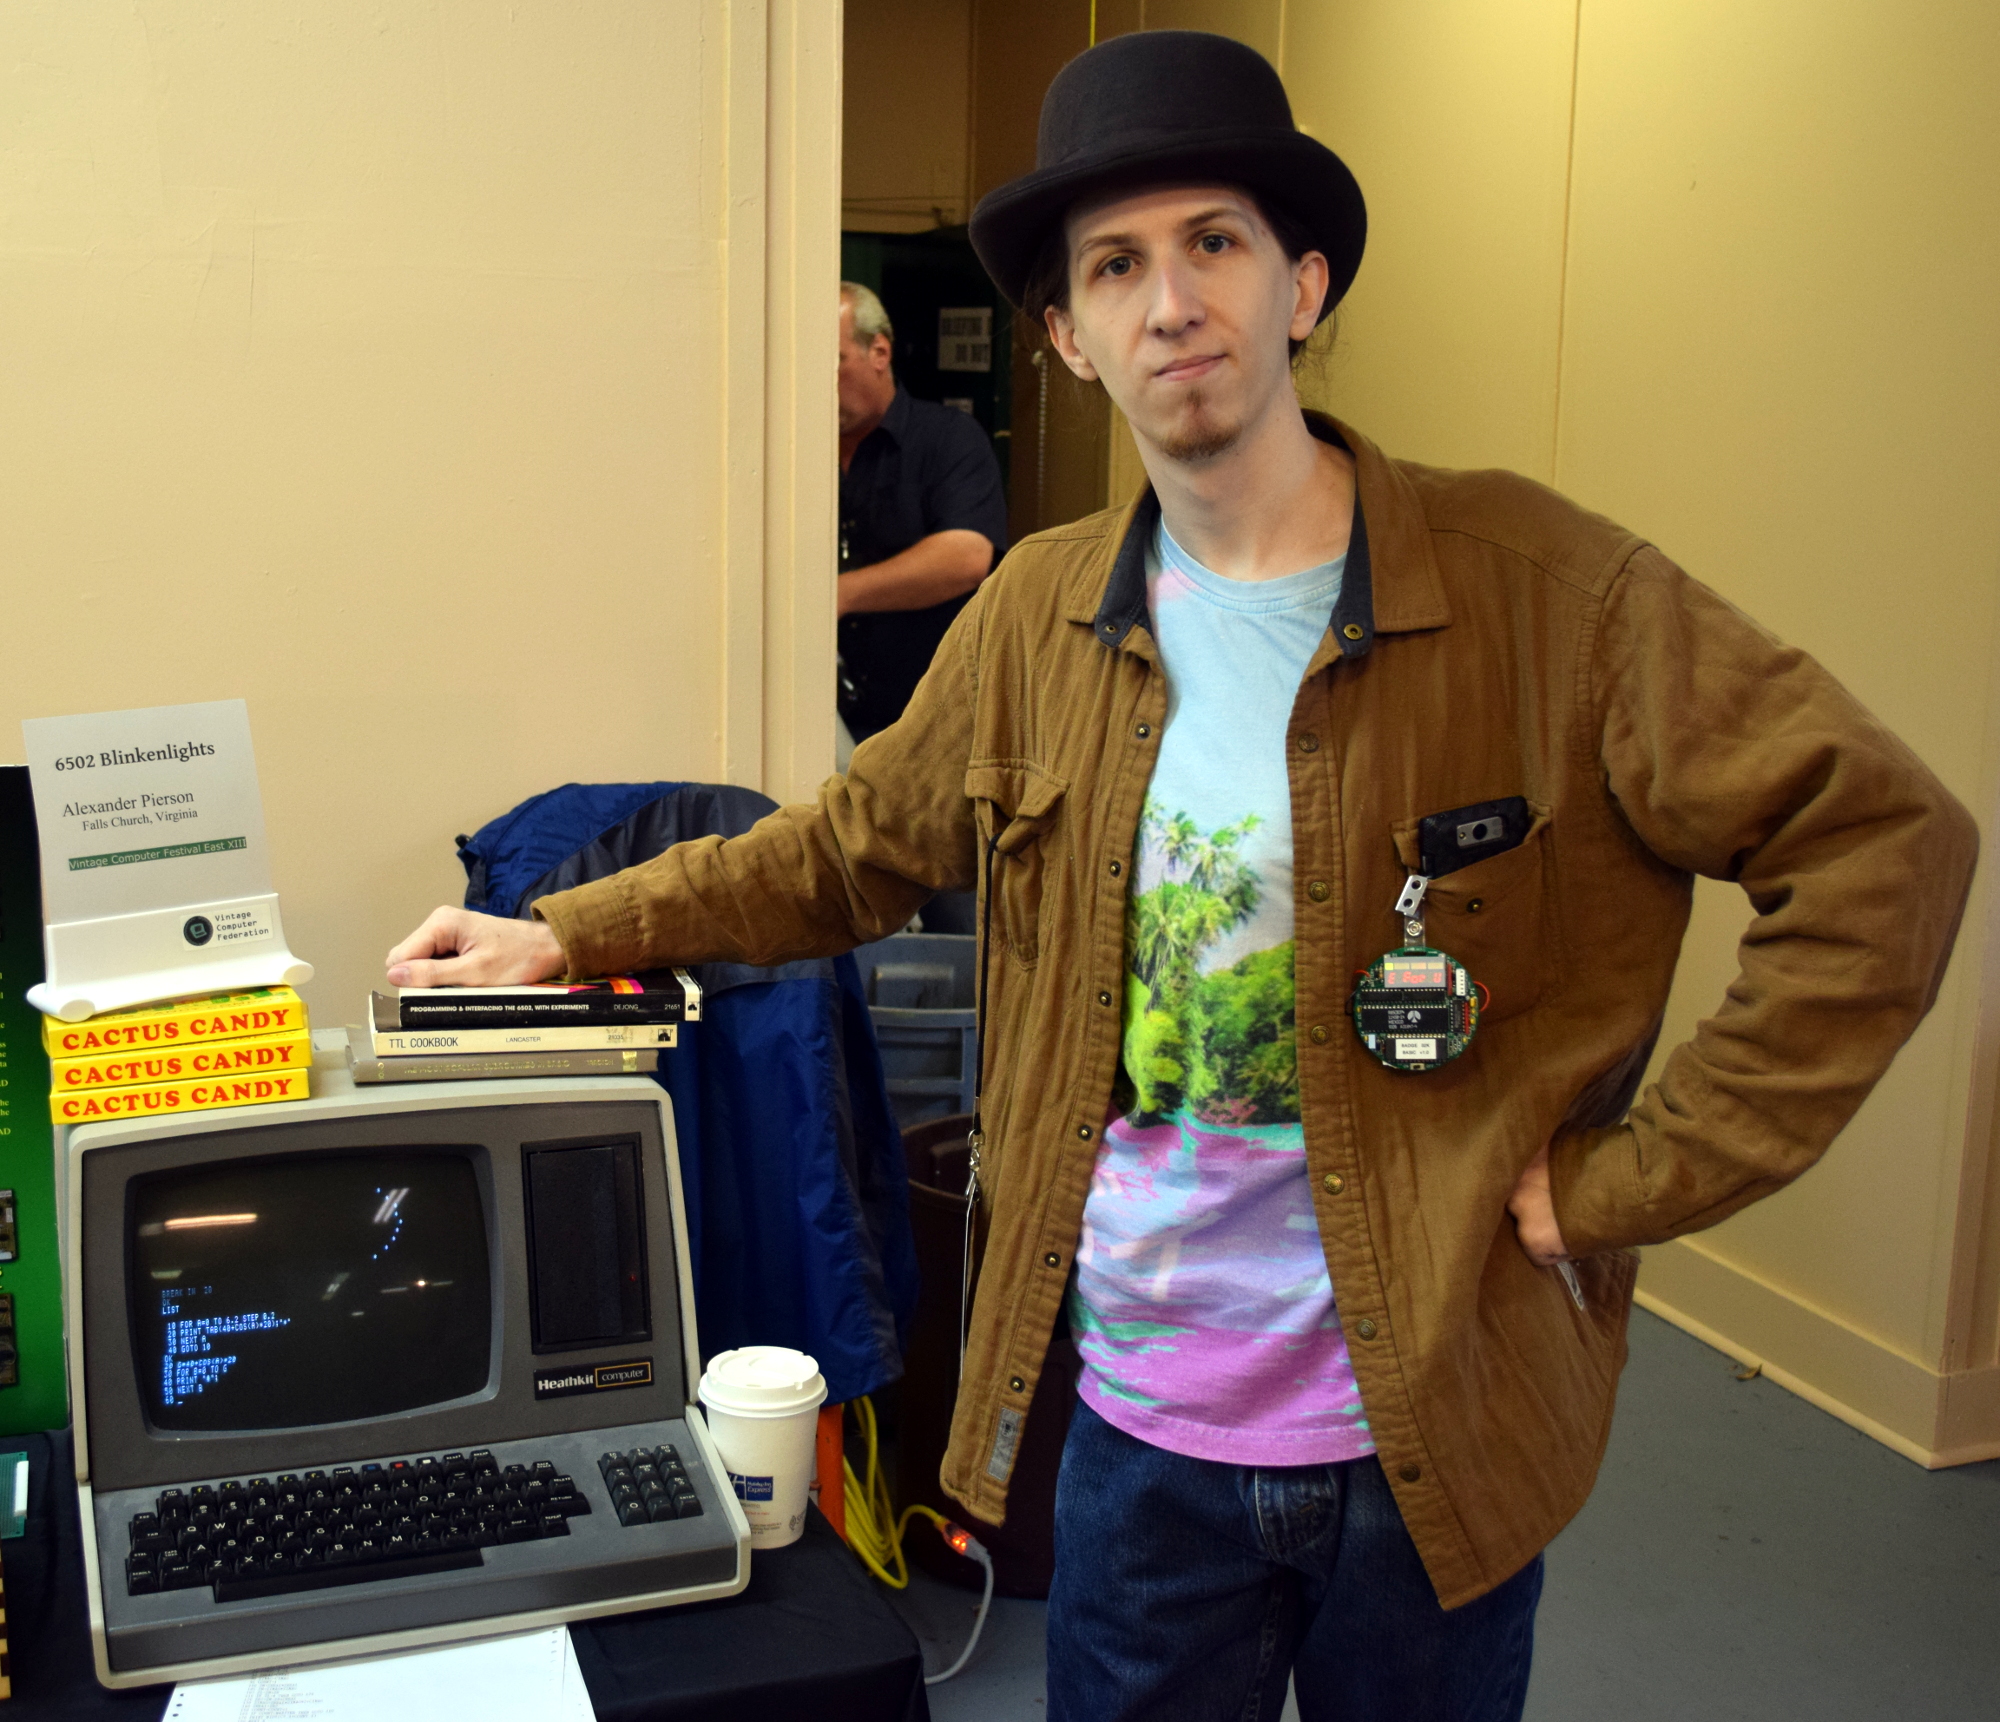 It’s called the Cactus, a love letter to the homebrew microcomputers of the 1970’s, designed and built by somebody at least 20 years too young to have experienced them the first time around. Alexander Pierson created the Cactus not because he had fond memories of putting together an Altair 8800 in 1975, but because he’s fascinated with the retro computer experience: the look of the front panel, the satisfying clunk of era-appropriate switches, and the idea that the computer’s inner workings aren’t an abstract black box but rather something you can interact with and study. Judging by all the attention the Cactus got at VCF East XIII, he’s not the only one.
Let’s take a look at everything Alexander poured into this retrocomputer build.
Best of Both Worlds
On paper, the Cactus is a pretty simple idea. Take the venerable 6502 8-bit microprocessor that powered (in some form or another) legendary home computers such as the Apple II and Commodore 64, and give it the classic front panel interface of the microcomputers that came before it. The appeal of such a computer is easy to see. You get the classic look and experience of the early kit computers, but with a more modern (relatively speaking) processor and capabilities.
It’s hardly the first time somebody’s wanted such a machine. We’ve seen people add “blinkenlights” to the Z80 in the past, so why not the beloved 6502? After all, it only missed the era of the blinkenlights by a few years. Plus, there’s already an incredible amount of information and prior art out there when dealing with the 6502. As with some other 6502 projects we’ve seen, the core design of the Cactus is based on the work of Grant Searle, with some inspiration from Quinn Dunki’s Veronica.
The front panel interface is similar to 1970’s era microcomputers, though it does have a few anachronistic niceties. For one, the data and address bus are clearly separated with different color LEDs and separate sets of switches. This makes it a bit easier to operate for the novice, though obviously does increase the part count and amount of wiring for the panel. In addition, the front panel is isolated from the actual data bus through a series of flip-flops, allowing for what [Alexander] calls a “temporary workspace”.
But perhaps the biggest advantage of a modern homebrew computer with a front panel interface: you can actually touch it. While there were plenty of Altair and IMSAI machines to look at, very few of their owners were inviting people to sit down and fiddle with them. Something about being 40+ years old and worth thousands of dollars kept the owners of said machines never more than a step or two away from them, oddly enough.
But Alexander literally had seats lined up in front of the Cactus and invited anyone to try their hand at examining the machine’s RAM or using the attached Heathkit H89 terminal to run BASIC programs. I spent a few minutes flipping switches on the Cactus, and while the infectious excitement of its proud creator sitting next to me may have had something to do with it, I can report it’s definitely a blast to use.
Dissecting a Cactus
The Cactus features a backplane layout that contains seven hand-wired cards. The CPU, RAM, and EPROM cards make up the 6502 system itself, and the rest of the cards are dedicated to front panel operations. While nothing on the Cactus could be called extravagant, there are a few areas where Alexander went with higher end components than what would strictly be historically accurate. Such as using the WDC 65C02 processor (a CMOS version of the 6502) and a single 32K SRAM chip rather than loads of DRAM.


When Alexander walked me through the layout of the Cactus, he did mention more cards are planned for the future. Eventually he’d like to add capabilities such as more serial ports, an audio card, and perhaps even a video card. He’s even got ideas for things like tape drives and core memory, but they would be more educational experiments than practical equipment.
Passion Projects are Never Ending
Alexander stresses that the Cactus isn’t finished, and that his journey is really only just beginning. He spent months researching and planning before he started piecing together the earliest versions of the Cactus, and that was already over a year ago. This project is as much about the experience as it is the end goal for him, and it’s obvious he’s in no hurry to stop working on his creation. It doesn’t take long to realize that he’s a classic perfectionist, and the idea of the Cactus being “Done” may well elude him forever as he continually finds new ways to improve the system.
Which is somewhat at odds with what many people, myself included, asked him at VCF: “When can I buy a kit?” Alexander says selling the Cactus was never the goal, but with such an outpouring of interest during the show he admits it’s something he needs to consider. Here’s to hoping we see a few more Cacti spring up by the next time VCF East rolls around.


Great writeup, Tom. Thank you!
“Take the venerable 6502 8-bit microprocessor that powered (in some form or another) legendary home computers such as the Apple II and Commodore 64, and give it the classic front panel interface of the microcomputers that came before it. ”
Reminds me of the Society for Creative Anachronism
http://www.sca.org
I’m sure (if not already) the SCA will use computers like this in their future endeavors.
Are those switches scavenged, or can they be purchased new?
From the link…
” However, the data bus is not directly wired to the status lights. Instead, a series of interlocking buffers are used to load that value into a series of flip-flops, used as a temporary workspace. From there, the user can modify a byte, one bit at a time using SET & CLEAR momentary switches. When the user has finished entering a new byte or modifying an existing byte, pressing Deposit will allow that byte to pass back to the data bus and overwrite the previous value in RAM. This allows the user to fix off-by-one errors with greater ease. ”
COOL!
The silver switches were purchased new from All Electronics or maybe Jameco. The C&K dual-momentary paddle switches are 7205J4 or J5’s, and those have been out of production for quite some time to my understanding. I scored the last 19 available from Electronic Goldmine quite a few years ago. Either way, they’re tough to source.
Glad you like the data bus interaction. Turns out HP thought it was cool too, they used something like that on the HP-1000 minicomputer.
I had some of that Cactus Candy a couple of years ago. Good stuff…
Someone did describe a 6502 based computer with front panel in Byte, around 1978. I can picture it, but not a date or author. I don’t remember any other 6502 projects in magazines that had a front panel. Once the Altair 8800 was out, front panels became retro, few wanting to use it on an ongoing basis, and they being costly and bulky just to bootstrap a system.
The Motorola 6800 had a series of “Bug” monitors which meant people went that way, though Mits did have a 6800 based computer with a front panel, but it wasn’t much of a contender.
MOS Technology had their “Keyboard Input Monitor”, which of course was in the KIM-1, but I’m not sure how available it was, and none of the popular systems used it. But the 6502 was popular for the all in one computers, so they all had some sort of monitor in ROM, bypassing the front panels.
Michael
Is this the article you remember?
https://archive.org/details/byte-magazine-1977-11
“A 6502 Personal System Design: Kompuutar” by David Brader
Yes, I looked after I posted. It was a particularly good issue at the time, it seemed to be thicker but also a bunch of articles that interested me at the time. There’s even another computer project earlier in the issue, on page 80, where he builds up from logic, no microprocesor.
Michael
Kinda reminds me of a cross between a Microtan 65 and a IMSASI 8080.
More computers should use a lock-and-key to power them on and off.
I was the sysop for an IBM System/36 and later an AS400. They both had keys to lock/unlock the service panel.
And I was the keeper of the key. /smug
The /36 actually had a hex input panel. Set mode (0000=normal, 00FF=quick boot, CPU single-step, etc) and LED display, with other keys.:
http://www.corestore.org/36.htm
And the AS400 was somewhat simpler:
https://www.ibm.com/support/knowledgecenter/en/ssw_i5_54/rzatm/rzatmcpdetails.htm
Only four buttons – up, down, select, enter/perform.
sorry but I have to comment this: cactus cactus.. PLA for life!
cactus cactus…cactus?
long live RBCP :)
So…where should I be sending my money for one of these?
I thought I read somewhere that the edge connector sockets used in an S-100 bus are becoming rare.
If that is true, perhaps PCI connectors are more available for this style of computer.
Looks like the cactus has 2 rows female sockets on the cards and just a single row male header on the backplane, so he is not using any edge connector. Digikey has the connector used for ISA 8 bit, I bought a handful not too long ago.
The bus is 35 pins, using a single row of 7 total 5-pin right-angle female sockets. For the moment, this is fine. However, a card edge connector is certainly being considered for when I upgrade the bus size down the line. I hadn’t considered PCI specifically, but something similar. Certainly nothing as exotic and hard to source as S-100 connectors, because it took me years to source a few for another project.
Yeah, the fact that they’re £10 each id a bit off-putting for me wanting to build an s100 system in future
“While nothing on the Cactus could be called extravagant, there are a few areas where Alexander went with higher end components than what would strictly be historically accurate. Such as using the WDC 65C02 processor (a CMOS version of the 6502) and a single 32K SRAM chip rather than loads of DRAM.”
The reason for the W65C02 is from two reasons:
1) The older 6502 CPUs are getting a bit harder to source now than they used to. The 6502 40th Anniversary Computer Badge that debuted at VCF-MW used Ricoh’s R65C02, which there were barely enough to fulfill orders with on the market in any condition! I suggested they switch to the W65C02 for the badge, and it looks like newer revisions support both now.
2) The older 6502 CPUs do not like to be single-stepped. They need a minimum clock speed to work. Part of the appeal and core design of the Cactus is that you can single-step the CPU like the Altair. I remember talking with Alex on Discord about this, and I brought up the idea of biting the bullet and buying some W65C02s from Mouser to see if that would make things more stable. He did, and lo, it worked! This is because the W65C02 has a static core; that is, you can completely halt the clock but still preserve the state of the CPU. You NEED something like that to properly single-step a CPU, either a static core CPU or some other means of preserving the state of the CPU while the clock is halted.
Also, nice writeup! And I see a little board of mine in the back left of the main photo… (I whipped up some ASCII Terminal kits and sent one to Alex. He’s using it as the primary serial terminal for the Cactus and also its power supply!)