Automatic Sunglasses For The Lazy Hacker

[Andreas] may have created the ultimate lazy hacker accessory: automatic sunglasses, or “Selfblending sunglasses” as he creatively titled his video. If you can’t tell from the name, these are glasses that you never have to take off. If the light is dim, they move away from your eyes. Going back outside to bright light? The glasses move to protect your eyes.

The glasses consist of a couple of micro servos which move tinted lenses toward or away from the user’s eyes. A side-mounted Arduino Uno reads a CdS cell light sensor and drives the servos.  Why an Uno rather than a much more wearable Arduino Nano? It’s what [Andreas] had lying around.

Yes, a good portion of the fun of this build is [Andreas’] comedy. But the best part comes when he tests the glasses out — in an actual car on the highway. The glasses work better than expected — moving the lenses into and out of [Andreas] field of view as he drives through tunnels. You can actually see how surprised [Andreas] is that it works so well.

These aren’t the first automatic sunglasses we’ve seen, nor are they the most peril-sensitive. Still, it’s a fun project and the video gave us a few chuckles.

Continue reading “Automatic Sunglasses For The Lazy Hacker”

Extracting Water From Fog

Most of us take it for granted that water is as close as your kitchen tap. But that’s not true everywhere. Two scientists at MIT have a new method for harvesting water from fog, especially fog released from cooling towers such as those found from power plants. It turns out, harvesting water from fog isn’t a new idea. You typically insert a mesh into the air and collect water droplets from the fog. The problem is with a typical diameter of 10 microns, the water droplets mostly miss the mesh, meaning they typically extract no more than 2% of the water content in the air.

The team found two reasons for the low efficiency. Water clogs the mesh openings which can be somewhat mitigated by using coated meshes that shed water quickly. Even in the lab that only increases the yield to about 10%. The bigger problem, though, is basically only some of the droplets hit the mesh, and even those that do may not stick because of drag. Fine meshes can help but are harder to make and have low structural integrity. Their solution? Inject ions into the fog to charge the water droplets and impart the opposite charge on the mesh.

Continue reading “Extracting Water From Fog”

Simplifying Basic LED Effects

There was a time when having a blinking blue LED on a project was all you needed to be one of the cool kids. But now you need something more complex. LEDs should not just snap on, they should fade in and out. And blinking? Today’s hotness is breathing LEDs. If that’s the kind of project you want, you should check out [jandelgado’s] jled library.

At first glance, an Arduino library for LED control might seem superfluous, but if you are interested in nice effects, the coding for them can be a bit onerous. If you don’t mind stopping everything while you fade an LED on (or off) then sure, you just write a loop and it is a few lines of code. But if you want to have it happen while other things continue to execute, it is a little different. The library makes it very simple and it is also nicely documented.

Continue reading “Simplifying Basic LED Effects”

Cigar Box Synth Is A Fun Time

It’s fair to say that the groovebox market has exploded. Store shelves are overflowing with the umpteenth releases from KORG’s Volca line and the latest Pocket Operators. These devices often feature a wide array of tones in an enticingly compact and attractive package, but is it possible to build something similar at home? As [lonesoulsurfer] relates, it certainly is.

The Cigar Box Synth is, well… a synth, built in a cigar box. Based upon a 555 & 556 timer, and a 4017 decade counter, it provides a wealth of beepy goodness all crammed into a neat wooden package. We dig the cigar box form factor, as it’s a readily available wooden box often finished in an attractive way, and readily reworkable for all kinds of projects.

Sound is controlled with three master potentiometers, and there are four separate potentiometers to set the note for each of the four steps in the sequence. While its melodic abilities are limited to just four notes, it’s certainly something fun to play with and can act as a great jumping off point for further electronic experimentation in this area.

It takes us back to our guide on building DIY logic-based synthesizers – read on!

ESP8266 Uses LiFi To Get On WiFi

Connecting your shiny new ESP8266 to WiFi can be as simple or as complicated as you please. Most people decide to manually add it. Some people find clever ways to make the bloody thing connect itself. [Eduardo Zola] transfers his WiFi password using the flashing light of a smartphone screen.

A simple photo-resistor and a bit of tinkering allows him to easily send credentials — or any data really — to his ESP8266, through the power of LiFi. Short for Light Fidelity, LiFi transmits data using light with on and off states representing digital values. It can use visible light, or reach into either the ultraviolet or infra-red radiation if need be. For the nitty-gritty details on the subject, check out our primer on LiFi.

 A flashing LCD screen and a photo-resistor barely make the cut for a one-way LiFi system, but [Eduardo Zola] makes it work. The approach is to build a resitor divider and watch an input pin on the ESP for changes.

The trick is to keep ambient light out of the mix. The test sensor shown here places the LDR in a black cap, but [Eduardo] 3D-Printed a slick little enclosure for his reverse flashlight so it fits flush with the phone screen. One click and about half a minute of a flashing screen later, and the Wi-Fi credentials are transferred. This circuit could really be added onto any project, for short data transfers. With a bit more work on the sensor circuit, speed could be improved with the limiting factor being the timing on the phone screen itself.

Since the ESP8266 has its own WiFi connection, it’s likely you’ll use that for data transfer once the LiFi gets it onto the network. But any situation where you don’t have a full user input or a network connection could benefit from this. Pull out that old scrolling LED matrix project and add this as a way to push new messages to the device!
Continue reading “ESP8266 Uses LiFi To Get On WiFi”

VCF East 2018: Cactus, Retro Because It Wants To Be

Among the rows of digital dinosaurs, one blinking front panel stood out. It certainly looked the part of a retro computer; with banks of blinking LEDs and multicolored paddle switches. But upon closer inspection, the laser cut wooden front panel betrays the fact that this machine is an impostor. It may have the appearance of a machine from the heady days where home computers looked like they could have doubled as a prop on the bridge of Kirk’s Enterprise, but it’s actually a product of much more modern provenance.

It’s called the Cactus, a love letter to the homebrew microcomputers of the 1970’s, designed and built by somebody at least 20 years too young to have experienced them the first time around. Alexander Pierson created the Cactus not because he had fond memories of putting together an Altair 8800 in 1975, but because he’s fascinated with the retro computer experience: the look of the front panel, the satisfying clunk of era-appropriate switches, and the idea that the computer’s inner workings aren’t an abstract black box but rather something you can interact with and study. Judging by all the attention the Cactus got at VCF East XIII, he’s not the only one.

Let’s take a look at everything Alexander poured into this retrocomputer build.

Continue reading “VCF East 2018: Cactus, Retro Because It Wants To Be”

Friday Hack Chat: All About The Hackaday Prize

Right now we’re neck deep in the Hackaday Prize. What’s the Hackaday Prize? It’s the Academy Awards of hardware creation, or at least that’s what we’re calling it until we get a cease and desist from the Academy of Motion Picture Arts and Sciences.

Already we’ve seen over eight hundred entries in the Hackaday Prize, and there are still months to go. We’re already through the Open Hardware Design Challenge, and twenty fantastic projects from that are moving onto the final round. Yesterday, we announced the winners of the Robotics Module challenge, and again we were blown away. These are the greatest bits of hardware anywhere, and we couldn’t have imagined anything more awesome.

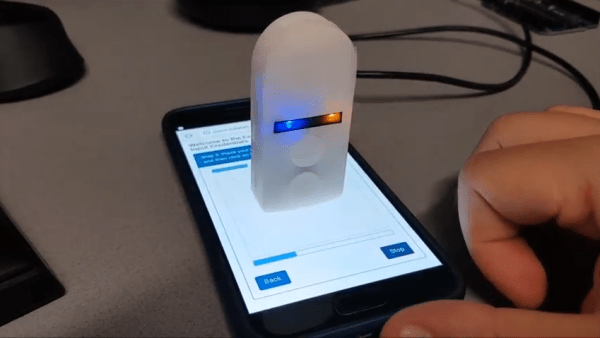
For this week’s Hack Chat, we’re going to be talking all about The Hackaday Prize. This is your chance to be a hardware hero and finally get some recognition for what you’ve been working on. Right now, we’re in the Power Harvesting Challenge in this year’s Hackaday Prize, and we want to see what you can come up with that will get energy from solar, thermal, wind, or random electromagnetic energy. This is your time to shine, and we can’t wait to see what you come up with.

Of course, you might have a few questions on what it takes to make a successful Hackaday Prize entry. For this week’s Hack Chat, we’re going to sit down with [Stephen Tranovich], the person coordinating this year’s Prize, to see what makes a successful entry. This is your chance to find out what it takes to become the next great hardware hacker, and it’s all going down this Friday in the Hack Chat.

Some of the things we’ll be talking about in this week’s Hack Chat:

  • What makes a winning entry?
  • How can you get publicity for your project?
  • Want to bounce your project ideas off the community?
  • What’s the story behind the seed funding confusion from this year?

You are, of course, encouraged to add your own questions to the discussion. You can do that by leaving a comment on the Hack Chat Event Page and we’ll put that in the queue for the Hack Chat discussion.join-hack-chat

Our Hack Chats are live community events on the Hackaday.io Hack Chat group messaging. This week is just like any other, and we’ll be gathering ’round our video terminals at noon, Pacific, on Friday, June 15th.  Here’s a clock counting down the time until the Hack Chat starts.

Click that speech bubble to the right, and you’ll be taken directly to the Hack Chat group on Hackaday.io.

You don’t have to wait until Friday; join whenever you want and you can see what the community is talking about.