There’s no shortage of debate about the “Internet of Things”, largely centered on security and questions about how much anyone really needs to be able to turn on their porch light from the other side of the planet. But while many of us are still wrestling with the realistic application of IoT gadgets, there’s undoubtedly those among us who have found ways to put this technology to work for them.
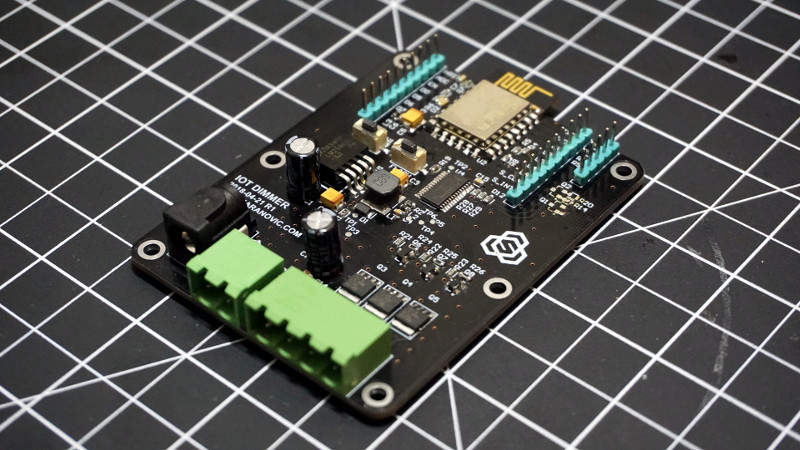
 One such IoT devotee is [Sasa Karanovic], who writes in to tell us about his very impressive custom IoT LED dimmer based on the ESP8266. Rather than rely on a commercial lighting controller, he’s designed his own hardware and software to meet his specific needs. With the LED strips now controllable by any device on his network, he’s started working on Python scripts which can detect what he’s doing on his computer and react accordingly. For example, if he’s watching a movie the lights will automatically dim, and come back up when he’s done.
[Sasa] has provided all the files necessary to follow in his footsteps, from the Gerber files for his PCB to the Arduino code he’s running on the ESP. The source code is especially worth checking out, as he’s worked in a lot of niceties that we don’t always see with DIY projects. From making sure the ESP8266 gets a resolvable DNS hostname on the network to using websockets which update all connected clients with status info in real-time, he’s really put a lot of work into making the experience as complete as possible.
He’s explains in his blog post what needs to be edited to put this code to work in your own environment, and there’s even some descriptive comments in the code and a helpful debug mode so you can see how everything works. It’s always a good idea to consider that somebody else down the road might be using your code; taking a few minutes to make things clear can save them hours of stumbling around in the dark.
If you need more inspiration for your ESP8266 lighting project, check out this ambient lighting controller for a kid’s room, or this professional under-cabinet lighting controller.


Pleasantly surprised to see a proper LED PWM driver not the software one. For simpler hardware however, the ESP32 has proper hardware PWM channels. Couple it with logic level NMOS and a few more components can be skipped.
I set up an led strip using the software PWM on an ESP8266 and I couldn’t notice any issues with it, even when the ESP8266 was also running a Wemo plug emulator for Alexa integration. Is there anything you could recommend to show up the flaws of the software PWM?
Main problem with software PWM is usually if you try to dim to a very low light level, such as fade to black. The resolution is just not enough and the fade will be “choppy”.
Not sure how AnalogWrite uses PWM modules, but I’d avoid it and use PWM registers directly. ATMega328 (Arduino Uno) has 6 PWM hardware implemented outputs and UART/I2C/SPI hardware modules, seems enough for 3 channel PWM controller that is not choppy. Chip used in the featured article is great since it has 16 PWM channels, so is easily expandable.
Depends on what frequency and resolution you want. I like having at least 11-12 bits to get a good resolution in actual perceived brightness. Couple that with a high enough frequency and you will get the ESP to spend most of its time in interrupts. I cannot say I tried, but simply that considering the cost of the ESP8266 + extra led dimmer vs ESP32, i would go for ESP32.
This is so cool! And a very good realization!
Agreed. Great job.
Thank you! I’m glad you liked it.
I also use ESP8266 for control of living-room LEDs, but I took an easy route: addressable LED chains. The module works in the network as an ArtNET node, so that it can be controlled by a host of software. I cannnot way for my brother in law, who works as an LJ, to come with his console :)
Art-net: https://en.wikipedia.org/wiki/Art-Net
Care to share?
Most of the code is not mine. Also, make sure you do not make the same mistake as I did: this code leaves ESP82266 in dual mode, so it acts also as a WiFi access point (with default credentials). It is not only rather insecure, but then the additional WiFi shows up around the house. Unfortunately, my device is rather inaccessible now…
https://pastebin.com/Z0GTbqB9