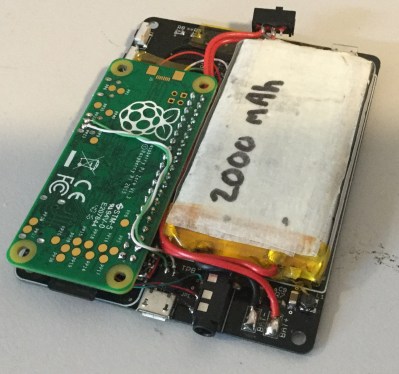
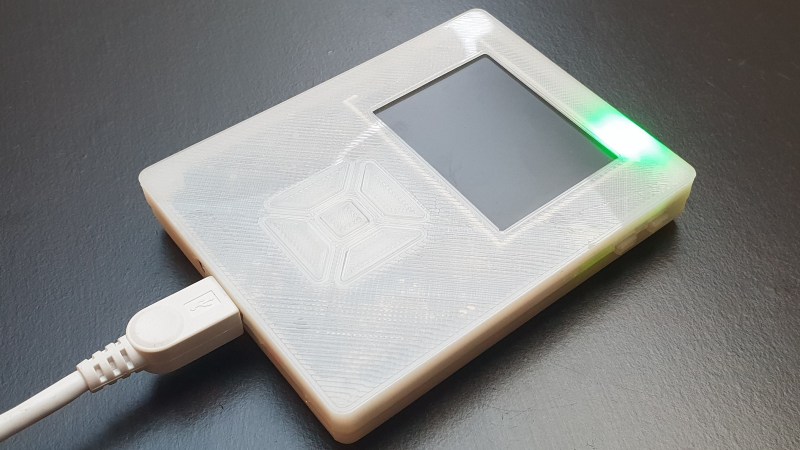
[Bram] wasn’t satisfied with the portable music playback devices that were currently available. He craved an offline music player that had a large storage capacity but found that this was only available in high-end, off-the-shelf options, which were far too expensive. [Bram] decided to make his own, powered by a Raspberry Pi zero. After building an initial prototype, the design was iterated a few times, with the latest version featuring a BOM cost of roughly €80.

The whole project is open source, with hardware and software files available on the project GitHub. A 2.2″ TFT displays the UI, which is of course completely customisable. Everything is squashed into a 3D printed case, which has the smallest form factor possible whilst retaining a decent amount of battery life. The electronics are what you’d expect: a boost converter to produce 5 V for the Pi from the 3.7V battery, a charge controller and a battery protection circuit. As a bonus, the battery voltage is monitored with a 12-bit ADC which reports to the Pi, enabling it to do a safe shutdown at low voltage, and display battery level on the UI.
Since the whole purpose of the device is to play audio, onboard filtered PWM wasn’t going to cut it, so instead a 24-bit DAC talks to the Pi via I2S. The audio player backend is VLC, so there’s support for plenty of different file types. A disc image of the whole system is available with everything pre-configured, and you can even buy the assembled PCB from Tindie.
Want to keep the look and feel of your old iPod? We covered an impressive restoration of a 6th gen model, upgrading the storage and battery significantly.


Neat, i like the idea. But is there really no amp behind the dac? According to the datasheet this is a line level dac that can drive down to 1k ohm loads… You would need to connect at least a standalone headphone amp to that if it only has line level output.
Any headphone that is loud enough on line level would be 32 ohm. And probably no chance to drive any real higher impedance headphone apart from earphones.
I agree, that really doesn’t work out when using good headphones (although the difference in ohm IMHO isn’t enormously big for the quality of sound). Maybe there’s a tiny amp somewhere that could be added.
I took the easy way out.
I replaced the hdd and battery in my 4th gen ipod with a 128gb ssd and a new battery.
Only cost about 65 USD and get same as original battery life.
I’m surprised you don’t get more than the original battery life, replacing a mechanical drive with a solid state drive should save on power. Did you go for a battery with a smaller capacity? That would make your iPod lighter, so maybe not a bad choice.
Nope OEM replacement same capacity. Replaced it because battery was shot and only lasted an hour before ipod was modified. Now it will run for ~8 hours of straight playback. downside to the mod I did is the system board of the g4 ipod has a max drive size of 128gb so if you want more you are SOL. Also you need to format the ipod as fat32 before you can restore the os from itunes. If anyone reads this and wants to try my mod just a note do not use 3rd party windows tools to format fat 32 use diskpart.
Also this is the SSD I went with.
https://www.amazon.com/gp/product/B007PF15VG/ref=oh_aui_search_detailpage?ie=UTF8&psc=1
I have an old iPod I still use with a 20GB HDD in it, I run it with Rockbox though. I might update with an SD card and an SD-ZIF adapter at some point.
The original iPod firmware was really aggressive about predictive caching, so the hard drive spent almost all of its time spun down.
Ah that’s interesting, thanks for the insight.
FYI, I will totally be making the same thing but with the Beaglebone SiP chip, its been on the backburner for 2 years but like I’m gonna do it. Great job on this implementation, using the Pi Zero makes it harder to achieve a slim profile but this designer did so great work with that challenge, the end product looks great too!
Did the 1GB ram versions ever materialize or did they get canceled?
Not knocking the DIY approach here at all since it is the best way to get exactly what you want out of a build and I looked into doing something similar but some of the recent off the shelf higher end DAP units (from typically China) are actually fairly well made and support all sorts of things like USB C and support just about every format like VLC does and have dedicated hardware as well as decent battery life and deep standby, etc.
There are several that are about 90 euros or so that have support for things like 512GB+ Micro SD Cards, LDAC and two way Bluetooth 4.1, DSD Support, Bidirectional USB Type C, 32bit/384khz, with a decent 12+ hour battery life.
There are several others out there that are what I would consider to be a basic (and sanely priced) but still higher end audio DAP. Take a look at Shanling, Cayin, HiBy’s R3 and FiiO if you don’t want the junk units that are out there that are somewhat cheaper.
Why 5v boost is needed? Zero can runs directly from li-po battery as it needs just 3.3V
Wouldn’t the fully charged lipo at 4.2v kills the 3.3v Raspi?
Just puff a LDO behind your LiPo, if there isn´t one already behind that 5V-Lane.
you put li-po battery to 5v input, not 3.3. Even discharging to 3.5V would still give you good 3.3V
There’s one thing i’m not getting here: the post says that the maker went the DIY way because available off the shelf solutions were to expensive and ended up with something costing 80$ in BOM alone for the final version (excluding the SD card).
A Sansa Clip+ is also based on a microSD (albeit with a 32Gb limit), has (if a correctly recall) pretty decent sound quality and costs 50$.
I’m not dissing the DIY approach itself, “for the pleasure of it” is already a great reason for any DIY project.
But if the reason are economics then it doesn’t make much sense.