Radio-Gaga Is A Toddler Friendly Remote In A Radio

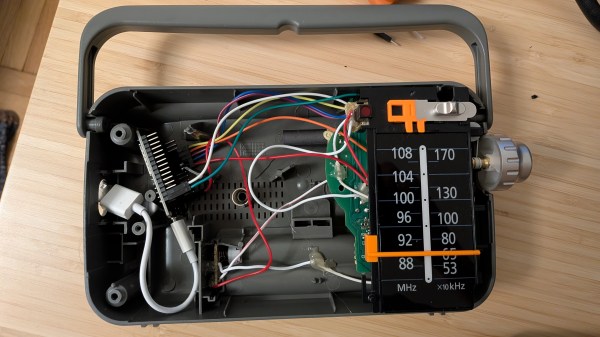
Humans of all ages like music, but you can’t exactly pass a toddler the aux cable. That’s not to say the younger set don’t have their own particular tastes– they absolutely do, and they absolutely love to take control and inflict them on the rest of us. [nbr23] has a toddler who loves both music and tactile controls, and decided to combine the two for them with a project he calls Radio-Gaga, which is a gutted Panasonic radio that calls up tunes via Home Assistant.

Interestingly enough the radio is now just a remote control– the speaker has been removed along with the rest of the radio hardware. The buttons and dials are still there, though, letting the toddler control what tunes are on offer and at what volume via couple of potentiometers hooked to an ESP32. The sound itself is being served up from the homelab to a USB speaker. There’s one notable flaw with this architecture: if the batteries die on the remote, “Let it Go” does not until an adult intervenes manually or recharges the remote.

One interesting lesson [nbr23] wanted to share was that he was able to improve an unsatisfactorily slow startup time by assigning the device a static IP on his network– apparently the single longest step in getting the tunes going was negotiating a DHCP lease. Skipping that gets the tunes playing in under a second, which is fast enough even for the most impatient of tiny humans.

If you prefer a more self-contained device, we’ve seen toddler jukeboxes that keep storage and speaker built-in, many with NFC control. 

Win95-Tracker-CYD Is A Cheap Yellow Mod Tracker With I2S

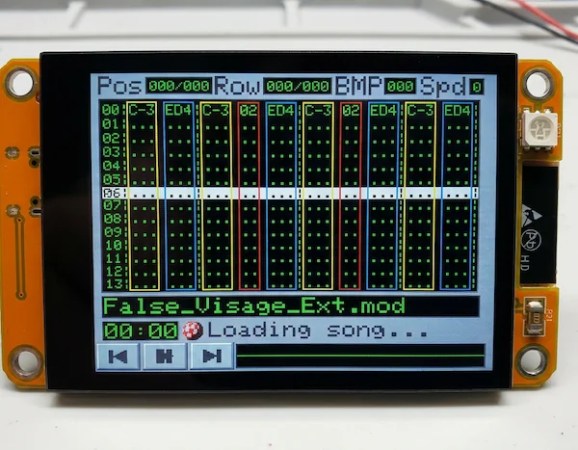
The Cheap Yellow Display is a great little module to start a project with, but it wouldn’t necessarily be our first choice for an audio device. That’s because the PWM on the ESP32 isn’t exactly going to put out hi-fi, and the I2C pins needed for the I2S audio protocol aren’t broken out on the CYD board. That didn’t stop [ivans805] AKA [Ill-Town-5623]– he wanted a mod tracker, he had a CYD board, and necessity is the mother of invention.

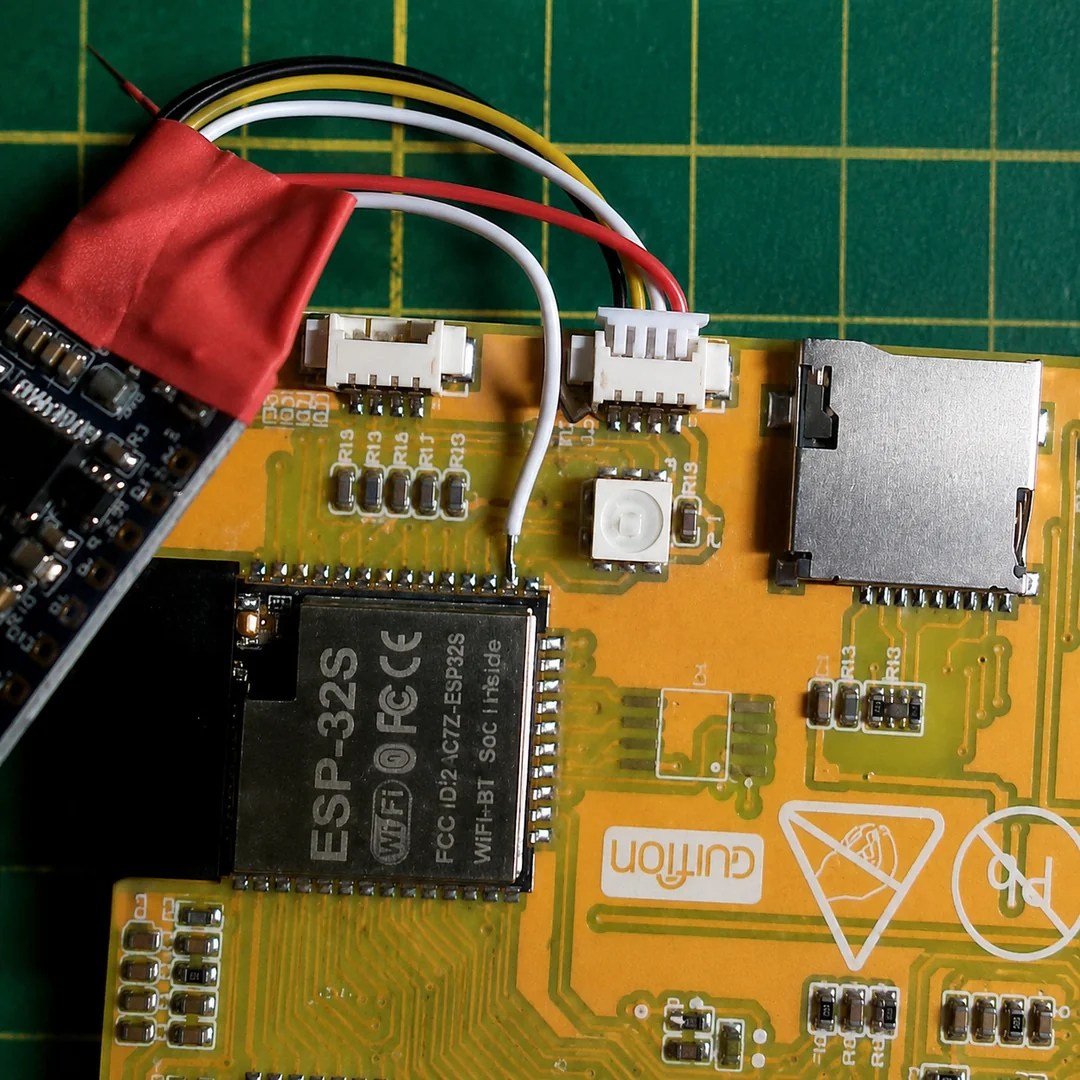
It isn’t exactly a ground-breaking hack: he’s just tossed a bodge wire to the pin he needs on the ESP32, and run it to the I2S sound module. Still, in this era of endless modules it’s nice to see someone hacking what they have rather than running to AliExpress or somewhere else for a part that has everything the project needs built in.

The bodge wire is how you know it’s a hack.

What really caught our eye when we saw this project on the ESP32 subreddit was the aesthetics. It might be called “Win95-Tracker-CYD” but that interface just screams “Amiga” to us– look at that Boing Ball! Given where MOD files come from, that’s perfect. The UI was made with Lopaka.app, which we haven’t seen before but appears to be a sort of WYSIWYG editor for embedded device interfaces.

While you don’t need an ESP32 to play mod files– the diminutive CH32 can manage the task— there’s no arguing the CYD could make a nice little player. If you actually wanted to push its limits, you might try a 3D engine instead,

Two white, cylindrical speakers are shown. The sides and most of the tops of the speakers are covered in holes, and at the center of the top of each, there is a circular LCD display. The top of the speaker is marked “Braun.”

A Modern Take On Iconic Industrial Design

The Functionalist design philosophy that Dieter Rams brought to Braun from the 50s to the 90s still inspires the look of a few devices, including Apple’s iPod, Teenage Engineer’s synthesizers and recorders – and [2dom]’s IR7 streaming radio.

The streaming radio was inspired by Braun’s portable radios, particularly the SK2, TP1, and the T3 pocket radio. [2dom] started with the T3’s circular pattern of holes and experimented with several variations, finally settling on a cylindrical shape with a central display; a prototype with a low-power monochrome rectangular display was eventually rejected in favor of a circular LCD. The housing consists of four 3D-printed components: an upper and lower shell, a resonator for the speaker, and a knob for a rotary encoder.

Electronics-wise, an ESP32 handles the computing requirements, while the LCD and rotary encoder provide a user interface. For audio, it uses a VS1053 MP3 decoder, PAM8403 amplifier, and a wideband speaker, with an audio isolation transformer to clean up the audio. To reduce power consumption, a MOSFET cuts power to the peripheral components whenever the device is in sleep mode. The full design is available on GitHub.

The end result of this effort is a quite authentic-looking 21st-century adaptation of Rams’s original designs. If you’re interested in more Braun designs, check out this replica of one of their desk fans. We’ve also seen a restoration of one of Braun’s larger radios, the TS2.

Yaydio, A Music Player For Kids

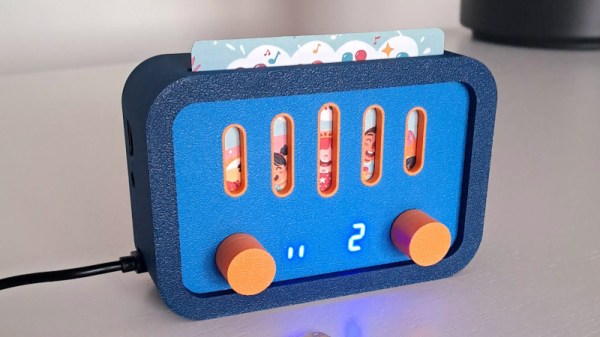
Music consumption has followed a trend over the last decade or more of abandoning physical media for online or streaming alternatives. This can present a problem for young children however, for whom a simpler physical interface may be an easier way to play those tunes. Maintaining a library of CDs is not entirely convenient either, so [JakesMD] has created the Yaydio. It’s a music player for kids, that plays music when a card is inserted in its slot.

As you might expect, the cards themselves do not contain the music. Instead they are NFC cards, and the player starts the corresponding album from its SD card when one is detected. The hardware is simple enough, an Arduino Nano with modules for MP3 playback, NFC reading, seven segment display, and rotary encoder. The whole thing lives in a kid-friendly 3D printed case.

Some thought has been given to easily adding albums and assigning cards to them, making it easy to keep up with the youngster’s tastes. This isn’t the first such kid-friendly music player we’ve seen, but it’s certainly pretty neat.

Get Your Raspberry Pi Jamming With MuPiBox

Over the years we’ve seen a lot of Raspberry Pi boards pushed into service as media players. In fact, second to emulating old game consoles, that’s probably the Pi’s most common vocation when it comes to DIY builds. But despite the popularity of this particular use case, it seems like each one has had to reinvent the wheel.

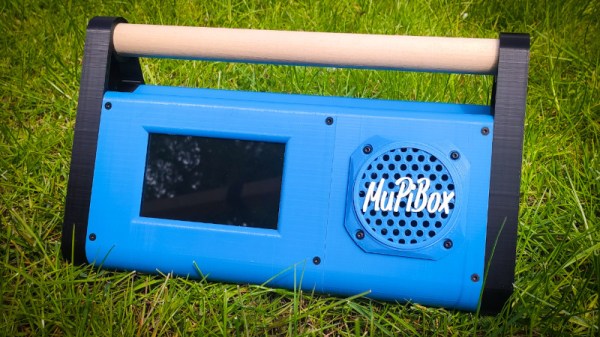
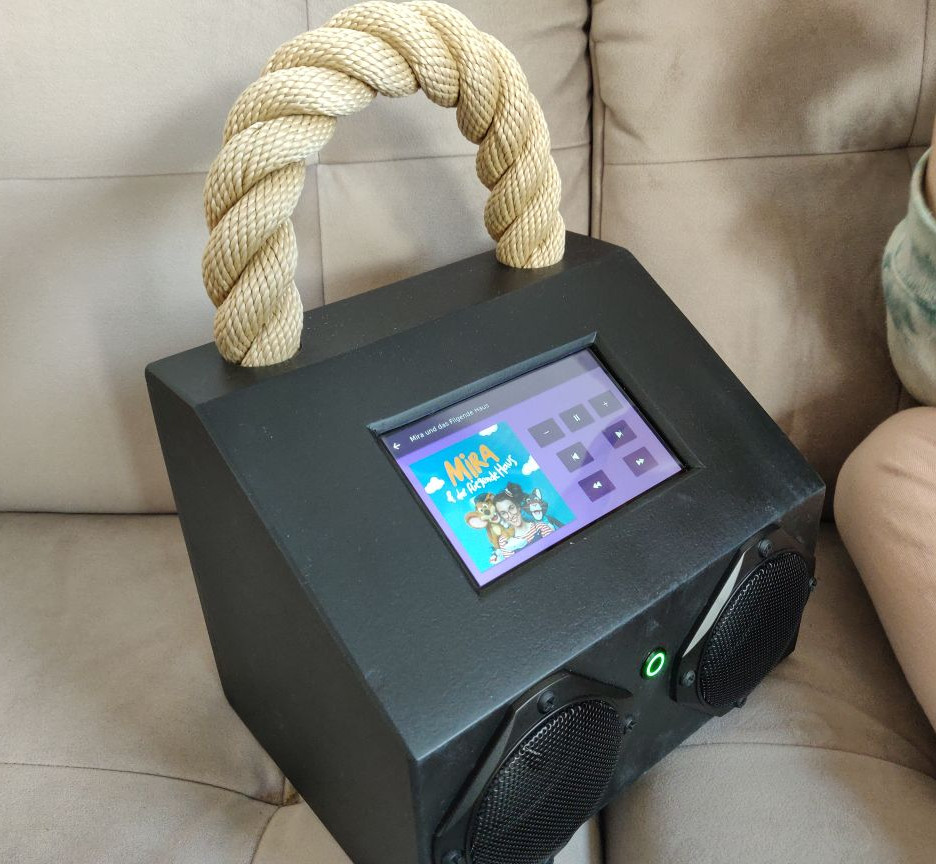
Perhaps there’s where MuPiBox fits in. Developed by [Eric Gerhardt] and [Olaf Split] with the assistance of [Andreas Lippmann] and [Andrew Frericks], this project aims to turn everyone’s favorite Linux single-board computer into everyone’s favorite music player. MuPiBox provides not only the software to run your new high-tech boom box, but it even standardizes the hardware design and provides a 3D printable enclosure — though naturally there’s still room for interpretation if you don’t want yours to look exactly like all the others.

Your MuPiBox can look like whatever you want.

At the very minimum you’ll need a Raspberry Pi, a HifiBerry MiniAmp, and a speaker, though the instructions also recommend you invest in a Pimoroni OnOff SHIM (or wire up something comparable) to facilitate more graceful shutdowns. For the best experience you’ll also want a five inch Waveshare touch screen display and a USB power bank so your beats can go mobile.

The video below shows off the polished stock GUI, which is simple enough that even children should be able to navigate around and find their favorite tracks. Which is good, especially since it’s in German. The video also shows off some advanced setup features so you don’t have to pull the SD card out of the Pi just to change the WiFi network it’s attached to. There’s also a web interface that you can access from other devices on the network.

It’s a slick project, and we really like the aesthetics of the 3D printable enclosure. But even if you don’t want to replicate the project exactly, there’s certainly components here which could be utilized in your own Pi media center build.

Continue reading “Get Your Raspberry Pi Jamming With MuPiBox”

The Floppy Disk As A Portable Music Format

We remember the floppy disk as the storage medium most of us used two decades or more ago, limited in capacity and susceptible to data loss. It found its way into a few unexpected uses such as Sony’s Mavica line of digital cameras, but outside those who maintain and use older equipment it’s now ancient history.

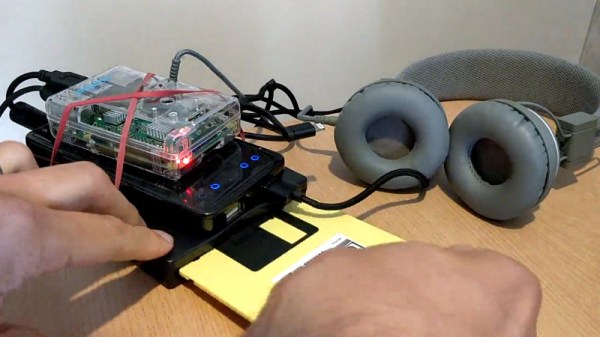
Seemingly not for [Terence Eden] though, who has made a portable audio player that uses a floppy disk as its storage medium. It came about with the realization that half an hour of extremely compressed audio could be squeezed onto a standard 3.5 inch floppy, and then that the Beatles’ A Hard Day’s Night album comes in at only a shade over that time. With some nifty manipulation of the compression command line and the judicious removal of some unnecessary metadata, the album can fit on a floppy in equivalent quality to the AM radio fans would have heard it over back in 1964.

The player would have been a major undertaking when the floppy was king, but in 2020 it’s simply a USB floppy drive, a Raspberry Pi, and a battery pack. He’s given us the full instructions, and no doubt a more permanent version could be built with a 3D-printed case.

We’re fascinated by the recent trend of storing audio on floppy disks, but despite the hipster vibe, we doubt  the idea will catch on. It’s not the first floppy-based player we’ve seen, but the previous one was more of a fake player.

Easy-To-Use Music Player Relies On RFID

Microwaves used to be simple to use. Set the dial for the desired time, and hit start. Then, everything went digital and the average microwave now takes between four and six button presses in precise order just to start heating. Music players have gone down a similar path, and those that grew up in the era of vinyl records can find modern digital media simply too hard to work with. To solve this problem, [ananords] whipped up Juuke, a music player focused on ease of use.

The Juuke has a simplistic interface intended to be as easy to use as possible. Songs are selected using printed cards with embedded RFID tags – placing them on the Juuke triggers playback. Volume is controlled with a simple knob, and the only two buttons are for play/pause and shuffle mode.

Underneath, an Arduino Uno runs the show, hooked up to a RC522 RFID interface board. Music is handled by the DFPlayer mini, which loads tracks off a microSD card. The DFPlayer can be hooked up to a speaker directly, but there’s also a 3.5mm jack output if the device is to be used with an external amplifier.

It’s a tidy project, and one that actually looks pretty fun to use. Obviously, there’s some time investment required to prepare the SD card and produce the RFID cards, but the final product could be fun to use at a party, too. We’ve seen similar builds before, as well. Video after the break.

Continue reading “Easy-To-Use Music Player Relies On RFID”