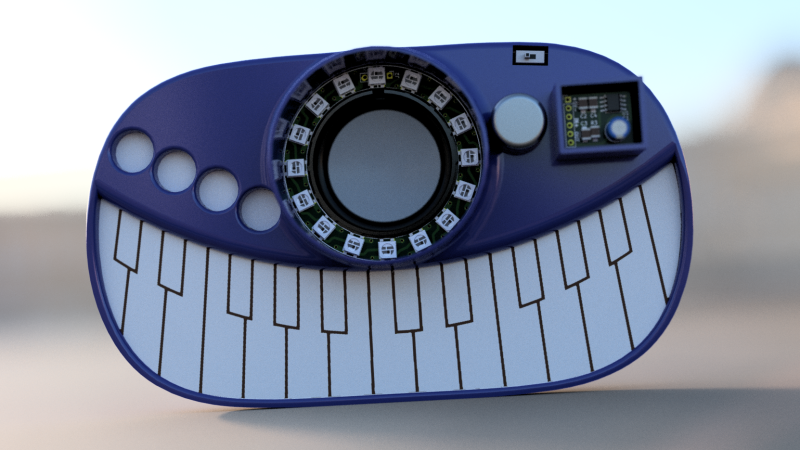
Stylish! is a wearable music synthesizer that combines slick design with stylus based operation to yield a giant trucker-style belt buckle that can pump out electronic tunes. With a PCB keyboard and LED-surrounded inset speaker that resembles an eyeball over a wide grin, Stylish! certainly has a unique look to it. Other synthesizer designs may have more functions, but certainly not more style.
 The unit’s stylus and PCB key interface resemble a Stylophone, but [Tim Trzepacz] has added many sound synthesis features as well as a smooth design and LED feedback, all tied together with battery power and integrated speaker and headphone outputs. It may have been originally conceived as a belt buckle, but Stylish! certainly could give conference badge designs a run for their money.
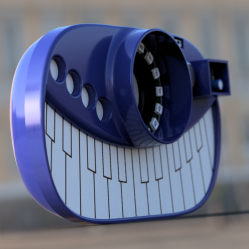
The photo shown is a render, but a prototype is underway using a milled PCB and 3D printed case. [Tim]’s Google photo gallery has some good in-progress pictures showing the prototyping process along with some testing, and his GitHub repository holds all the design files, should anyone want a closer look under the hood. Stylish! was one of the twenty finalists selected for the Musical Instrument Challenge portion of the 2018 Hackaday Prize and is therefore one of the many projects in the running for the grand prize!


> The photo shown is a render, but …
It can’t be both, or can it?
There are lots of actual photos in the project logs. I’ll update the front page to include them.
Which would be kind of a shame, since those renders are SO pretty.
Wow, very nice project. Good use of 3D printed part.
It’s a pity not to order a custom PCB and have it gold plated, as they are so cheap.
Instead of CNC it, with a huge pitch, preventing of using SMD parts, and thus adding theses ugly bumps on the case.
I would use an li-po pouch battery, with a small battery charger, as they are flat and store much more energy than theses AA cells.
Wish I could design 3D parts and rendering like this, but, hey, you cannot do everything! We should team up!
Keep in mind that this is a very early version of the design, and I had to make an enclosure that fit the one board I cut as a prototype because there wasn’t time to update, mill, and populate a new board in time for the Hackaday contest deadlines. Dog-and-pony shows matter. I kinda wish they had included pictures of the actual constructed version
https://cdn.hackaday.io/images/687511540473401500.jpg
or even later renders
https://cdn.hackaday.io/images/711031540471785848.png
both of which appear late in the build logs.
This case had to accommodate thru hole parts, third party boards for the amplifier and LED ring, bumps for the wires for vias that are not plated through on a home milled PCB, all of the bodge wires I added to fix errors in the design, and the extra height added by pin header sockets for those parts. That explains the strange box for the amp board, and the pimple on the front of the case next to it, as well as the strange tube for the LED ring.
The version 2 board design has already been finished, and I’m just waiting on a parts order to arrive before I cut and assemble it.
The point about the LiPo batteries is a good one, but as this badge is being done as a piece of convention swag, I have to keep the price down. By using traditional AA batteries, I can avoid the extra expense of charging circuitry and the batteries are cheaper too.
I’ve still got a lot of work ahead on this project, but getting a bit of money in the Hackaday contest will help keep it moving. MAGwest doesn’t pay for my time in developing this, and only pays for part of the parts cost, so I have to be creative in funding it!
Hi Tim, this post was written before some of your later build photos were available, so that slipped past.
It’s sometimes tough choosing a photo or photos that get an idea across well, and at the time the post was written, the ones shown seemed the best way to sum up what the project was all about. I do also encourage people to check out the build logs, there’s lots of detail in there for anyone who’s interested.
The golden ratio has been pretty much ignored on this one. It looks more like *fit everything on a given surface*, than aesthetically *designed*. But it sounds equally awful, so it´s fine !
I’ve no idea what you are talking about, but it seems really mean.
Why are you trying to be mean? Are you trying to make me cry?
Please don’t make me cry!
notgonnacrynotgonnacrynotgonnacry….
Is it your position, then, that the golden ratio should be used everywhere? That would certainly be boring. Most motion pictures these days are way wider than 1.61:1 – plenty are 2.35:1, and some still boldly rock the 1.33:1 shape. Do you criticize those as well?
Is is just me or does this thing look like it was designed by the same guy who designed the E-Meter?
https://upload.wikimedia.org/wikipedia/commons/thumb/c/c3/Scientology_e_meter_blue.jpg/300px-Scientology_e_meter_blue.jpg
It is supposed to look kind of like a cartoon of a grinning cyclops. Sort of a 1970’s feel, maybe?
I made everything really rounded so it wouldn’t hurt to wear it as a belt buckle. Getting poked in the belly is not fun.
Fillets FTW!
That’s just straight-out Cheshire Cat.
I like the belt buckle idea – with the keyboard curved as it is, the fingers would naturally land in about the right place. But maybe the case could have curved cutouts for each key, to make finding the keys without looking easier.
Need two octave light solar or inboard rechargeable battery where is that two octave Black Keys number 10 10 is the magic number to make any number into a song Melody
ERROR: Line cannot be parsed. Please add missing punctuation and complete sentence structure, and I will be happy to answer.
I can see how a 16-LED ring would be useful in a sequencer, but how is this used for an instrument playing a 12-tone scale?
I did update it from 12 to 16 LEDs for the purpose of giving it a sequencer capability
I also intend to have the LEDs reflect the parameter status when editing patches, so it will act a little like turning a knob, except that you use the keyboard for the value input.
Having a ring shape for the LEDs is also quite pretty!
Finally, I intend for this project to also be buildable as a kit, so you can buy a generic 16 LED ring and just attach that to the board and save a bunch of tricky SMD soldering! Similarly, the amplifier board can be purchased and attached separately. All of the parts that need to be soldered to the board and don’t have a daughterboard version have the option of using through-hole components OR SMD components, so it should be almost trivial for anybody to build their own with the PCB and a handful of parts.
A multipurpose electronic belt buckle, you say? Does it have party mode? Reminds me of certain neighborly buckles of yore. http://www.radiantmachines.com/category/belt-buckles/
Oh, that’s interesting! I hadn’t seen that one.
I was mostly trying to find a good way to work a synthesizer into a wearable convention swag. The “Giant Trucker Belt Buckle” seemed to be one that hadn’t been done before.
And when you’re ready to up your game,
consider the belt buckles of the World Wresting Federation!
B^)
http://www.kayfabememories.com/beltgallery/wwwf-wwfbelts.htm
I’m kinda disappointed in the quality and quantity of these comments. Given that this is basically a swadge for a convention, I thought folks would be a bit more impressed. I guess I’ll have to find some way to tag it #badgelife …
As my mom always says: “F**k ’em if they can’t take a joke.” I think it’s a dope hack, that prototyping your PCBs at home is way cooler than ordering them, that (at least on a badge) more LEDs is always better, that bumpy musical cyclopsborgs are charming, that you can power your hack as you see fit, and that if you aren’t selling it in Crate and Barrel or designing a building facade (etc), the Golden Ratio can take a long spirally walk off a short pier and try to find a nautilus to chill with. And yes, my mom actually says that. She’s awesome. And she thinks your synth is awesome. And so do I. Nice work, Tim.
If it’s quantity you want, you have to do something egregious, like mixing inches with millimeters. If you did that, I missed it.
Is the “eye” a round LCD?
It’s a speaker.