He’s The Operator Of His Pocket Arduino

The band Kraftwerk hit the music scene with its unique electronic sound in the 70s in Germany, opening the door for the electronic music revolution of the following decade. If you’re not familiar with the band, they often had songs with a technology theme as well, and thanks to modern microcontroller technology it’s possible to replicate the Kraftwerk sound with microcontrollers as [Steven] aka [Marquis de Geek] demonstrates in his melodic build.

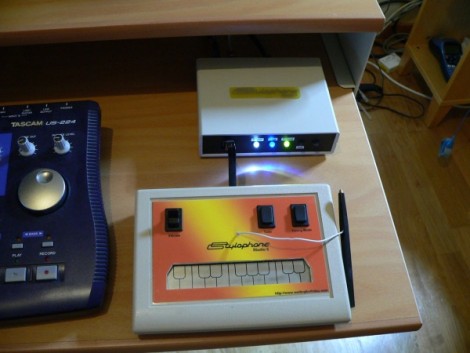
While the music is played on a Stylophone and a Korg synthesizer, it is fed through five separate Arduinos, four of which have various synths and looping samplers installed on them (and presumably represent each of the four members of Kraftwerk). Samplers like this allow pieces of music to be repeated continuously once recorded, which means that [Steven] can play entire songs on his own. The fifth Arduino functions as a controller, handling MIDI and pattern sequencing over I2C, and everything is finally channeled through a homemade mixer.

[Marquis] also dressed in Kraftwerk-appropriate attire for the video demonstration below, which really sells the tribute to the famous and groundbreaking band. While it’s a great build in its own right and is a great recreation of the Kraftwerk sound, we can think of one more way to really put this project over the top — a Kraftwerk-inspired LED tie.

Continue reading “He’s The Operator Of His Pocket Arduino”

With Grinning Keyboard And Sleek Design, This Synth Shows It All

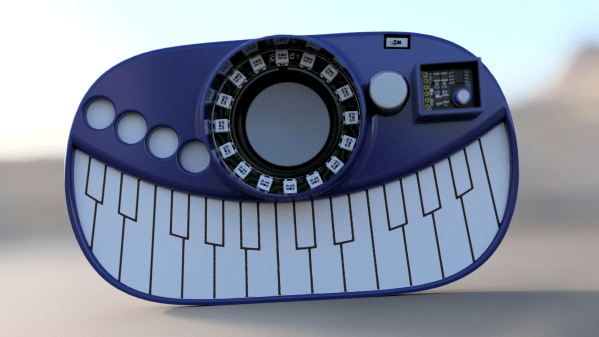
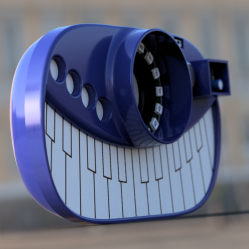
Stylish! is a wearable music synthesizer that combines slick design with stylus based operation to yield a giant trucker-style belt buckle that can pump out electronic tunes. With a PCB keyboard and LED-surrounded inset speaker that resembles an eyeball over a wide grin, Stylish! certainly has a unique look to it. Other synthesizer designs may have more functions, but certainly not more style.

The unit’s stylus and PCB key interface resemble a Stylophone, but [Tim Trzepacz] has added many sound synthesis features as well as a smooth design and LED feedback, all tied together with battery power and integrated speaker and headphone outputs. It may have been originally conceived as a belt buckle, but Stylish! certainly could give conference badge designs a run for their money.

The photo shown is a render, but a prototype is underway using a milled PCB and 3D printed case. [Tim]’s Google photo gallery has some good in-progress pictures showing the prototyping process along with some testing, and his GitHub repository holds all the design files, should anyone want a closer look under the hood. Stylish! was one of the twenty finalists selected for the Musical Instrument Challenge portion of the 2018 Hackaday Prize and is therefore one of the many projects in the running for the grand prize!

Stylish Business Card With A Stylophone Built In

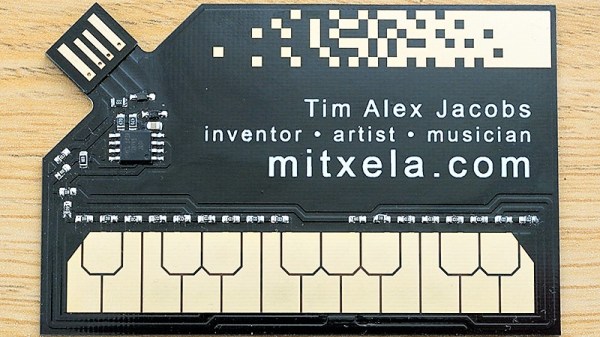
If you’re in the electronics business, PCB business cards seem like a natural fit. They may be impractical and expensive, but they can really set you apart from that boring paper card from Vistaprint crowd. But they need to make sense for what you do, so for a musician and MIDI pro, this MIDI-controller stylophone business card is a real eye- and ear-catcher.

This business card is an idea that [Mitxela] has been kicking around for a while, and he even built a prototype a couple of years ago. The homebrew card, made using the spray paint, laser etching, and ferric chloride method, worked well enough as a proof of concept, but it was a little rough around the edges and needed the professional touch of a PCB fabricator. We’ve got to say that the finished cards are pretty darn sexy, with the black resist contrasting nicely against the gold-immersion pads. He selected a 1-mm thick board and made the USB connector as a separate small board; snapped off of the main board and reflowed back on, it builds up the edge connector to the proper thickness. The parts count is low — just an ATtiny85 and a resistor ladder to encode each key, with a simple jumper used as the stylus. The device itself is just a MIDI controller and makes no music on its own, but we still think this is a pretty creative way to hang out a shingle.

[Mitxela] has quite a few interesting builds, and is no stranger to our pages. Check out his recent servo-plucked MIDI music box, or these amazing miniature LED earrings.

Continue reading “Stylish Business Card With A Stylophone Built In”

Nebulophone Microcontroller Synthesizer Project Sounds Great

Judging from the video (found after the break) the Nebulophone is one of the best sounding DIY synthesizers we’ve seen. Especially when you consider the simplicity of the hardware design. It uses an AVR chip and an OpAmp. The rest of the parts are just a few handfuls of inexpensive components.

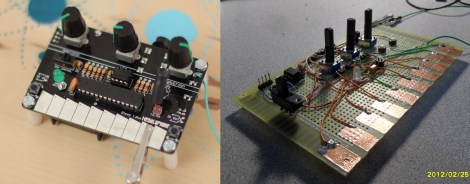
The device was developed by Bleep Labs, and they sell the synthesizer kit seen on the left. But since it’s an open source project you can follow their design to fabricate your own, which is what [BlinkyBlinky] did with his offering seen to the right.

An ATmega328 drives the device, which is the chip often used in the Arduino Duemilanove. The keyboard is a set of traces hooked to the microcontroller. These are tinned pads on the kit PCB, but the DIY version simply uses some adhesive copper foil with a jumper wire soldered to it. The keys are played with a probe that makes the electrical connection, a common practice on these stylophone type designs. Chances are you have everything on hand to make this happen so keep it in mind for that next cold winter weekend that’s making everyone a bit stir crazy.

Continue reading “Nebulophone Microcontroller Synthesizer Project Sounds Great”

Reverse Engineering A Stylophone

The Stylophone – a musical toy from the 60s – is a surprisingly simple piece of engineering. With a simple metallic keyboard played with a stylus and just a handful of transistors, the Stylophone was able to produce a few marvelous for their time sounds, and is the equivalent of a pre-[Stradivarius] violin for the electronic music scene. [Simon] tore apart an original Stylophone, and did a complete teardown of the circuit, going over the ins and outs of why this ancient noise box is so cool.

There have been quite a few DIY Stylophone clones, but all of them suffered from the same raspy sound made by a 555 timer chip slightly misguided makers used instead of the relaxation oscillator (in the pic seen above) used in the original. Aside from the oscillator connect to the RC circuit of the metallic keyboard, [Simon] also looked into the vibrato circuit. This is just a simple oscillator producing an 8 Hz sine-ish wave. The keyboard, of course, is connected to the circuit with an array of resistors which [Simon] happily provided the values for.

[Simon] put up a schematic of his reverse engineered Stylophone, allowing you to clone this ancient electronic instrument. If you can source the transistors, that is.

Stylophone 5 – Modernizing The Best Of The 1968 Hardware

We love looking in on [Simon Inns’] projects, and this must be one of his very best. This is the fifth version of his MIDI-capable stylophone. The gist of the control system is that a conductive keyboard (made of a tinned PCB) is played by making a connection with the tip of a wired stylus — hence the name. The idea comes from the original 1968 Dubreq Stylophone hardware, but [Simon’s] not just using the idea. He has his own working original and used it to reverse engineer the circuit design.

When it first came out, the Stylophone had three flavors for Bass, Standard, and Treble audio ranges. They differed only in the choices of passive components used in the circuit. [Simon] built the variations into his design so that they are selectable on one unit. This most recent version connects via USB, allowing you to control MIDI software. But unlike his first four iterations, this also offers MIDI-In capabilities. This makes it possible to control tuning, vibrato, and to drive the Stylophone circuitry from the computer interface. Get a good look at that, and a nostalgic Portal moment, by watching the clip after the break.

If you’re looking for an easier build, you might try this analog standalone version of the Stylophone.

Continue reading “Stylophone 5 – Modernizing The Best Of The 1968 Hardware”

Analog Stylophone

[Doug Jackson] just finished building an analog Stylophone. We’ve seen this instrument a few times before, most recently with an Arduino-based controller, but this one makes use of 555-timer, resistors, and potentiometers to generate the waveform for each note. If you’ve got the copper-clad and the means to etch the board everything else should be pretty easy to come by. We did note that since this is a single-sided board you’ll be soldering on the same side as the components, which can get a bit hairy but manageable. We just wish that [Doug] has posted a demonstration video so we could hear what this sounds like. But it can’t be too much different from that electronic vuvuzela that used a 555 timer as well.