In the era of touch screens and capacitive buttons, we’d be lying if we said we didn’t have the occasional pang of nostalgia for the good old days when interfacing with devices had a bit more heft to it. The physical clunk and snap of switches never seems to get old, and while you can always pick up a mechanical keyboard for your computer if you want to hear that beautiful staccato sound while firing off your angry Tweets, there’s a definite dearth of mechanical interface devices otherwise.
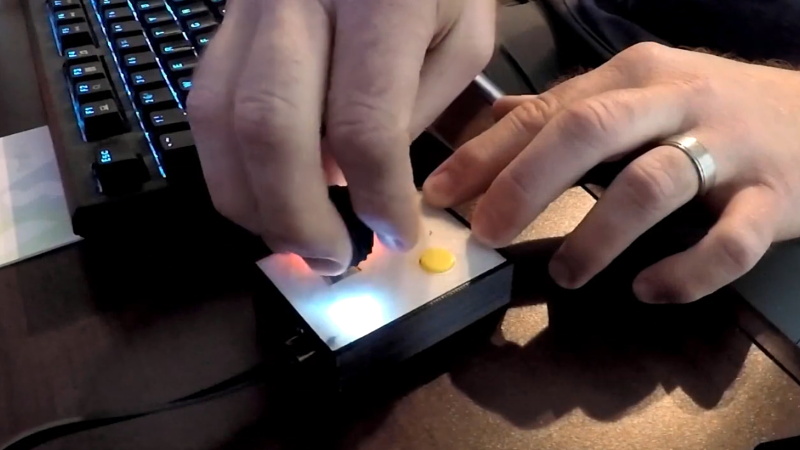
 [Jeremy Cook] decided to take matters into his own hands (literally and figuratively) by designing his own multipurpose USB rotary input device. It’s not a replacement for the mouse or keyboard, but a third pillar of the desktop which offers a unique way of controlling software. It’s naturally suited to controlling things like volume or any other variable which would benefit from some fine tuning, but as demonstrated in the video after the break even has some gaming applications. No doubt the good readers of Hackaday could think of even more potential applications for a gadget like this.
The device is built around the diminutive Arduino-compatible PICO board by MellBell, which features a ATmega32u4 and native USB. This allowed him to very rapidly spin up a USB Human Interface Device (HID) with minimal headaches, all he had to do was hang his buttons and rotary encoder on the PICO’s digital pins. To that end, he [Jeremy] used the fantastic I2C rotary encoder designed by [fattore.saimon], which readers may remember as a finalist in the Open Hardware Design Challenge phase of the 2018 Hackaday Prize. He also added a NeoPixel ring around the encoder to use for some visual feedback and because, well, it just looks cool.
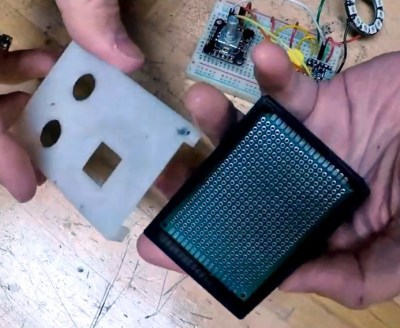
Since all of the core components are digital, there’s not a whole lot required in the way of wiring or passive components. This let [Jeremy] put the whole thing together on a piece of perfboard, freeing him up to spend time designing the 3D printed enclosure complete with translucent lid so he can see the NeoPixel blinkenlights. He got the tolerances tight enough that the whole device can be neatly press-fit together, and even thought to add holes in the bottom of the case so he could push the perfboard back out if he needed to down the line.
[Jeremy] spends a good chunk of the video going over the software setup and development of the firmware, and details some of the nuances he had to wrap his head around when working with the I2C encoder. He also explains the math involved in getting his encoder to emulate a mouse cursor moving in a circle, which he thinks could be useful when emulating games that originally used an encoder such as Tempest or Pong.
We’ve seen similar USB “knobs” in the past for controlling volume, but the additional inputs that [Jeremy] built into his version definitely makes it a bit more practical. Of course we’re suckers for interesting USB input devices to begin with.


Ultimate ? come on ! https://www.ebay.com/sch/i.html?_nkw=100PPR+encoder
I just found a 100PPR wheel for < 11€
But they are just encoders – still need some glue to connect to make them work.
You can get 200PPR out of any ol’ stepper (1.8deg/step) lying around and that have less problems that the switch type encoders.
Get a $10 optical encoder with 400 lines / rev from Ali, connect to interrupt driven sketch on an ESP, get up to 1600 ticks / rev (thats an angular resolution of 0.225) with the right library.
Wow u have links to that? Can i pick ur brain?
Thanks for the writeup Tom!
Cool video. I liked the time-lapse footage of the 3-D print jobs where the print head was always in the same spot.
I’ve implemented a project with one of these rotary knobs and found some great benefit. Originally, I was going to use all these buttons to toggle options in a physical UI. There were so many options, the buttons were getting expensive and I was running out of connectors on my raspberry pi. I got rid of all the buttons in the design phase and implemented with a rotary knob and a 3-line LCD display. This allowed for a scrolling menu with the built-in push down of the knob as a selector button.
The main problem, which I can’t remember if I ever solved, was a ghosting problem where the knob itself will lose track of how far it has spun. I didn’t hear mention of this in the video and was curious if it was a problem here. I researched it and found software-based solutions, but I don’t remember if they worked for me.
Hi Seth,
Glad you enjoyed the print footage. It’s thanks to Octolapse, which I discovered via a Hackaday article.
Re: ghosting, I haven’t noticed this problem, as reading the encoder itself is taken care of by the separate I2C board.
In my experience (with 3D printing firmware) ghosting happens if you rotate faster then you poll the encoder.
Potentially, there could also be an issue with bouncing contacts on fast rotations, but I didn’t check that.
The knob doesn’t keep track of where it is, they just give you movement events.
Sounds like you have an underflow/overflow in your code which is causing the problems, e.g. after turning the knob more than 255 clicks or whatever.
It reminds me the volume knob kit from adafruit, but this is more versatile.
Yep, actually built a Trinket version based on their instructions. Much happier with this one!
Nice project. My local surplus shop has had a nice assortment of old video edit controllers and remotes, many with a nice weighted wheel encoder. These are great for use with audio and video editing software.
Thanks – yeah, a nice weighty one would be perfect. Guess these projects are never quite done ;-)
There are some commercial versions of these available but more for the 3D design world and tend to be proprietary devices with proprietary drivers.
You can always just add a second cavity to the bottom of the box, fill it with sand, and then hot-glue the hole shut. Put a rubber foot/mat on the bottom, and you’ve got weight+friction. Very nice feel.
Stole the idea from http://www.thingiverse.com/thing:2481204
Thx for the idea!
Can’t you use a ball mouse as the hardware? They have two wheels, each interrupting two optocouplers, so all you need is a quadrature rotary encoder, like a stepping motor in reverse. Figure out how to attach a knob to one of the interrupter wheels, and you’ve got it made. I haven’t looked inside, but I have some Delco digitally tuned car radios with stepped tuning and volume controls, so I suspect low definition quad encoders.
Michael
Sony Jog Dial. The rotary encoder used by no one ever.
Funny coincidence: I just today received my one hundred(!) v2 encoders from [fattore.saimon]’s new Kickstarter (https://www.kickstarter.com/projects/1351830006/i2c-encoder-v2) (thanks, Simone!), and was wondering what I should make for my first project. BTW, the version 2 encoders are available with an RGB LED built into a translucent knob, so I’m going to have ???????????????????? blinkenlights.
Cool, I don’t follow crowd funding sites, so it was nice to see that.
Maybe it’s just me, but I think [Jeremy Cook] could use a slightly lighter touch with that soldering iron.
Ha, my soldering skills are definitely sub-par!
Me too. It’s like we need to steal some gracefulness techniques used in ballet and apply it to our soldering. 1 2 3 flux 1 2 3 touch ….. I know we *COULD* do a great job, but its like our muscles don’t know what to do. I really do think that muscle control and gracefulness is an acquired ability, built up with controlled thoughtful motion. (kind of an alien thing to people who read computer screens, think, type their thoughts, and then go get more coffee between restroom breaks)
I guess we need to build one of those 6-digit LED digital clocks made completely with discrete components placed in pin-through-hole circuit boards. After that we would be pretty good at it. :-)
PDL(0) PDL(1) Apple ][ game paddles lovingly come mind. 0-255 using built in access procedure. A bigger range was possible with custom made machine code and a willingness to wait longer for a certain capacitor to drain.
I even remember writing a crude worm steering game similar to what we saw in the video that filled the screen with worm tracks, just for the joy of doing it. Those were the days. :-) Rotory encoders *ARE* good to have around and use in UI’s. 2D ones like trackballs are doubly so. Hyperbowl anyone?
these encoders are great at setting a digital value
like 0 to 100 of volume or brightness
include into any project where setting to a final integer value
dont forget about that rotary encoder under your right middle finger
use in combination with keyboard to map it to values other than scrolling
think [ctrl + scroll] for zooming or [shift + scroll] for rotating cad designs