USB HID And Run Exposes Yet Another BadUSB Surface

You might think you understand the concept of BadUSB attacks and know how to defend it, because all you’ve seen is opening a terminal window. Turns out there’s still more attack surface to cover, as [piraija] tells us in their USB-HID-and-run publication. If your system doesn’t do scrupulous HID device filtering, you might just be vulnerable to a kind of BadUSB attack you haven’t seen yet, rumoured to have been the pathway a few ATMs got hacked – simply closing the usual BadUSB routes won’t do.

The culprit is the Consumer Control specification – an obscure part of HID standard that defines media buttons, specifically, the “launch browser” and “open calculator” kinds of buttons you see on some keyboards, that operating systems, surprisingly, tend to support. If the underlying OS you’re using for kiosk purposes isn’t configured to ignore these buttons, they provide any attacker with unexpected pathways to bypass your kiosk environment, and it works astonishingly well.

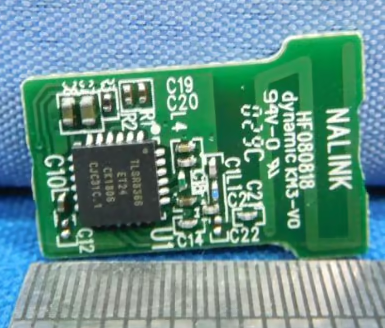
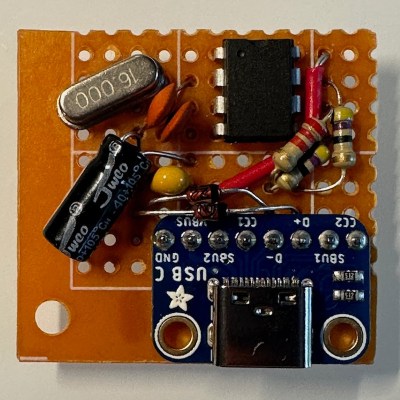
[piraija] tells us that this attack provides us with plenty of opportunities, having tested it on a number of devices in the wild. For your own tests, the writeup has Arduino example code you can upload onto any USB-enabled microcontroller, and for better equipped hackers out there, we’re even getting a Flipper Zero application you can employ instead. While we’ve seen some doubts that USB devices can be a proper attack vector, modern operating systems are more complex and bloated than even meets the eye, often for hardly any reason – for example, if you’re on Windows 10 or 11, press Ctrl+Shift+Alt+Win+L and behold. And, of course, you can make a hostile USB implant small enough that you can build them into a charger or a USB-C dock.

USB image: Inductiveload, Public domain.

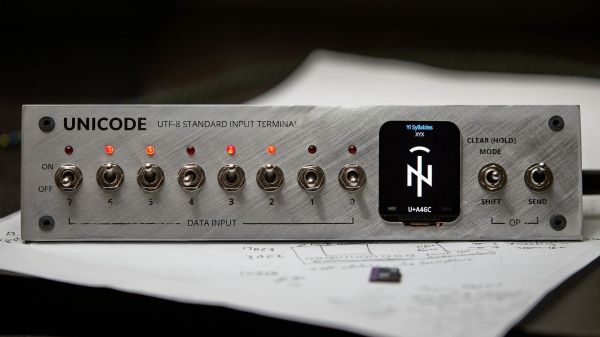
Building Up Unicode Characters One Bit At A Time

The range of characters that can be represented by Unicode is truly bewildering. If there’s a symbol that was ever used to represent a sound or a concept anywhere in the world, chances are pretty good that you can find it somewhere in Unicode. But can many of us recall the proper keyboard calisthenics needed to call forth a particular character at will? Probably not, which is where this Unicode binary input terminal may offer some relief.

“Surely they can’t be suggesting that entering Unicode characters as a sequence of bytes using toggle switches is somehow easier than looking up the numpad shortcut?” we hear you cry. No, but we suspect that’s hardly [Stephen Holdaway]’s intention with this build. Rather, it seems geared specifically at making the process of keying in Unicode harder, but cooler; after all, it was originally his intention to enter this in last year’s Odd Inputs and Peculiar Peripherals contest. [Stephen] didn’t feel it was quite ready at the time, but now we’ve got a chance to give this project a once-over.

The idea is simple: a bank of eight toggle switches (with LEDs, of course) is used to compose the desired UTF-8 character, which is made up of one to four bytes. Each byte is added to a buffer with a separate “shift/clear” momentary toggle, and eventually sent out over USB with a flick of the “send” toggle. [Stephen] thoughtfully included a tiny LCD screen to keep track of the character being composed, so you know what you’re sending down the line. Behind the handsome brushed aluminum panel, a Pi Pico runs the show, drawing glyphs from an SD card containing 200 MB of True Type Font files.

At the end of the day, it’s tempting to look at this as an attractive but essentially useless project. We beg to differ, though — there’s a lot to learn about Unicode, and [Stephen] certainly knocked that off his bucket list with this build. There’s also something wonderfully tactile about this interface, and we’d imagine that composing each codepoint is pretty illustrative of how UTF-8 is organized. Sounds like an all-around win to us.

Hackaday Prize 2023: Sleek Macro Pad Makes 2FA A Little Easier

We all know the drill when it comes to online security — something you know, and something you have. But when the “something you have” is a two-factor token in a keyfob at the bottom of a backpack, or an app on your phone that’s buried several swipes and taps deep, inconvenience can stand in the way of adding that second level of security. Thankfully, this “2FA Sidecar” is the perfect way to lower the barrier to using two-factor authentication.

That’s especially true for a heavy 2FA user like [Matt Perkins], who typically needs to log in and out of multiple 2FA-protected networks during his workday. His Sidecar is similar in design to many of the macro pads we’ve seen, with a row of Cherry MX key switches, a tiny TFT display — part of an ESP32-S3 Reverse TFT Feather — and a USB HID interface. Pressing one of the five keys on the pad generates a new time-based one-time password (TOTP) and sends it over USB as typed keyboard characters; the TOTP is also displayed on the TFT if you prefer to type it in yourself.

As for security, [Matt] took pains to keep things as tight as possible. The ESP32 only connects to network services to keep the time synced up for proper TOTP generation, and to serve up a simple web configuration page so that you can type in the TOTP salts and service name to associate with each key. He also discusses the possibility of protecting the ESP32’s flash memory by burning the e-fuses, as well as the pros and cons of that maneuver. The video below shows the finished project in action.

This is definitely a “use at your own risk” proposition, but we tend to think that in the right physical environment, anything that makes 2FA more convenient is probably a security win. If you need to brush up on the risks and benefits of 2FA, you should probably start here.

Continue reading “Hackaday Prize 2023: Sleek Macro Pad Makes 2FA A Little Easier”

The MouSTer Adapter Now Has Amiga Scroll Support

The MouSTer is a device that enables modern USB HID mice to be used on various retro computers. The project has been through its ups and downs over years, but [drygol] is here to say one thing: rumors of the MouSTers demise have been greatly exaggerated. Now, the project is back and better than ever!

The team has been hard at work on quashing bugs and bringing new features to bear. The headline is that the MouSTer project will now offer mouse wheel support for Amiga users. This is quite the coup, as mouse wheels were incredibly obscure until the late 90s. Now, users of Commodore’s finest machines will be able to scroll with abandon with modern HID mice.

While the progress is grand, much is still left to be done. Despite the name, the MouSTer was never intended to solely serve Atari users. Future goals involve adding support for ADB mice for retro Macs, DB9 mouse support for even-older Apple machines, and DB9 mouse support for older PCs. The team is eager for there to be one MouSTer to rule them all, so to speak, and hopes to make the ultimate retro computer mouse adapter to serve as many purposes as possible.

We first looked at the MouSTer back in 2020, and it’s great to see how far it’s come.

Continue reading “The MouSTer Adapter Now Has Amiga Scroll Support”

Foot Pedal Ups Vim Productivity, Brings Ergonomic Benefits

Vim is the greatest or the worst text editor of all time, depending on the tribe you’re in. Either way, members of both camps can appreciate this build from [Chris Price], which uses a foot pedal to ease operations for the user.

The basic concept was to use a pedal to enable switching between normal and insert modes. In Vim’s predecessor, vi, switching modes was easy, with the ESC key located neatly by the Q on the keyboard of the ADM-3A terminal. On modern keyboards, though, it’s a pain, and so a foot pedal is a desirable solution. In the Vim world, it’s referred to as a “Vim clutch.”

The build used a cheap pedal switch sourced from eBay, into which a Raspberry Pi Pico was installed. The Pico was hooked up to the switch contacts, and programmed to act as a USB HID device. When the pedal is pressed down, the Pico sends an “i” keypress to enter Vim’s insert mode. Releasing the pedal has the Pico send a “ESC” keypress to return to normal mode.

Those that use Vim on a regular basis would likely appreciate the productivity improvements of such a device. Plus, there’s some ergonomic benefits to not having to strain one’s hand over to reach the ESC key. Of course, it’s an old-school solution, but there’s still something so compelling and next-level about having a foot pedal hooked up to one’s dev rig.

A PCB with an Arduino Micro Pro, RCA connectors and a sub-D connector

Odd Inputs And Peculiar Peripherals: Using A Commodore Light Pen On A Modern(ish) Computer

If you worked with computers back in the 1970s, there’s a good chance you used a light pen at some point: a simple input device that you’d point at the CRT screen to highlight text, choose menu options or manipulate graphic objects. Although ubiquitous in those days, the light pen lost the battle for ergonomics to the humble mouse and was all but extinct by the late 1980s. Touchscreen styluses implement a similar function today, but touching the screen somehow doesn’t feel the same as simply pointing at it.

We therefore applaud [Maciej Witkowiak]’s efforts to bring the light pen into the 21st century by building a USB interface for a Commodore 64/128 light pen. At its heart is an Arduino Micro Pro that implements the USB HID protocol to communicate with any modern computer. It connects to the classic light pen as well as to the computer’s analog display signal and uses those to calculate the delay between the video synchronization pulses and the light pen’s output. The sync pulses are extracted from the video signal by an LM1881, a sync separator chip that will be familiar to anyone who’s worked with analog video signals.

The Arduino calculates the light pen’s position based on the measured timing intervals and reports it to the computer, using the absolute positioning mode that’s also used by things like drawing pads. [Maciej] demonstrates his system in the video embedded below, in which he uses it to operate the menus on an X window system. A great success then, although there’s one catch: light pens only work on CRT displays, so you’ll need to drag one of those big glass beasts out of storage if you want to try this yourself.

We’ve featured the Commodore light pen before in this odd gaming input device. A similar device built with a discrete LED matrix is a good illustration of the light pen’s working principle.

Continue reading “Odd Inputs And Peculiar Peripherals: Using A Commodore Light Pen On A Modern(ish) Computer”

Raspberry Pi Pico Gets A Tiny Keyboard On Its Back

With hackers and makers building custom computing devices that don’t necessarily follow conventional design paradigms, there’s been a growing demand for smaller and smaller keyboards. Many of the cyberdecks we’ve seen over the last couple of years have used so-called 60% or even 40% keyboards, and there’s been a trend towards repurposing BlackBerry keyboards for wearables and other pocket-sized gadgets. But what if you need something even smaller?

Enter this incredibly diminutive keyboard created by [TEC.IST]. With 59 keys crammed into an area scarcely larger than three US pennies, it may well be the smallest keyboard ever made. The PCB has been designed to mount directly onto the back of a Raspberry Pi Pico, which is running some CircuitPython code to read the switch matrix and act as a standard USB Human Interface Device. The board design files as well as the source code for the Pico have been released on the project’s Hackaday.io page, giving you everything you need to spin up your own teeny tiny input device.

The Pi Pico’s castellated pads make attaching the PCB a snap.

Of course, you probably won’t be breaking any speed records when banging out text on this thing. We know from past Hackaday badges that an array of microswitches make for a functional, if somewhat unpleasant, method of text entry.

Continue reading “Raspberry Pi Pico Gets A Tiny Keyboard On Its Back”