Way back when, before diesel-electric locomotives were a thing, trains weren’t really able to go backwards too well. Also it’s sometimes necessary to turn carriages around in a small space. For that, the railway turntable was invented. If you want to implement one on a model layout, this project from DIY & Digital Railworld is for you.
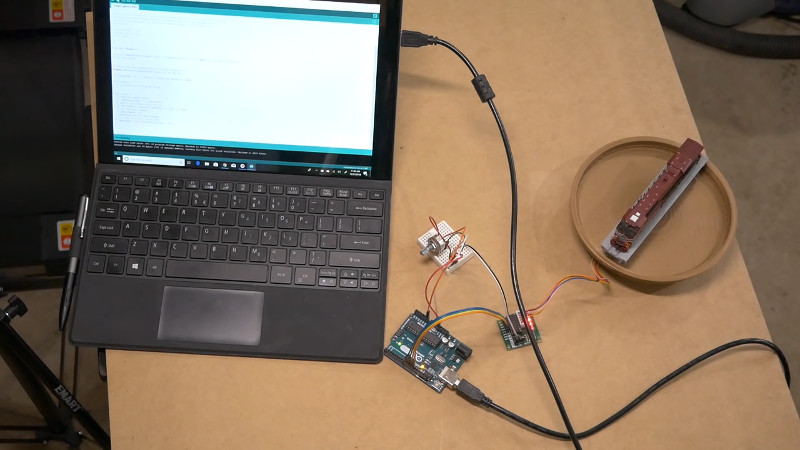
The project is at an early stage – thus far, laying out how to set up an Arduino Uno using a potentiometer to control the speed of a stepper motor, which rotates the turntable. The turntable itself is a 3D printed part sourced from Thingiverse, designed to suit the specific stepper motor used.
This has the easy part sorted – rotating a piece of track through 360 degrees to orient a train properly. However, there’s significant work ahead. Power needs to be hooked up to the rails, and a system for accurately aligning the turntable with outgoing tracks needs to be devised. This is particularly relevant for N-gauge setups, where tolerances are everything.
We’d love to know how you’d tackle the various issues to build a working model turntable in the comments. We’ve seen some serious model railroad builds before around these parts. Video after the break.


Alignment should be easy. Put a dimple in a spot on the turntable, sized for a roller tipped microswitch lever to fit partially into. Have one switch for each track position, mounted so the switches can be adjusted in/out and sideways.
Sufficiently weighting the turntable and using a motor with more torque should make it move smoothly across the switches without any jerking as the rollers go in and out of the dip.
The most dead simple method of selecting the position would be to have the edge of the turntable holding all but one switch in its tripped position when stopped at one of the track positions.
I’d have to think and draw to figure out a circuit. I *know* there are ways to make this work wiring the switches as normally open or normally closed. I’m thinking it’d be easiest to wire all the switches in series, normally closed, so that when the table moves to the desired position the circuit opens and power to the motor is cut. That has the issue of *temporarily* closing the current position switch to make the table move off that switch.
There’s probably a way to use both the NO and NC positions of the switches and parallel connections to each switch so that the connection state of the current position switch is inverted until the physical switch state changes. then from there the table just free runs past all the *unselected* switches until releasing the lever of the *selected* switch, causing power to the motor to be cut.
To keep it all electro-mechanical you’d want to use a ‘radio button’ switch, like those radio station or fan speed selectors that only allow one button at a time to be pushed in.
Fancy solid state electronics could be used, without involving any sort of microcontroller.
Hi how do you wire the switch for each track position, can you sent me some sort of schematic or drawing.
Awating your reply soon
Jacques
I still admire the low-tech approach featured in Model Railroader magazine decades ago: use a 1/4″ phono jack as a pivot, and align the bridge to the approach tracks by hand.
Phono connectors as slip rings? Nice idea! Not come across that before.
Here’s a thought: use two circular ‘fences’ for optical interrupter switches. One would have very narrow gaps while the other has fairly wide ones, both centred on each track connection. How it would function is that both switches are low, the motor turns at 100% speed. When the second (wide gap) switch goes high, the turntable is close to alignment with a track connection and the speed is cut to 50%(?). Once both are high, the motor is stopped. UNLESS the ‘Connection Select’ (or w/e) button is held down. In that case, the motor doesn’t slow down as the turntable rotates past track connections. (I’m sure that one of y’all with discrete component kung fu can come up with an analogue circuit that only needs a three-position toggle switch that springs to centre so that you only need to hold the switch in a particular direction until the turntable has rotated close to the desired track connector.) (More ‘fences’ + optical interrupter switches = more slowdown options.) Does that make sense?
Aligning to the tracks is not easy. I’ve had a store-bought Fleischmann turntable and never managed to get it perfectly aligned. Probably my most dispappointing purchase ever.
I modded my Kato Unitrack turntable with some optocouplers driven by a function-only mobile decoder. Since I’m using the logic in the Kato controller, I just throw a switch on my DCC throttle, then kill it when I’m nearly to the track I want, and the Kato controller finishes the job. For polarity on the table rails, I have a Digitrax digital auto reverser, so nothing to do there, just turn the table CW/CCW by throttle, and back off when it’s close, then drive off. It’s a fairly easy DCC conversion that works very nicely. I still need to mount the Kato board and my mod-add-on opto board in a roundhouse ceiling, but the functionality is just what I wanted. I like it much better than the stationary Kato turntable controller!!
I like my model Electric trains sets
when it comes to alignment, backlash is going to be enemy number 1. I would suggest a physical detent that a spring loaded ball can click into to make sure that there is absolutely proper alignment. Then i would use a drive mechanism with enough torque to get the ball past the detent, that way you don’t have to be too accurate about position sensing. So the motor would get the spring loaded ball detent past its secure location and only need to rotate to the desired position with an accuracy as big as the detent engagement area is.
Btw, steam engines had no problem going either direction. Turntables were for putting rolling stock into Roundhouses. More compact than having a separate yard full of switches. Be able to 180 was a bonus.
Steam engines going at speed need to be moving forward. Leading trucks guide the driving wheels into the curve. Trialing trucks hold the fire pan. Also the sand goes in front not the rear of drivers. Box cars care less which direction they are facing. Also every round house has the exhaust pipe/fan at the same point. Engine goes in one way only. The is why the roundhouse has a turntable. Or were you pulling our leg? Now if you waited until April first.
Every domestic printer comes with a rotary encoder on the paper roller that has more than enough accuracy… add a teensy and you are done. I use printers for all my position control. You get one linear and one rotary encoder and a free linear bushing/bearing rail (although newer cost reduced printers do require the print head as the rail is costing stamped sheet steel; older ones have nice rods in)
For getting power to the turntable track you could use a copper circuit board. Drill a hole in the center of the board. Mount to drill then run at low speed. Scrape a circle to separate inside and outside of circuit board. Use pogo pins (from EBay) to pick up power from the board. Alignment does not have to be as precise as other methods.
Interesting comment regarding the turntable being needed to put rolling stock into roundhouses. If that were indeed the case why have both turntables and roundhouses both been eliminated. Rolling stock still exists, so….
Look up electrical slip ring on google to make your connection for track power. I used one of these with an auto-reverser to control the DCC polarity for my turntable. I also used a Photosensor from Sparkfun to detect a piece of plastic to home the turntable, then counted steps with the Arduino to position the turntable at programmed track locations. Was a pain to program, but worked well. Cannot take credit for this, it’s all been done before.
Making a flat “pancake” turntable. Just sits flat ( near as damn) on top your layout No bowls to cut out. No software simple switch hardware and accurate. Heart is a diy pancake multi track slip ring. The simple dc motor rotates with the table Big issue with stepper motors is the immense heat they create from smaller ones. Melts everything in the end ! No thanks.
Issue : I’m all plastic track battery rc cab control How to auto reverse track voltage polarity when 360 rotate to any clock position Any ideas . Ms O
Two years later, and this is still a ‘hot’ topic. Just finishing a Kitwoods ‘gallows’ turntable controlled completely using an Arduino Nano.
Here’s an Idea. A clock in the form of a railroad turntable. The engine represents the hour hand. Possibly an outer ring pointer for the minute hand. Would require more programming, or an off-the-shelf electric clock movement with enough torque.