Anyone who’s tried to encapsulate something in epoxy resin knows how much of a hassle air bubbles can be. If you’re trying to get a perfectly clear finish, the last thing you want is a bunch of microscopic bubbles frozen in time. The best way to prevent this is to put the parts in a vacuum chamber so all the air works its way out before the epoxy cures, but that’s a considerable investment for a one-off project.
But assuming your parts are small enough, [Jasper Sikken] has a great tip that allows you to construct a simple vacuum chamber for just a few dollars. He shows his homemade chamber off in the video after the break, and we think you’ll agree that the change between before and after is pretty dramatic. The best part is that if you want to build your own version, you only need two parts.
The first one is a airtight container large enough to hold the piece you’re working on. Remember that the larger the chamber is the more time it will take to pump down to a suitable vacuum, so avoid the temptation to use something larger than necessary. [Jasper] used a glass jar with a locking lid, which is not only cheap and readily available, but has a decently large internal volume.
Obviously, the second component is the vacuum pump itself. This might normally be a tall order, but [Jasper] recently found that you can buy small battery-powered gadgets designed for sucking the air out of food containers for as little as $5 USD from the usual import sites. All you need to do is pop a hole in the lid of your container, hold the device over the hole, and watch the magic.
This method is great for anything smaller than a paperweight, but if you’ve got something bigger than that, you’ll need to step up your chamber game. Luckily even larger vacuum chambers can be built cheaply at a pinch.


Generally you want to use a pressure pot for materials that set hard (eg. resin) and a vacuum chamber for flexible materials (eg silicone molds). Resin tends to be too viscous for the bubbles to really escape, but if you use a pressure pot during curing the bubbles shrink to the point you can’t see them, and then remain that way since it forms a hard material.
See this for a discussion: https://www.artmolds.com/pressure-pot-vacuum-chamber
Don’t want to take away from the hacker in this case. Really cool technique for small scale vacuum. I didn’t know those devices would draw enough air for this. I look forward to giving this a try!
I’m surprised as well. I assume he was using a relatively slow curing epoxy, since any time I’ve used resins that set in ~15 minutes, it takes every bit of available time to really degas it in a chamber with an actual vacuum pump. Really impressive results.
With respect to this sentence: “…but that’s a considerable investment for a one-off project”, I’d say yea, it’s an investment, not a prohibitively high one though, and once you have it, you may find you use it more often than you ever thought. I bought cheap vacuum pump and chamber (~$150) for a single project I needed to cast a silicon part, and I’ve used it many times since. Once you have one, it removes an impediment to doing things that require one.
I watch a YouTube video of someone doing this stuff professionally a while back, they did both. vacuum to degas as much as possible, then into a pressure chamber to shrink any remaining bubbles while hardening.
One can even get rid of bubbles entirely. Raising pressure also raises the resin’s ability to dissolve air. Once the resin is hardened, air degasses again, but since the resin is hard, it can’t create bubbles any more.
That said, using vacuum for more than a few seconds achieves about the same, degassing during vacuum, then dissolving air at the higher ambient pressure.
The problem with raising the temp is that for every 10 degrees or so(I forget if that’s C or F) it halves the cure time.
I’d say that ideally you would want both, the vacuum chamber first to get rid of most of the trapped air, and the pressure pot for the actual resin curing to shrink any residual gas to the point it’s either invisible or compressed enough that it will escape the cured resin over time.
I’m assuming there’s some pretty tight limits on the type of resin used to cast too. Judging by Peter Brown videos, many types of resin either outgas while curing or have a ton of dissolved gasses and can just foam to massive multiples of the volume for long enough to ruin the casting. Which is why he ended up using a pressure pot to minimize and dissolve bubbles instead.
Indeed, I’m wondering if it’s easier to build a pressure pot some how (I have no idea how!) – some weird contraption of a foot pump and a old metal pressure cooker?
I seem to recall in one of his videos he explained the switch, mostly because the vaccum method would make such a mess if you weren’t paying attention and you’d often get bubbles forming after forming the vaccum sometimes far into the setting cycle. With the pressure, the bubbles simply never formed, as the gas stayed disolved in the resin, or inside whatever he was dipping.
I have indeed made a pressure pot (and vacuum chamber) out of a pressure cooker – but that is risky if you don’t really really know your stuff. Mine is super old 3-4mm thick stainless so despite not having a PSI stamped on it I know it will easily take casting pressures (and I’ve left the original pressure relief on for now – it will be replaced by a new one once I decide how low I want to set it, I think 40psi is probably optimal using pressure).
Most modern pressure pots seem to be designed around 15psi pressure differential which is a bit low for resin casting from all my reading and tests. No idea how they are built for any idea if they can be safely adapted (I’d guess probably, but far safer to pick something with a rating giving nice safely margins)
I think most of the DIY pressure pots start with the paint pressure tank from Harbor Freight. I found it for $99. I don’t know what other parts are needed.
I think Peter Brown even mentioned that when he first used his pressure pot on the channel. He said basically look up how to do it.
Paint pressure tanks work great. You can replace the stir stick that penetrates the middle of the lid, cut it off (cut the part inside the tank) or loosen the screws holding it in place and slide it up out of the way. Then you can still use it for painting if you need to.
Apologies, I meant to say that when you replace the stir stick, you replace it with a bolt and a setup of washers and rubber gasket washers. It’s pretty easy to find the instructions on how to do this with your pot online.
For those with 5/8″ use a 3″ size 5/8″ bolt with 2 5/8″x2″ steel washers and 2 5/8″x2″ neoprene washers. Sandwich the lid with the neoprene washers, followed by the steel ones (obviously with the bolt going through the middle) and tighten it down.
Hmm, surprisingly good results. Most of the cheap vacuum pumps for food packing only pull down to 0.5 bar or so, which is enough to force air out of a flexible bag but only expands bubbles 2x. But I guess that already can give a noticeable improvement.
I would imagine one of these would be more effective https://www.amazon.com/HFS-Brake-Bleeder-Vacuum-Tuner/dp/B00NP60URE and cheap enough. Probably have to replace the lines that came with, I know the ones on mine were flattening at about 2/3 the scale.
I believe Harbor Freight and Princess Auto have similar ones at similar prices if you wanna get one locally.
Encouraging me to invest in one of these handheld units more as I’ve been waiting until I need to perform a more thorough test of an engine and carb.
We use a similar hand pump for degassing resin at work, with good results. The vacuum chamber is a small mason jar.
Personnally, I would use a valve to control the flow and a vacuum cleaner.
An old refrigerator compressor makes a brilliant vacuum pump, as well as a high pressure air compressor (92% vacuum and >300psi with one I salvaged from an old fridge put out for garbage collection)
I wonder if it would be enough to use a hot container & then whack it in the freezer? That wouldn’t even require a pump…
Not sure you’d really need the freezer, you can put those type of mason/kilner jars in boiling water for canning, do that and tighten the lid, let cool to room temp.
Some resins warm up while setting (some an incredible amount) – not sure how ‘weird’ they’d go with this kind of temp change happening. Might be an interesting experiment though. How you going to open it? I guess warming it up could work…
Resins also tend to cure much faster at higher temps. You may not have enough time for the vacuum effect to occur before the resin hardens too much to pour.
Warming it up would accelerate the epoxy cure time, maybe too much?
If you need cheap vacuum you could also use a water aspirator.
I guess simplest way to produce vacuum is 3d printed venturi tube, powered by stream of water from garden hose :-)
When I cast with clear silicone, it has an incredible 24 hours pot time, so I put my molds into the fridge, and wait;
the vibrations of the compressor are just perfect to degas all those bubbles…
But I don’t always, sometimes I want to keep some bubbles ;o)
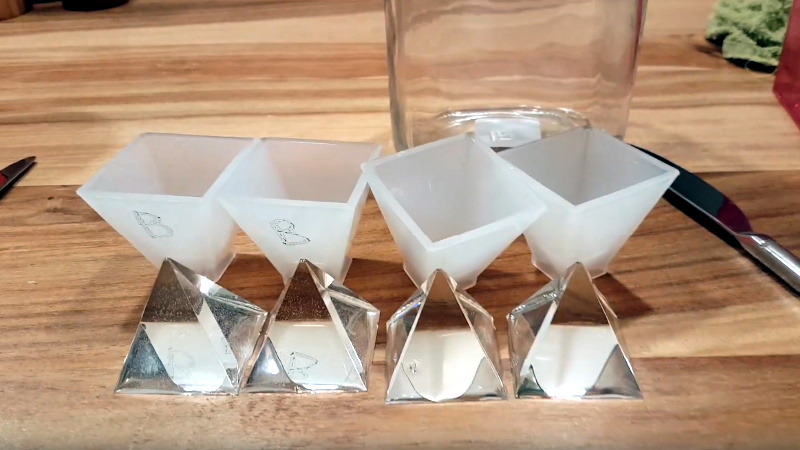
I bought a set of these vacuum containers when I wanted to try casting pewter into heat-resistant silicone. I use the middle one for storing coffee and the small one for degassing. It’s made a huge difference, especially if I keep the silicone in the fridge for a while to give it time to settle down. I doubt they pull a huge vacuum, but it gets the job done.
https://www.amazon.co.uk/gp/product/B008O3EM04/ref=ppx_yo_dt_b_asin_title_o00_s01?ie=UTF8&psc=1
I have done a similar thing to vacuum impregnate a magneto stator. In that case I used a 12V tyre inflator with a tube attached to the air inlet. (I actually added the tube some time ago, so that I could use it to pump argon in to a shock absorber)
Pic here: http://bodgesoc.blogspot.com/2014/06/neracar4.html
How about this for an idea, mix the epoxy IN a vacuum. It seems you could use a modified magnetic stirrer, that is a bit more 3D than the type you find in labs, and slow it down a bit so the magnet and motor wouldn’t become unsynced with each other . That way the only air you would introduce to the mix would be when you poured the resin and hardener into the container, and if you had a large enough vacuum chamber(see Cody’s Lab), you could even devise a way to pour it under vacuum, then mix.. If you planned everything right that wouldn’t be too difficult…then you could release the vacuum, pour into your mold and put under a vacuum or pressure depending on your needs at that point..
A friend of mine pours that liquid glass epoxy over thick wood slabs and creates table tops with it. After pouring he goes over it with a torch while it is still wet to bring out the bubbles. He always gets a few so he winds up wet sanding to take them out. I have been pondering if you could make a “good enough” vacuum chamber out of a couple sheets of 3/4″ plywood coated with that epoxy stuff separated by 2×8’s coated with that stuff. Make a gusset around the front that could hold an O ring or some kind of a seal and use some bolts to hold it on. This would be like a pizza over vacuum chamber. I guess you could use it for pressure as well.
A lovely idea, certainly possible but over large table top spans the force of pulling even a relatively minor vacuum could warp the ply tops, as thick and stiff as 3/4″ is if the table top is big enough it could still sag into the surface..
Really comes down to the quality of the ply, and the size of the chamber. I had a big box I made into a impromptu vacuum chamber and that wouldn’t even fit a coffee table top in – it barely functioned just using a domestic vacuum cleaner as the top would flex too freely and ruin the seal – Think I was just using 18mm cheap ply with a little poured two part silicone for a gasket.
Also with that size box and timbers inside its possible you would struggle to actually pull a vacuum at all. Woods even long dried will probably degas badly which on top of the large volume might well outrun the pumps capacity.
Would love to be proved wrong and find it is really practical though! So if its tried do let us know.
Using a pressure cooker and the compressor from an old dorm fridge is pretty cheap and easy vacuum pressure tank…
I know this is an old thread, but FWIW http://www.novalab.org/rockets/mixer.htm shows a vacuum chamber made out of plywood, large enough to hold a Kitchen Aid mixer. I have used a heavy stainless steel mixing bowl with a 1/2″ polycarbonate lid; plumbing fittings to attach to vacuum or to admit air. Gasket cut from sheet rubber works fine.
Using a filter housing like this https://www.ebay.com/itm/133123159218 of a reverse osmosis (RO) setup, pretty good results with a cheap vacuum pump like this https://www.ebay.com/itm/274433181883 can be achieved. I’m using such setup to pull air bubbles out of the supply hose (RO pumps do a terrible job when having to pressurise air, they just want to pump water). When the main water pump and the osmosis pump fight for water, the air pump reduces the volume occupied by air in a 1:8 ratio, suggesting superior suction capacity.