With A Little Heat, Printed Parts Handle Vacuum Duty

We don’t have to tell the average Hackaday reader that desktop 3D printing has been transformative for our community, but what might not be as obvious is the impact the technology has had on the scientific community. As explained in Thermal Post-Processing of 3D Printed Polypropylene Parts for
Vacuum Systems
by [Pierce Mayville], [Aliaksei Petsiuk], and [Joshua Pearce]
, the use of printed plastic parts, especially when based on open source designs, can lead to huge cost reductions in the production of scientific hardware.

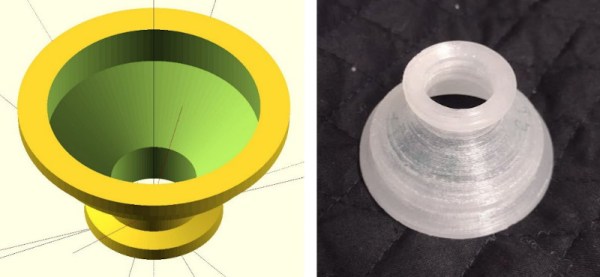
More specifically, the authors wanted to examine the use of 3D printing components to be used in a vacuum. Parts produced with filament-based printers tend to be porous, and as such, are not suitable for fittings or adapters which need to be pumped down to below one atmosphere. The paper goes on to explain that there are coatings that can be used to seal the printed parts, but that they can outgas at negative pressures.

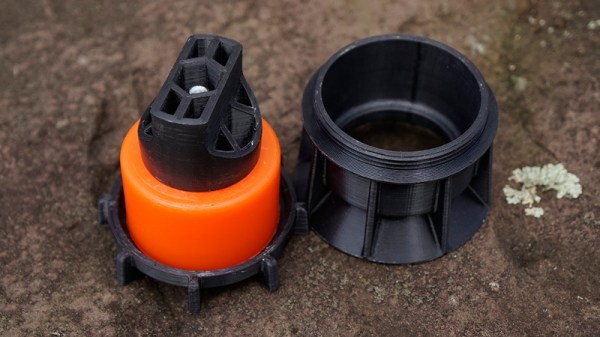
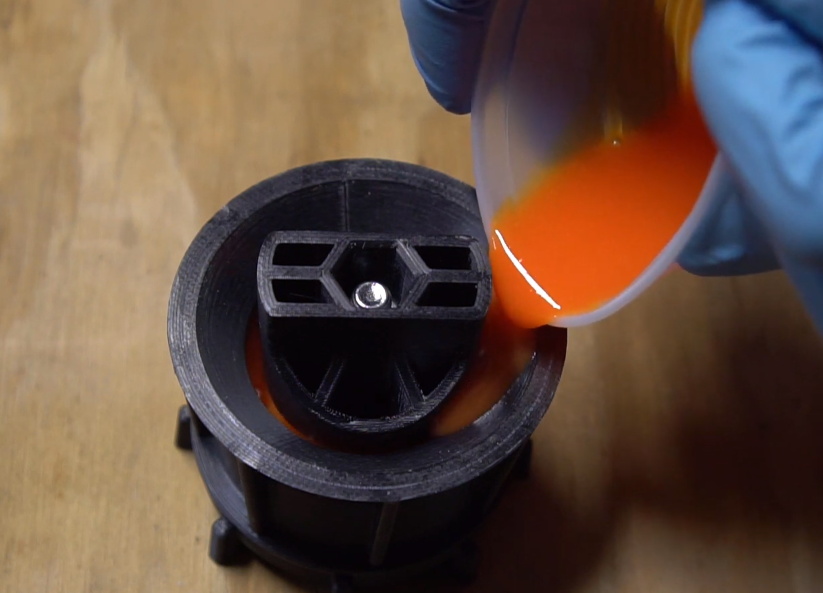
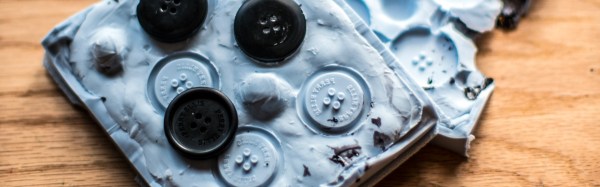
The solution proposed by the team is exceptionally simple: after printing their desired parts in polypropylene on a Lulzbot Taz 6, they simply hit them with a standard consumer heat gun. With the temperature set at ~400 °C, it took a little under a minute for the surface of take on a glossy appearance — the result reminds us of an ABS print smoothed with acetone vapor.

As the part is heated, the surface texture visibly changes. The smoothed parts performed far better in vacuum testing.

In addition to the heat treatment, the team also experimented with increasing degrees of infill overlap in the slicer settings. The end result is that parts printed with a high overlap and then heat treated were able to reliably handle pressures as low as 0.4 mTorr. While the paper admits that manually cooking your printed parts with a heat gun isn’t exactly the ideal solution for producing vacuum-capable components, it’s certainly a promising start and deserves further study.

Casting Skateboard Wheels With A 3D Printed Mold

We’ll admit that most of the Hackaday staff wouldn’t get too far on a skateboard, but that doesn’t mean we can’t appreciate the impressive DIY wheels that [Chris McCann] has managed to cast using 3D printed molds. From unique color combinations to experimental materials, the process certainly opens up some interesting possibilities for those looking to truly customize their rides. Though it’s worth noting there’s a certain element of risk involved; should a set of homemade wheels fail at speed, it could go rather poorly for the rider.

Both the STL and STEP files for the mold have been released under the Creative Commons Attribution 4.0 license, meaning anyone with a 3D printer can follow along at home. Unfortunately, it’s not quite as simple as clicking print and coming back to a usable mold. Because of the layer lines inherent to FDM 3D printing, the inside of the mold needs to be thoroughly sanded and polished. [Chris] mentions that printing the mold in ABS and using vapor smoothing might be a workable alternative to elbow grease and PLA, but he hasn’t personally tried it yet.

Once you’ve got the three part mold printed, smoothed, and coated with an appropriate release agent like petroleum jelly, it’s time to make some wheels. The core of each wheel is actually 3D printed from PETG, which should give it pretty reasonable impact resistance. If you have access to a lathe, producing aluminum cores shouldn’t be too difficult either. With the core loaded into the mold, urethane resin is poured in through the top until all the empty space is filled.

But you’re not done yet. All those little air bubbles in the resin need to be dealt with before it cures. [Chris] puts his filled molds into a pressure chamber, though he mentions that vacuum degassing might also be a possibility depending on the urethane mixture used. After everything is solidified, the mold can easily be taken apart to reveal the newly cast wheel.

While there’s often some trial and error involved, 3D printing and resin casting are an undeniably powerful combination. If you can master the techniques involved, you can produce some very impressive parts that otherwise would be exceptionally difficult to produce on a hacker’s budget. Especially when you’re ready to start casting molten metal.

Continue reading “Casting Skateboard Wheels With A 3D Printed Mold”

Degassing Epoxy Resin On The (Very) Cheap

Anyone who’s tried to encapsulate something in epoxy resin knows how much of a hassle air bubbles can be. If you’re trying to get a perfectly clear finish, the last thing you want is a bunch of microscopic bubbles frozen in time. The best way to prevent this is to put the parts in a vacuum chamber so all the air works its way out before the epoxy cures, but that’s a considerable investment for a one-off project.

But assuming your parts are small enough, [Jasper Sikken] has a great tip that allows you to construct a simple vacuum chamber for just a few dollars. He shows his homemade chamber off in the video after the break, and we think you’ll agree that the change between before and after is pretty dramatic. The best part is that if you want to build your own version, you only need two parts.

The first one is a airtight container large enough to hold the piece you’re working on. Remember that the larger the chamber is the more time it will take to pump down to a suitable vacuum, so avoid the temptation to use something larger than necessary. [Jasper] used a glass jar with a locking lid, which is not only cheap and readily available, but has a decently large internal volume.

Obviously, the second component is the vacuum pump itself. This might normally be a tall order, but [Jasper] recently found that you can buy small battery-powered gadgets designed for sucking the air out of food containers for as little as $5 USD from the usual import sites. All you need to do is pop a hole in the lid of your container, hold the device over the hole, and watch the magic.

This method is great for anything smaller than a paperweight, but if you’ve got something bigger than that, you’ll need to step up your chamber game. Luckily even larger vacuum chambers can be built cheaply at a pinch.

Continue reading “Degassing Epoxy Resin On The (Very) Cheap”

A quick brush over the part with some sand paper and it quickly transforms from obviously plastic to metallic.

Learn Resin Casting Techniques: Cold Casting

Sometimes we need the look, feel, and weight of a metal part in a project, but not the metal itself. Maybe you’re going for that retro look. Maybe you’re restoring an old radio and you have one brass piece but not another. It’s possible to get a very metal like part without all of the expense and heat required in casting or the long hours in the metal fabrication shop.

Before investing in the materials for cold casting, it’s best to have practical expectations. A cold cast part will not take a high polish very well, but for brushed and satin it can be nearly indistinguishable from a cast part. The cold cast part will have a metal weight to it, but it clinks like ceramic. It will feel cool and transfers heat fairly well, but I don’t have numbers for you. Parts made with brass, copper, and iron dust will patina accordingly. If you want them to hold a bright shine they will need to be treated with shellac or an equivalent coating afterward; luckily the thermoset resins are usually pretty inert so any coating used on metal for the same purpose will do.

It is best to think of the material as behaving more or less like a glass filled nylon such as the kind used for the casing of a power tool. It will be stiff. It will flex a relatively short distance before crazing and then cracking at the stress points. It will be significantly stronger than a 3D printed part, weaker than a pure resin part, and depending on the metal; weaker than the metal it is meant to imitate.

Continue reading “Learn Resin Casting Techniques: Cold Casting”

Learn Resin Casting Techniques: Duplicating Plastic Parts

Resin casting lets you produce parts that would be otherwise impossible to make without a full CNC and injection molding set-up. It costs about as much as a 3d printer, 300 to 600 US dollars, to get a good set-up going. This is for raw material, resin, dye, pressure chamber, and an optional vacuum degassing set-up. A good resin casting set-up will let you produce parts which are stronger than injection molding, and with phenomenal accuracy, temperature resistance, and strength. I will be covering various techniques from the simple to advanced for using resin casting from a hacker’s perspective.

Continue reading “Learn Resin Casting Techniques: Duplicating Plastic Parts”