Magic Pyramids Blink Eternal With The Power Of The Sun

Without knowing it, we’ve spent years watching [Jasper Sikken] piece together an empire of energy harvesting equipment, and now he’s putting the pieces together into wonderful creations. His recently finished solar harvesting pyramids are mesmerizing objects of geometric perfection we’d love to see glinting in the sun.

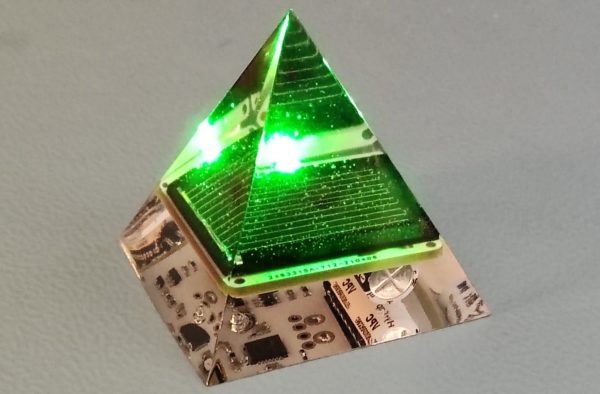
These solar harvesting pyramids are well described by their name. Each one contains a PCBA around 30mm on a side with a solar energy harvester built around the dedicated AEM10941 IC, a single solar cell, and a very bright green LED. [Jasper] calculates that the solar cell will charge the super capacitor at 20uA at with just 200 lux of light (a level typical for casual indoor spaces) letting it run indefinitely when placed indoors. Amazingly with the LED blinking for 15ms every 2 seconds it will run for 21 days in complete darkness. And that’s it! This is a software-free piece of hardware which requires no input besides dim light and blinks an LED indefinitely.

Small PCBA, large capacitor

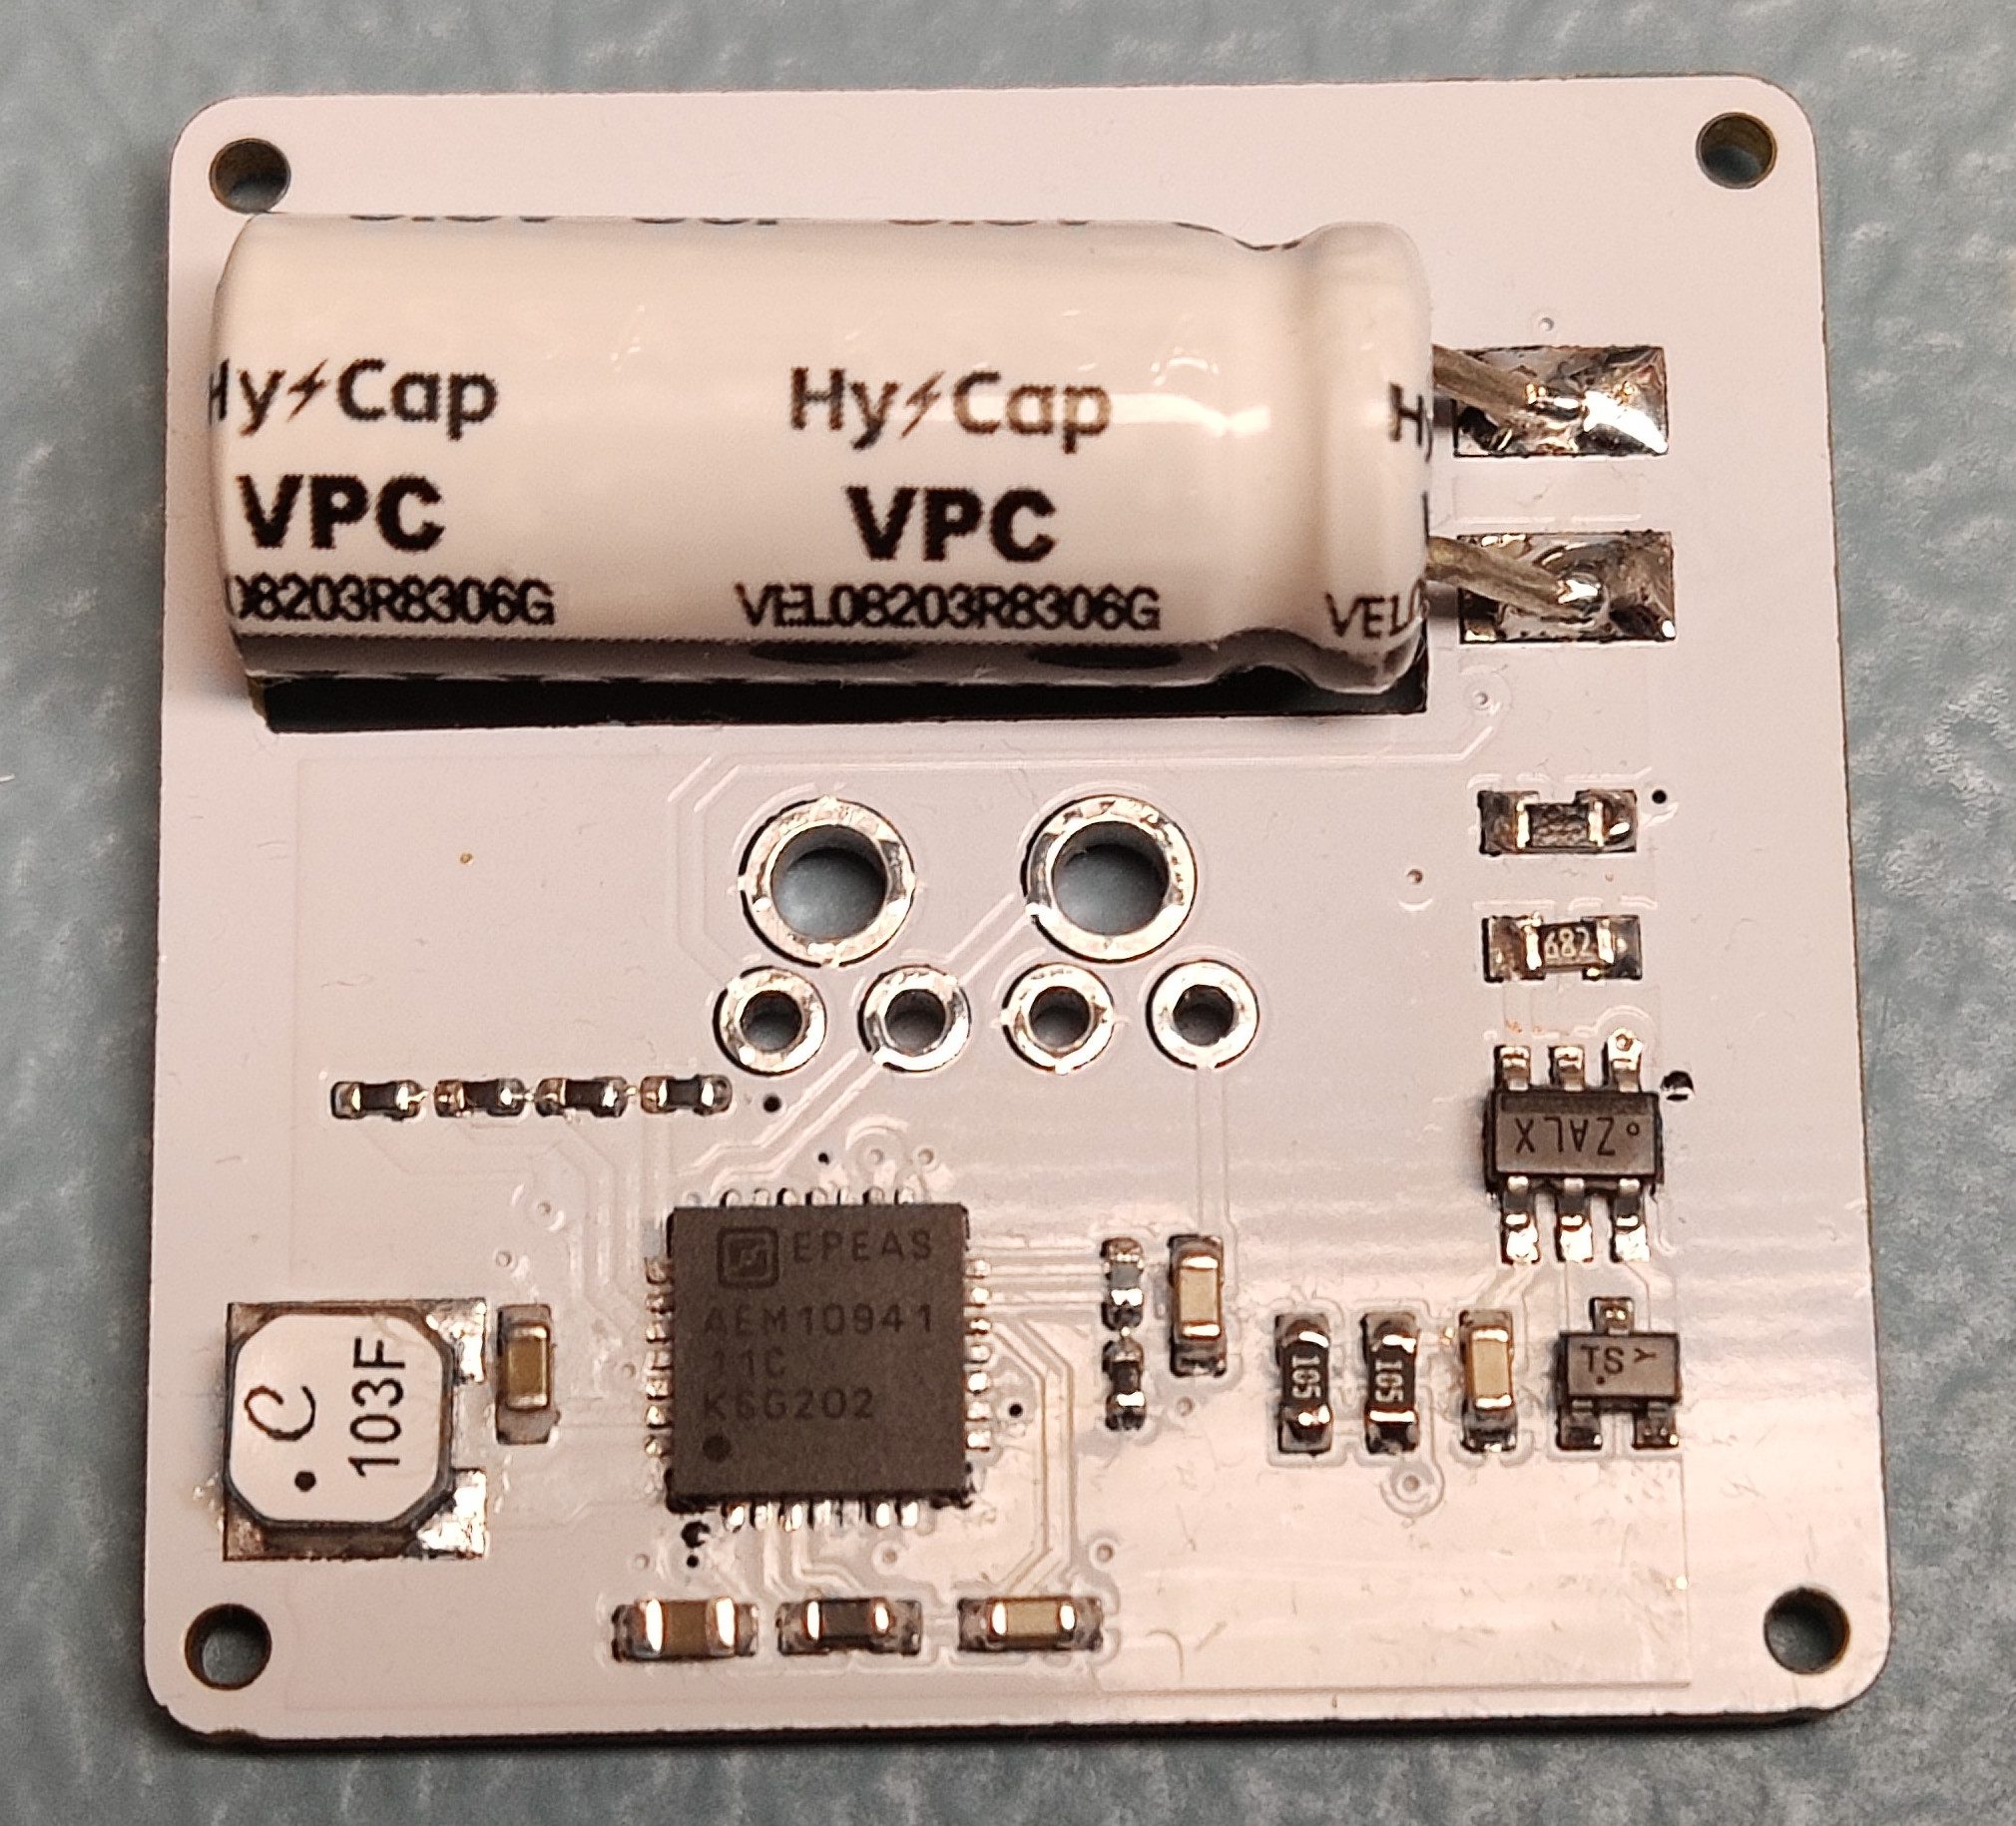
What about that super capacitor? It’s called a Lithium Ion Capacitor (LIC) and is a hybrid between a typical rechargeable lithium battery and an electrolytic capacitor, offering extremely high capacity in a convenient two leg through hole form factor. This one is a whopping 30 Farad at 3.8 V, and we first saw it when [Jasper] won the Hackaday Earth Day contest last month. Check out that link if you want to know more about their uses and how to integrate them.

For more detail about all of the components of the solar pyramid we need only turn to the Hackaday archives. In December 2019 [Tom Nardi] wrote about building a cheap degassing system for making some very familiar looking resin pyramids. And before that [Donald Papp] brought us another familiar piece of the pyramid when he wrote up a different 1″ x 1″ solar harvesting system that [Jasper] designed.

Check out the video after the break to see what one of these gems looks like from all sides. And for many more experiments leading up the final pyramid check out the logs on the Hackaday.io page.

Continue reading “Magic Pyramids Blink Eternal With The Power Of The Sun”

Degassing Epoxy Resin On The (Very) Cheap

Anyone who’s tried to encapsulate something in epoxy resin knows how much of a hassle air bubbles can be. If you’re trying to get a perfectly clear finish, the last thing you want is a bunch of microscopic bubbles frozen in time. The best way to prevent this is to put the parts in a vacuum chamber so all the air works its way out before the epoxy cures, but that’s a considerable investment for a one-off project.

But assuming your parts are small enough, [Jasper Sikken] has a great tip that allows you to construct a simple vacuum chamber for just a few dollars. He shows his homemade chamber off in the video after the break, and we think you’ll agree that the change between before and after is pretty dramatic. The best part is that if you want to build your own version, you only need two parts.

The first one is a airtight container large enough to hold the piece you’re working on. Remember that the larger the chamber is the more time it will take to pump down to a suitable vacuum, so avoid the temptation to use something larger than necessary. [Jasper] used a glass jar with a locking lid, which is not only cheap and readily available, but has a decently large internal volume.

Obviously, the second component is the vacuum pump itself. This might normally be a tall order, but [Jasper] recently found that you can buy small battery-powered gadgets designed for sucking the air out of food containers for as little as $5 USD from the usual import sites. All you need to do is pop a hole in the lid of your container, hold the device over the hole, and watch the magic.

This method is great for anything smaller than a paperweight, but if you’ve got something bigger than that, you’ll need to step up your chamber game. Luckily even larger vacuum chambers can be built cheaply at a pinch.

Continue reading “Degassing Epoxy Resin On The (Very) Cheap”

Build Your Own Vacuum Chamber For Degassing And More

A vacuum chamber can be a useful thing to have around the shop. It can be used for all manner of purposes, from science experiments to degassing paints and epoxies. They’re not something you’d find in every workshop, but never fear – you can always build one from scrap you’ve got lying around! (YouTube video, embedded below.)

[VegOilGuy] begins the build with a simple plywood box, which gets screwed together and then tarted up with bodyfiller and paint. This helps to make the box airtight, as well as improving the aesthetics. A slot is then cut in the lid, and then filled with an excessive amount of silicone sealant. A flat plate covered in aluminium foil is placed on top, and the silicone is left to cure for several days.This is used to create a flat sealing surface for the lid to be placed on later.

Once the seal is complete, it’s a simple plumbing job to finish the chamber. [VegOilGuy] does a great job of demonstrating copper soldering and the proper way to install the necessary taps and check valves. Combined with an electric pump, the vacuum chamber passes its tests with flying colors, completely ruining some marshmallows in the process.

With a few dollars spent online for the special bits, it’s a build that any handy maker could throw together in a weekend. You can always go another route, though – like using an old fridge compressor to get the job done.

[Thanks to Keith O for the tip!]

Continue reading “Build Your Own Vacuum Chamber For Degassing And More”

Hacked Vacuum Chamber Won’t Suck A Hole In Your Budget

There’s nothing like a true hack, where something useful is concocted from bits of scrap and bargain store finds. Builds like these are much more than the sum of their parts, especially when they result in a useful tool, like this DIY vacuum chamber that’s good for all sorts of jobs.

Everything [Black Beard Projects] used to accomplish this build is readily available almost everywhere in the world, although we have to note that appliance recycling efforts and refrigerant recovery programs have made it somewhat harder to lay hands on things like the old fridge compressor used here. The big steel cooking pot is an easy thrift store find, though, and while [Black Beard] used high-quality stainless fittings and valves to plumb the chamber, pretty much any cheap fittings will do.

The one sketchy area of the build is the plexiglass sheet used for the chamber top, which seems a little on the thin side to us. You can see it flexing in the video below as vacuum is pulled; it survived, but we can see it failing catastrophically at some point. We stand ready to be reassured in the comments. Still, it’s a tidy build with a few nice details, like wiring a switch into the old start capacitor box and using car door edge protector as a gasket on the chamber.

Fridge compressor hacks are standard fare, of course, being used to make everything from air compressors to two-stroke engines. Sometimes they’re even used to keep things cool too.

Continue reading “Hacked Vacuum Chamber Won’t Suck A Hole In Your Budget”