
You may find yourself living in interesting times. The world we knew two months ago is gone, and there is time enough at last, to finally go through those projects we’ve been putting off for one reason or another. Today, I wanted to explore and possibly repair an old unidentified typewriter that belonged to my late aunt for many decades.
A small disclaimer though, I am not an avid typewriter collector or connoisseur. I enjoy looking at them and using them, but by no stretch of the imagination I want to claim to be an expert in their history or inner workings — I’m a hacker after all. What follows is a layman’s adventure into her first typewriter repair, an exciting tale that explores typewriter anatomy and troubleshooting. Let’s dig in.
The Typewriter and It’s Quirks
This is my late aunt’s typewriter. It’s missing the type cover, which I assume had the only identifying information on it, because other than a small plaque indicating the company which imported it into our country, the whole body has no branding whatsoever. I’ve looked online and asked a few people, none of them could place their finger on it and no other ultraportable typewriter I can find looks like it. What do you way, Hackaday, anyone know what I have here? At best we can place it as post-1940s, and it looks like maybe a Smith-Corona Skyriter, but has many differences to it.
I remember being allowed to play with this typewriter as a kid, long after it had been decommissioned from any important work it might have served in the past, and since then it has some new quirks too. Most glaringly, two accent keys were constantly in a slightly depressed state and pressing them all the way down didn’t move their respective type heads, which also idled in a wrong position. This was the most mind-boggling issue, and the one I was often told “couldn’t be fixed”, or “would be too expensive to take to someone to fix.” The other issue was that the upper and lower cases were misaligned, making any printed text look wonky if you tried to capitalize words.
Straightening Type Bars and Cleaning Gunk
The way mechanical typewriters like these work is by striking a type head through an ink-soaked ribbon onto a piece of paper. The type head has the embossed mirror image of the letter you want to type in it, and the action imprints it onto the paper with the ink from the ribbon. As you use the typewriter over the years, ink can start to clog the type heads and “dull” them out, causing blurry printing.
This is easily remedied by taking an old toothbrush soaked in isopropyl alcohol and scrubbing all the type heads until they’re clean. If you want to be thorough about it, you can do them one by one, but doing large strokes across all of them at once in their resting position cleaned mine enough for sharper letters.

As I tried typing with newly-refreshed heads, I noticed some of the type bars would get jammed at the end of travel. Looking at this website on typewriter restoration, which has been an invaluable resource throughout this whole ordeal, I found out the causes of that can include bent type bars and a gunked up segment (the piece that holds the type bars). Sure enough, with some gentle scraping of the slots with a fine screwdriver followed by ever so slightly bending the bars that continued to stick after that, all seemed in order. As far as the typing experience, this typewriter was already starting to shape up.
The Broken Keys
The two accent keys in their broken state seemed like the most daunting part of this restoration. I’ve been discouraged from attempting repairs on this typewriter at a younger age, but now there’s little care left for it and I was able to inspect them however I wanted.
At first, guided by whatever I could gather from other typewriter models online, I tried looking underneath the mechanism, looking for any links that might have broken. After removing the bottom cover I was surprised to find that this model was mostly entirely boxed up, allowing me little to no access to any of the keys through here. However, I did notice two missing bolts, which corresponded to the keys that weren’t held up in the right place. At first I thought this could be related…
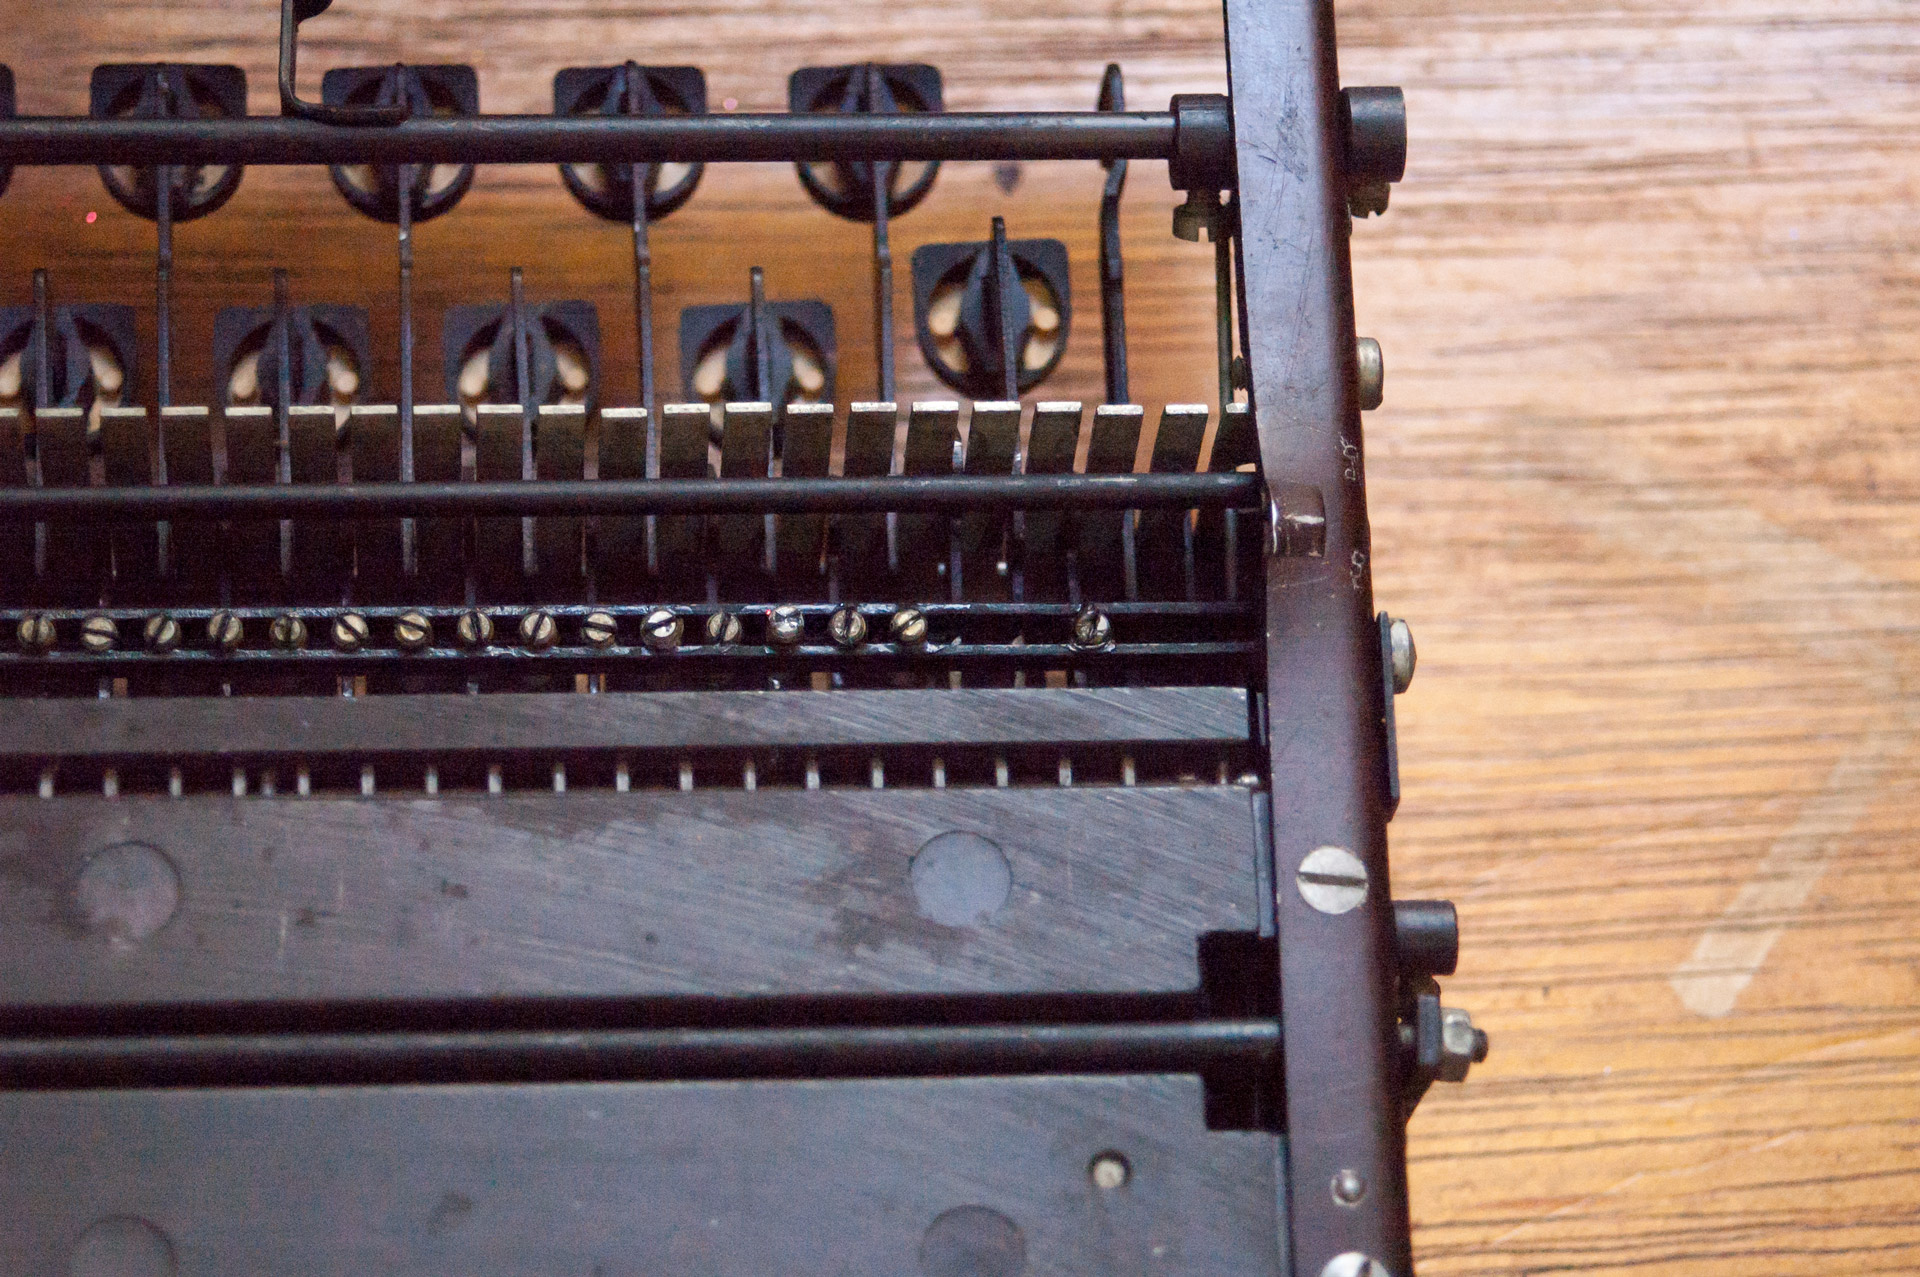
… But then I found out these bolts are in place in order for all type keys to equally activate the mechanism which pushes the carriage forward one character. In the case of the two accent keys, these bolts are meant to be missing on purpose, making them what’s called “dead keys” so the accent can be typed without moving the carriage, and then a letter can be typed underneath.

So I looked back up again, and noticed there was another plate behind the keys I could remove, and there I found the culprit. Right behind the keys themselves lies a row of springs which make part of the system that returns the keys to their starting position. Once I exposed the rest of the mechanism, I noticed the two broken keys had separated from their links to the type bars. Luckily, it was a simple matter of twisting a screwdriver between the bars and snapping them back into place in order to hook them again, and suddenly the keys were working after decades of negligence.
A Stiff Case of Improper Alignment
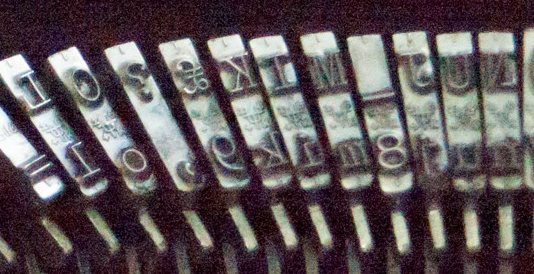 With the broken keys out of the way, the only thing that kept this typewriter from being in top shape was the fact that upper and lower cases were misaligned. If you look closely again at the picture with the type heads, you’ll notice each key has both their regular glyph and their shifted-position glyph on the same head.
The way typewriters change between one and the other is that the shift key on a typewriter literally shifts the entire carriage up so that the alternate glyph is printed on the page instead. For letters, that moves between upper and lower cases, with symbols it can be an entirely different symbol although the mechanical function is the same. Adjusting the resting and shifted positions of the carriage is what affects the alignment between both sets.
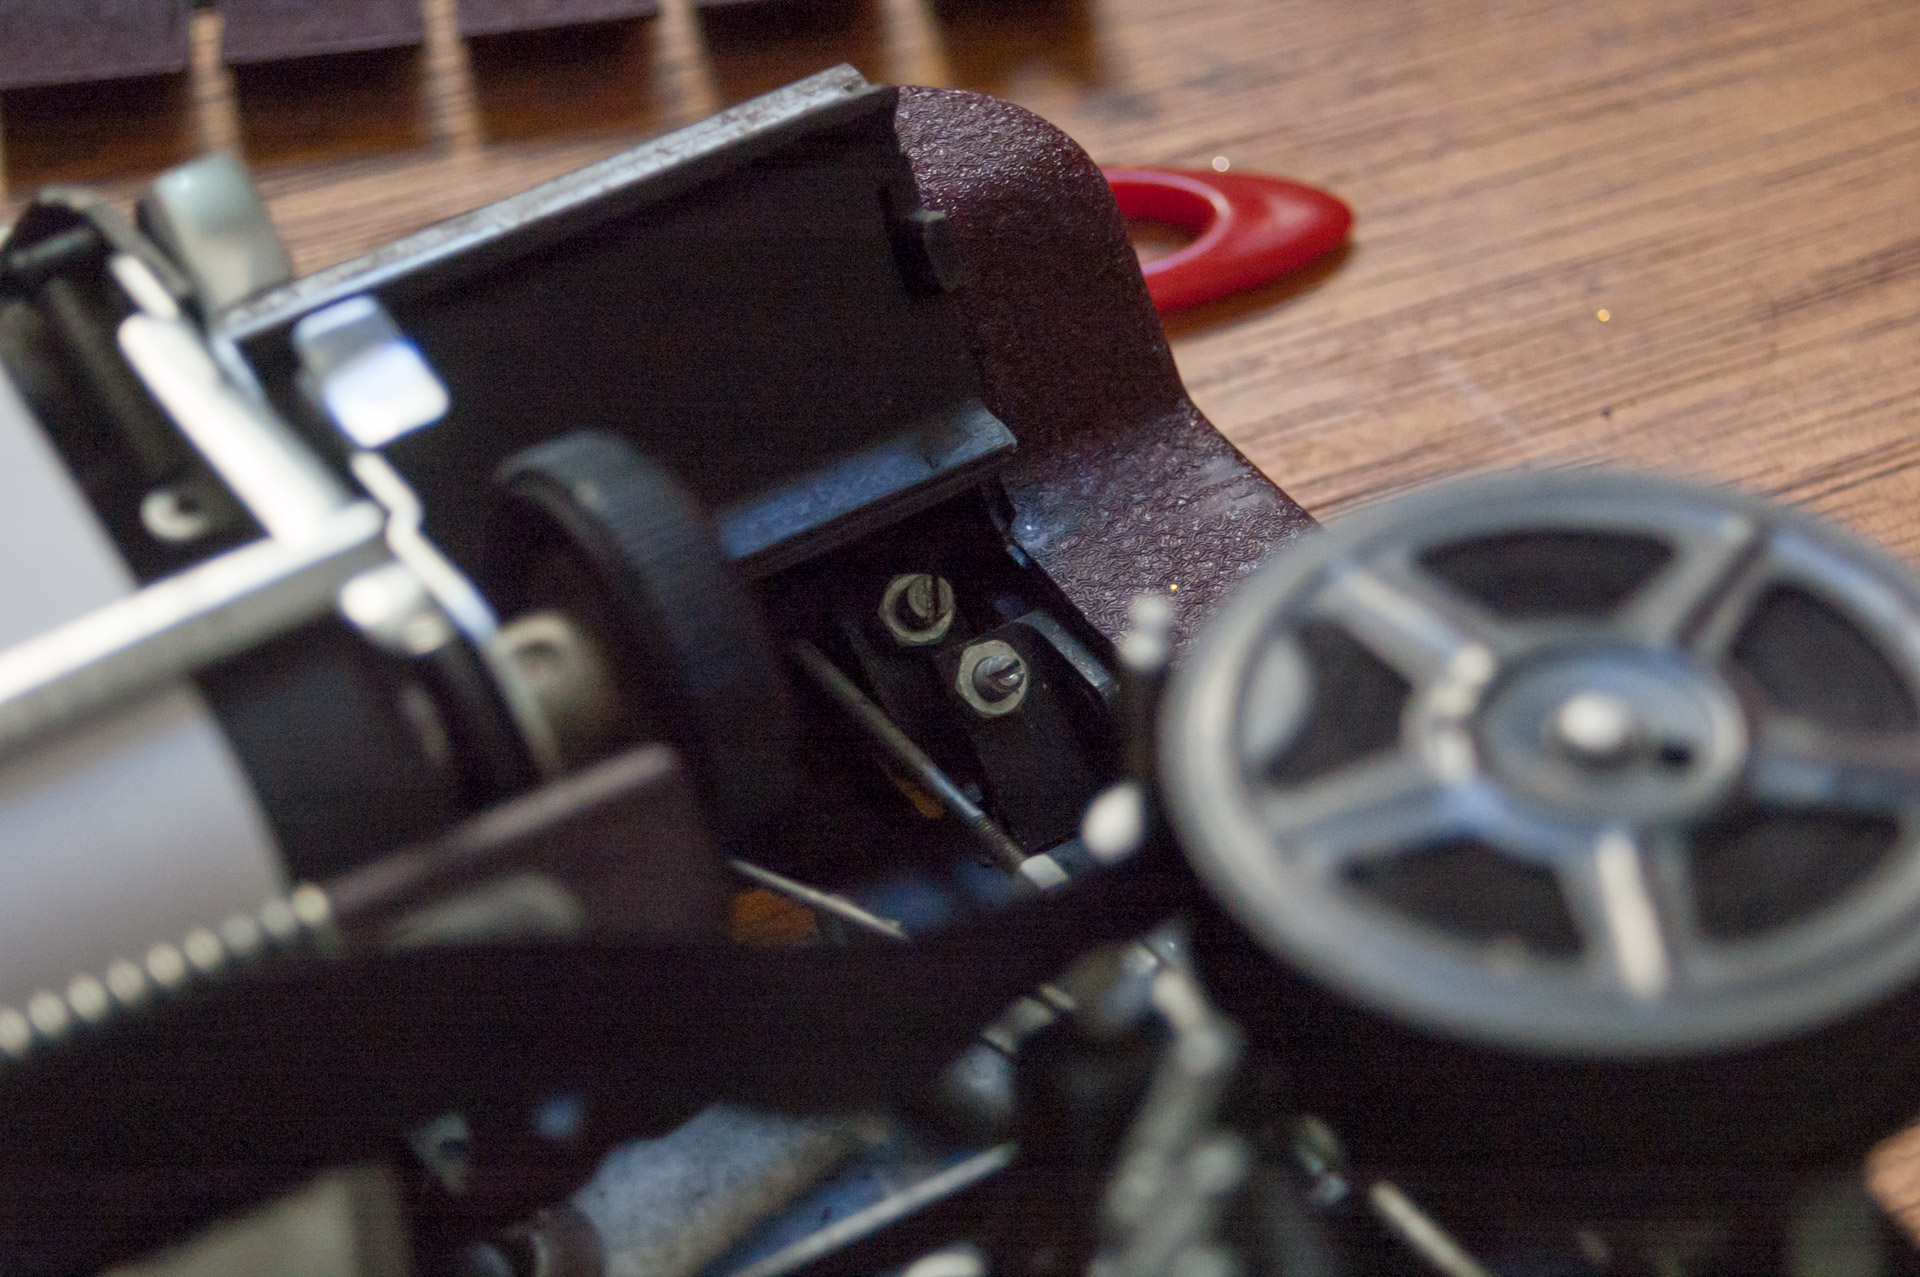
Every typewriter is going to have a slightly different mechanism, so to find mine I just kept looking around near the carriage to see which parts moved while I moved it in and out of shift. On each side of the carriage, I found two screws, one which would remain fixed to the body and one which was part of the carriage as it shifted. The one that shifts hits against the body of the typewriter, determining its rested position. The other one hits against the carriage as it moves up, determining where it stops for the shifted position.
With that in mind, first I tried to adjust the height of the shift case, but no matter what I tried the screw wouldn’t budge. So instead I adjusted the lower case position of the carriage and aligned it to the upper case. Though that resulted in the carriage resting a little lower than normal and grazing part of the body (which already had skid marks on it and I wonder if that’s why someone misaligned it on purpose in the past), the text was now perfectly aligned.
The Wrap Up
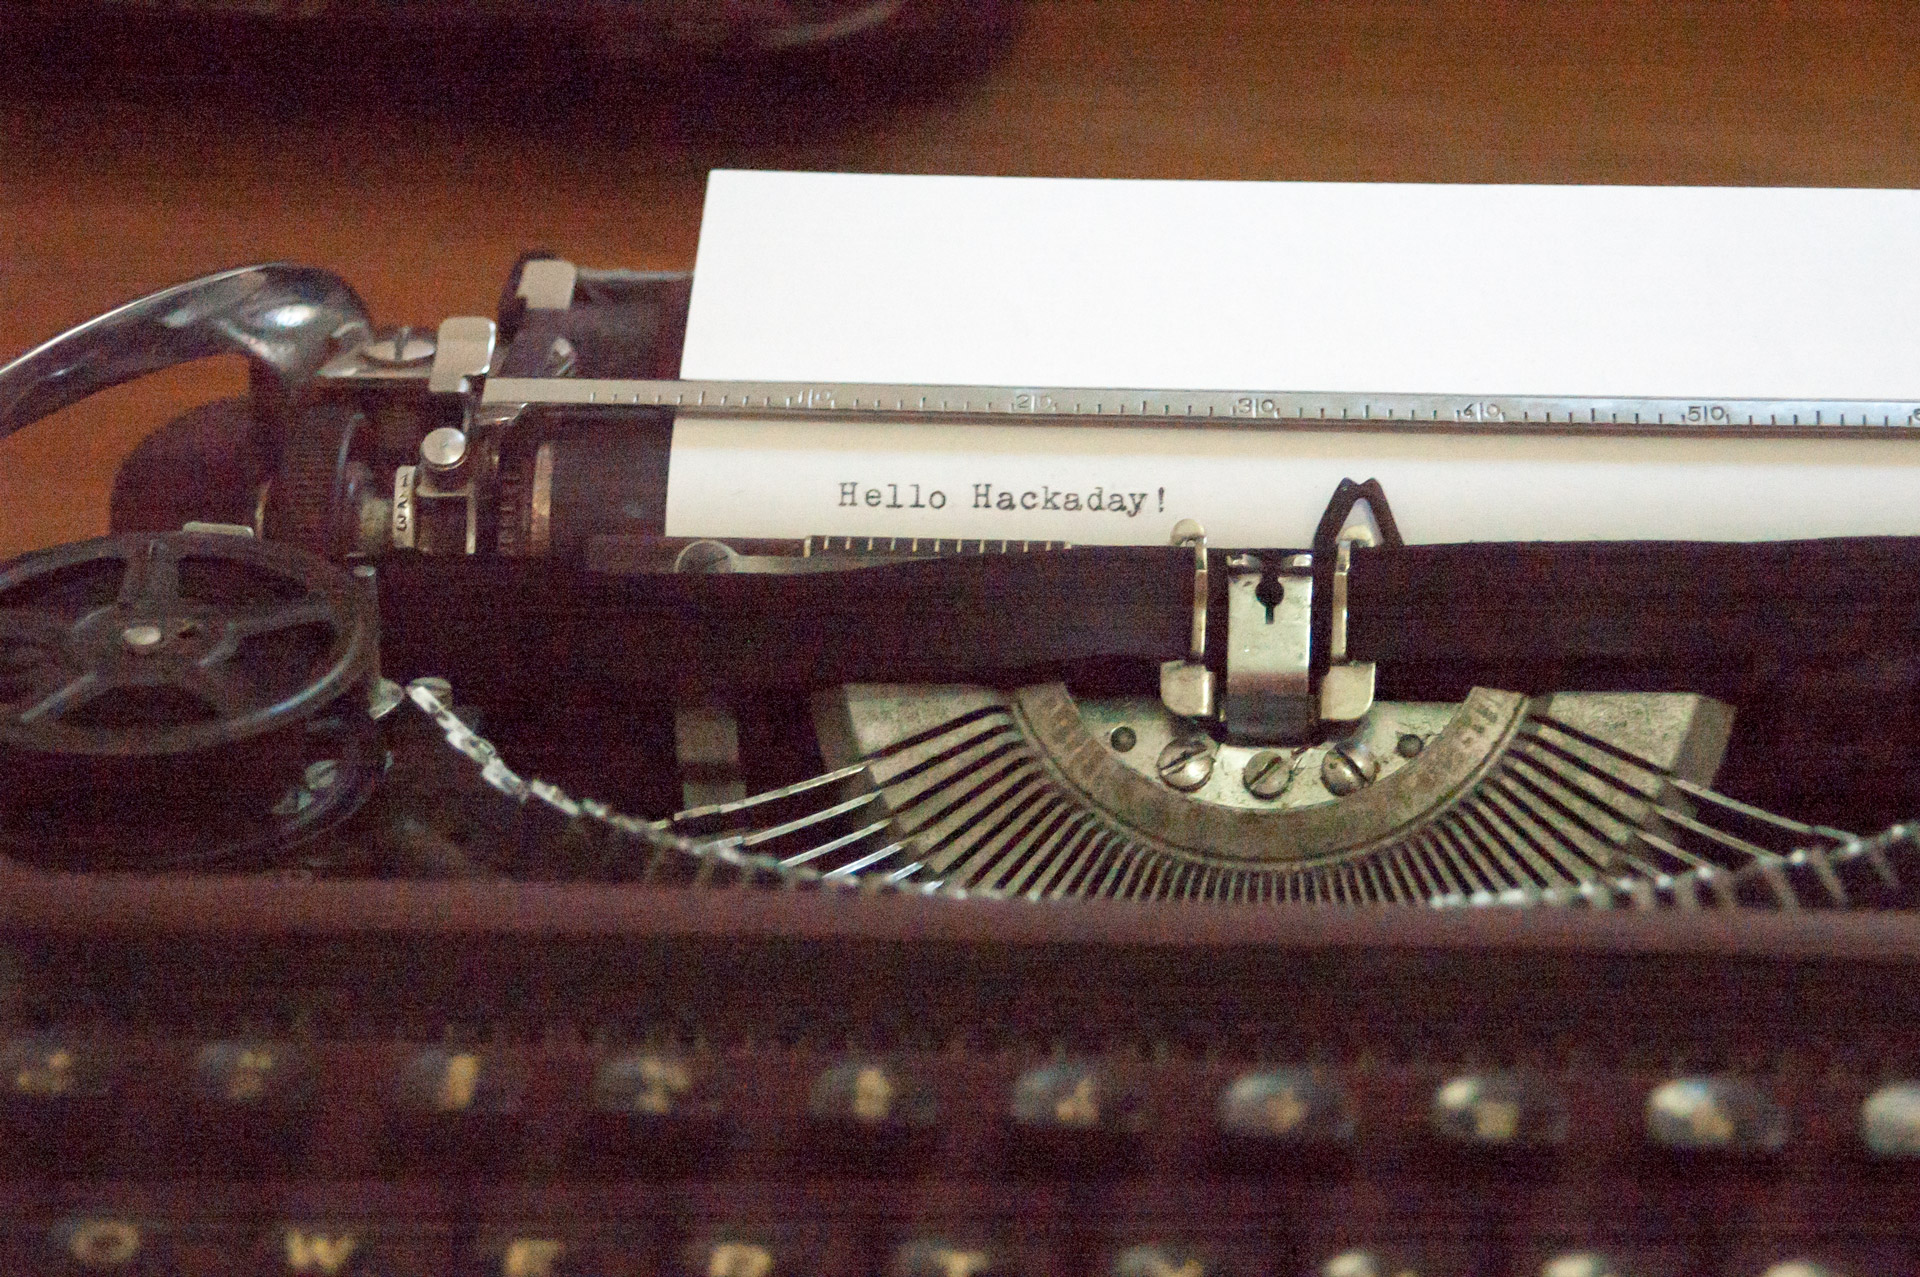
With everything working perfectly, I started to put the shell back together on this typewriter. Although I realize I didn’t have to take off nearly as much of the cover to get to the parts I ultimately needed for this relatively simple restoration, I’m glad I did it, for it gave me a newfound appreciation for this machine. It also made me reflect on how easy it is to dismiss yourself or others from attempting to learn how something works or how to repair it just because it looks complicated and daunting. Sure, most of us on Hackaday might not be so easily dissuaded, but if it weren’t for my continued interest with this machine to this day, it might still have been sitting in my mom’s storage surrounded by cobwebs and lost memories.
What projects will you undertake with your newfound spare time?


~25 years ago, an long standing auto parts store was closing. Among the items long forgotten on some back shelf was “typewriter oil”. It was a fine (light) petroleum based lubricant, much like “sewing machine oil”. I bought the last 7 vials.
I think only one remains.
So, Erin, consider using “sewing machine oil” (definitely NOT “3 in One” oil or WD-40) to lubricate the mechanism.
It does look like it uses SCM (Smith Corona (gasp!)) ribbon.
Probably still available.
I wouldn’t use 3 in 1 for clocks and watches but for anything else it’s not that bad. If you’re gonna oil something and forget about it for 10 years, you might have a gum problem, but if you’re gonna do it every year or so, it’s fine.
3-in-1 isn’t horrid. Not great, but consistent and clean. Back when we had mechanical contrivances in the computer room- remember computer rooms?- 3-in-1 got a lot of use. Not the proper juice, but but good enough for the selectrics (2741, IIRC) and the decwriters when they needed cleaning and relube after what was referred to as “an incident” (usually coffee, but sometimes soda pop, and, once, a milkshake) between regular service calls.
General typewriter lube was pretty basic light oil: sewing machine oil was inexpensive and readily available and, as far as i could tell, the same as the official stuff. Light, neutral/non-corrosive, non-gumming. It also was used for test instruments, chart recorders, and the like. Not always what was specified, but a surprising number of things did spec Singer oil.
Other options today include instrument oil (Starrett, for example. Not musical instrument oil. Then again, I have never investigated the oils used for brass and wind instruments. I would not be surprised if they have good cleanliness. weight, and corrosion inhibiting properties, and low gumming. I would bet someone here knows).
On the typewriter, If it rotates or pivots, lube it. Otherwise leave it dry, with few exceptions. NEVER lube the type guides. The bars shouldn’t touch the guides in general, and oil will grab dust and lead to jamming. Apply to pivot points where needed like doing a watch or dial indicator,. Use the tip of a needle. If you see the lube, there is WAY too much.
I haven’t touched a typewriter in 20 years, but for measuring instruments, I use a Nye synthetic. Not my real job, but I go through about 10ml a year doing maybe 100 plunger and lever indicators, as well as things like micrometers and other precision mechanisms.
On a related note, I still have a typewrite key plier (for removing and setting keys on the lever) and a bar plier (for tweaking bent bars). Surprising how often they comes in useful.
Would you be interested in renting or selling those Key Pliers? I am restoring my grandfathers Underwood and looking everywhere for those darn pliers…:(
When I was in electronics tech school, where wher advised not to use 3-in-1 oil. The only readily available oil alternative one, could by locally was\is gun oil. I have been ususingit ever since, convenient as I own guns.
Not to be confused with gun grease!
B^)
Pretty cool that you had such luck fixing it! My typewriter restoration project was a lot simpler, just oiling and replacing a bit of string that connected the carriage advance.
I’m hopping mad at, “The world we knew two months ago is gone, and there is time enough at last,” though. I have kids.
“To children, Love is spelled T-I-M-E”
-unknown
I hear you; I’m in the same boat. So many projects, and maybe 30 minutes in the evening to actually work on something… By which time I’m so exhausted from the day I can’t do much more than stare at a screen.
You’re not alone, friend.
people keep telling me the kids WILL get easier :lol: – mine are currently 22,4,3 and 1. it is true when they get old enough you never see them
The difference in experience between those with kids and those without is pretty amazing. The difference between “what do I do with all this free time” and “I would kill to have some free time again”.
Typewriters are awesome. I have two stashed in my parent’s house. The cooler of the two has cursive type bars.
I had an electric typewriter that had a “computer” font, (e.g. the letter “O” was an elongated (vertically) diamond. I thought it looked cool, but it probably made my resumes’ and cover letters difficult to read.
Oh, I found an example!
http://www.fontscape.com/pictures/bitstream/OCRA.gif
PB Blaster for loosening up sticky oil/grease. A little goes a long way. Light oil is a great tool. I’ve got a couple of Selectrics I’m working on. They’re plentiful and relatively cheap, though shipping is expensive and shipping damage is unpredictable, from “not much” to “busted keytops and bent metal”, depending on the packaging. Loads of fun to finally get one working though!
Love old mechanisms and bringing them back to life.
“What projects will you undertake with your newfound spare time?”
Catching up on a pile of “projects” and gardening.
Is that you, Clark-Nova?
The instructions that came with my La Salle Stenotype recommended “light mineral oil” for the clutch and feed roller, 30W motor oil for everything else.
My problem has been finding “light mineral oil.”
Sewing machine oil. Starrett instrument oil.
That screw that wouldn’t budge? You did loosen the lock nut, right?
I fail to mention it in the article but yes, I tried. That was jammed as well. It’s no issue since I managed to align the lower case to the upper case the other way around instead :)
You gave up too easily on the serial number. No company that manufactured a complex writing instrument that cost when it was new what laptops cost today (Check a currency adjuster for inflation, a $69.95 Smith-Corona would set you back a good $1,300 in 2020 dollarinis.) would ever ever EVER put it on a part that could be easily removed and not hamper normal functioning. It will be hidden on some part of the frame or on the comb-like plate that that guides and separates the key arms. Give it another try for a good 5-10 minutes. It’s light enough to turn upside down and around. Also, no such thing as a Smith-Corona or an Underwood rbbon. They’re pretty universal at 1/2″. I think there are some thst used to be 9/16 to be difficult, but if anything you’re more concerned about spools because those need to fit your machine and the posts they sit on. Thankfully, whoever used to use it often tended to keep it and simply spool a new ribbon onto the originals and continue writing where they left off.
Olympia princess 1950. I think it was the first of this model
https://images.app.goo.gl/1aoJjLWp6M7pbWmZ8
Ha, I think that’s exactly it! I don’t know how neither I nor any of the people I asked came across this one during our search. Kudos!
Hammond oil, available on line or at a keyboard store. When you have 200 fine bearings buried in there you can’t have it get gummy and not work when it’s cold. One organ I worked on lately just post WW2 fired right up never oiled in decades it was not gummy. Others got the wrong stuff and won’t run in a year. Tiny air pressure gun with solvent and lots of work and they respond.
I used to oil an old Hammond organ at my church.
The oil was stored inside the organ (just remove the back).
One squirt into the cup every 6 months.
First, beautiful machine! Very glad you it up and typing again. Thought I’d share a tutorial on the complete cleaning process, it may help a reader or two: https://youtu.be/SB9gRZy9oKI Up with the typewriter revolution!
It’s the very first Version of the “Princess”-model, made by Keller&Knappich GmbH, Machinefactory, once located in Augsburg (West-) Germany.
Best regards
Aaron
This typewriter is a Princess, made in Germânia, 1950’s.