The ThinkPad is generally considered the unofficial laptop of hackerdom, so it’s no surprise that we see plenty of projects focused on repairing and modifying these reliable workhorses. But while we usually see folks working on relatively modern incarnations of this iconic line of computers, this project by [Frank Adams] and [Brian Chan] shows that the hacker’s love affair with the ThinkPad stretches back farther than many might realize.
As explained on the project’s Hackaday.io page, the duo have produced an open hardware board that will allow you to take the keyboard and trackpoint from a late ’90s ThinkPad 380ED and use it as a standard USB input device on a modern computer. According to [Frank], the keyboards on these machines are notable for having full-size keys rather than the “chicklet” boards that are so common today.
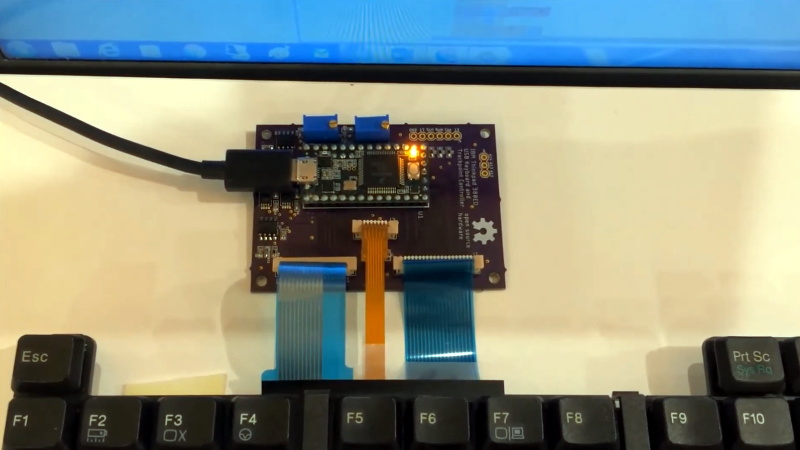
Now you may be wondering why this is significant. After all, we’ve seen plenty of projects that hook up an old keyboard to a USB-equipped microcontroller to get them speaking the lingua franca. Well, the trick here is that the trackpoint on these older ThinkPads actually required additional circuitry on the motherboard to function. The keyboard features three separate FPC connections for the matrix, the trackpoint buttons, and the analog strain gauges in the trackpoint itself.

After a considerable amount of reverse engineering, [Frank] and [Brian] have developed a board that uses the Teensy 3.2 to turn this plethora of pins into something useful. In the video after the break, you can see the new composite USB device working perfectly on a modern Windows computer.
It will probably come as little surprise to find that [Frank] is no stranger to hacking ThinkPad keyboards. In 2018 we covered a similar adapter he built for the far more modern T61, which was an absolute cakewalk by comparison.


Thinkpad keyboards were and are very good, but the best keyboards ever on laptops were on Toshiba laptops. Sadly, they exited the market.
Can still get them in Canada… *Scrooge McDucks into a vault full of Porteges, Tecras and Dynabooks*
Here’s a good resource just for interfacing with the trackpoint modules—popularly known as the “nipple” or “clit” mouse—embedded in the center of the keyboard. I’ve converted three to be standalone USB HID modules from totaled thinkpads or replacement keyboards. They often just unscrew from the back of the keyboard, so you just take screws out and unhitch a ribbon cable and there you go.
https://github.com/alonswartz/trackpoint/
They have a lot of good info on pinouts for various models. Could use some more submissions. I handed over photos of the ones I traced. Wish there was a reasonably-priced commercial product featuring a standalone clit mouse, but so far this is the best option imo. You can either use a teensy or comparable to listen to the PS/2 signals and spit out USB, or you can just get a super-cheap PS/2 to USB converter if you need no other features.
Interesting. I might grab one on eBay for a tiny pointing device for some project.
The youtube video is gone, are there any good links to this project? I have a Thinkpad 360CE keyboard that I have been independently trying to get working for a long while now with a Teensy. My last issue is interfacing with the trackpoint module. It has a ribbon cable looking somewhat similar to the one in the image at the top (though mine has 6 tracks, not 7). I have tried wiring it as a PS/2 connection, but either I haven’t figured out the right order to connect the tracks for CLK, GND, etc, or it just doesn’t use the PS/2 standard, like it sounds this keyboard does. Plus the thinkpad this keyboard is from is a couple years even earlier than the thinkpad from this article’s keyboard.
I wish I had a working thinkpad to test this keyboard with, and so I could look at the board and reverse engineer the trackpoint connection, I figured out the entire key matrix and the mouse buttons, but the trackpoint has had me caught up for over a year now…
I found the vimeo, hackaday.io, and github links for the project, thanks to the link within this article. Of course the connections were straight to a strain gauge! — I’d have never been able to figure that out without a working laptop to probe and poke at!
I am very thankful for the documentation on the circuitry and reverse engineering of the strain gauge connections, I will try out an amplifier circuit for reading values out of it soonish. Maybe I’ll finally finish this project of mine by year’s-end! Best news I’ve gotten recently lol