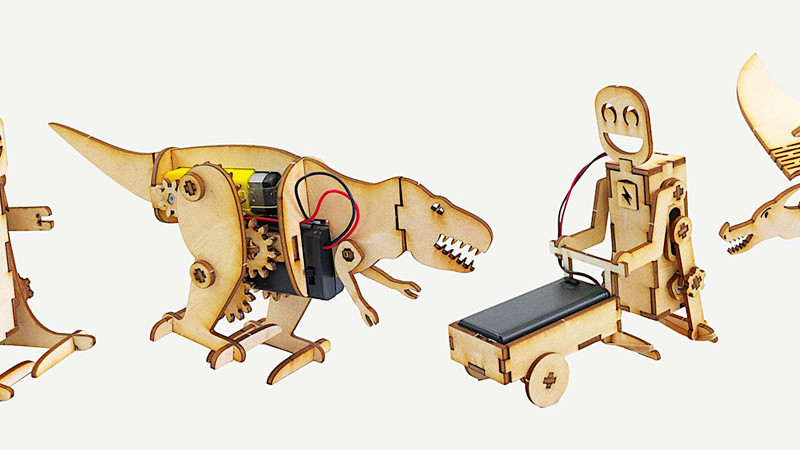
[Lance] loves making simple robots with his laser cutter. He finds great satisfaction from watching his robots operate using fairly simple mechanisms and designs a whole slew of them inspired by different animals, including a dinosaur and a dragon. His latest build is a jolly cart-pushing robot.
He cut each piece of his robot on his laser cutter, and in order to get the pieces to fit snugly together he made each tab a little bigger than its corresponding slot, ensuring the piece wouldn’t fall out. This also helps account for the loss in the material due to kerf, which is the bit of each piece of material that gets lost in the cut end of the laser cutter.
Making his robot walk was mostly as easy as attaching each leg to a simple DC motor such that the motor would rotate each leg in succession, pushing the robot along. From time to time, [Lance] also had to grease the robot’s moving parts using a bit of wax to help reduce friction. He even used a little rubber band to give the robot some traction.
[Lance] did a pretty good job detailing the build in his video. He also linked to a few other fun little robot designs that could entertain you as well. Pretty easy hack, but we thought you might find the results as satisfying as we did.
Robot companions may be here to stay. Time will tell.


Very good instructions.
I want a laser cutter!
Agreed. The instructions are very well detailed.
These are beautiful models, well done. I sure do want a Glowforge!
On a very similar vein, Tamiya made a number of well-known educational accessory kits such as a series of gearboxes, pulley sets, wheel and track set, submarine motor and so on.
Here is a project book I got in Japan in 1977 when I was there that details a number of projects similar to these:
https://archive.org/details/tamiya-educational-projects-1977-book-1
I built some of these, they are easy and fun to make. One model I was always intrigued by was the cable car ‘Aerial Ropeway Passenger Set’ shown on page 18, but I never had the kit for it.
About five years ago I took that photo and obtained (as close as possible) the original measurements from it, and drew up the plans in CAD, then made it using the RE-26 (I think), AA battery holder and pulley set. It ran fine along a string stretched across the backyard.
That reminds me of this one:
https://youtu.be/DVBgGngWZEw