When it comes to machining, the material that springs to mind is likely to be aluminum, steel, or plastic. We don’t necessarily think of glass as a material suitable for machining, at least not in the chuck-it-up-in-the-lathe sense. But glass is a material that needs to be shaped, too, and there are a bunch of different ways to accomplish that. Few, though, are as interesting as micromachining glass with laser-induced plasma bubbles. (Video, embedded below.)
The video below is from [Zachary Tong]. It runs a bit on the longish side, but we found it just chock full of information. The process, formally known as “laser-induced backside wet-etching,” uses a laser to blast away at a tank of copper sulfate. When a piece of glass is suspended on the surface of the solution and the laser is focused through the glass from the top, some interesting things happen.
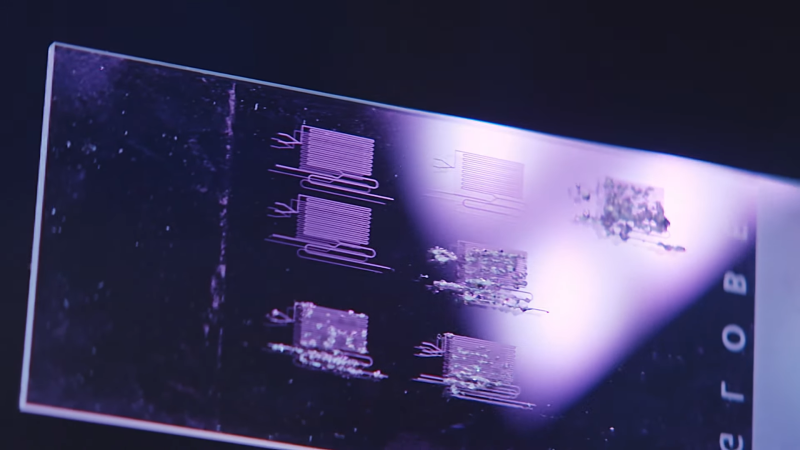
The first pulse of the laser vaporizes the solution and decomposes the copper sulfate. Copper adsorbs onto the glass surface inside the protective vapor bubble, which lasts long enough for a second laser pulse to come along. That pulse heats up the adsorbed copper and the vapor in the original bubble, enough to melt a tiny bit of the glass. As the process is repeated, small features are slowly etched into the underside of the glass. [Zachary] demonstrates all this in the video, as well as what can go wrong when the settings are a bit off. There’s also some great high-speed footage of the process that’s worth the price of admission alone.
We doubt this process will be a mainstream method anytime soon, not least because it requires a 50-Watt Nd:YAG fiber laser. But it’s an interesting process that reminds us of [Zachary]’s other laser explorations, like using a laser and Kapton to make graphene supercapacitors.


Looks like just the thing for making microchannel plates for testing very tiny fluid samples.
Depends on what you need those microchannel plates for. Doing this kind of machining significantly raises the background fluorescence of the machined region.
Source: used to build microfludic and nanofluidic devices to trapping single fluorescent molecules.
Which process did you use for chip fabrication?
I’m wondering if something like laser assisted wet etching would work better (femtosecond laser process).
I work for a small company that does this sort of thing regularly, particularly for microfluidics.
Interesting. Stephan Gotteswinter (a german machinist) put up a video today where he demonstrated machining glass with an ordinary carbide end mill. You had to use fair bit of speed, (but less than I thought) and machine with very light, 200 micron depth of cut, under oil (to control the silica powder if nothing else) It starts about halfway thru, (he was showing off his new cnc toy first). Original technique courtesy a paper published by NASA
https://youtu.be/ GLtdXvL7cpI
This is fascinating, thanks for sharing! Gonna have to give this a try! I knew you could do it with burr type tools, more akin to grinding really, but using normal carbide tooling is wild. Opens up a lot of possibilities, definitely more accessible than blapping things with lasers :)
Yes I saw that as well, and its a shame he’s still getting microfractures on the top edge of the cut, but it’s suprising it works at all.
I’ve always seen pcd done under water, so its cool to know standard carbide under oil can work too.
The laser process is very cool.
But for at least some precious glass work, it does get chucked up in a lathe.
Random youtube video of a small glass lathe:
https://www.youtube.com/watch?v=qmNZatIPFeo
Hotglass lathes are an interesting study, with the powered tailstock chuck
Traditional glassblower lathes had a square shaft similar to a threading screw, that powered chucks on both ends. They’re really wild to see. Modern implementations with synchro stepper motors are really neat, too, but it’s a steam engines to diesels comparison.
Dude you need to get on .io, I really would like to chat with you, you have long been a source of interesting knowledge.
Or you use a frequency tripler oe quadrupler to get down to 355nm or 266nm where you can micromachine glass directly. thats how a lot of smartphone glasses are cut.
Oh interesting, I’ll have to look into that. I knew longer wavelengths could machine/cut/melt glass (longer IR wavelengths), but didn’t realize that UV could do the same. Presumably you lose pulse power the more you double/triple/quadruple, just from conversion inefficiency or similar? Will do some reading, thanks for the tip!
I used to work in ablative laser machining, both excimer (ArF) and doubled Nd-YAG/BBO. The yag machine was a production system used for laser-trimming precision resistors, so there should be a lot of hardware out there for it. The doubling crystals were fairly nonlinear, with the efficiency increasing as some high order product of the photon flux: at lower intensity they were useless, while at their best efficiency (still not the theoretical max of 50% for a doubling) the photon flux was so high it’d damage the crystals. (This was a consequence of the lifetime of the single photon metastable state and absorption of a second exciting photon.)
They’re not impossible to make cheaply (green laser pointers were mostly IR with a doubler at least until 2010, I don’t know about now) but they’re fussy and fragile. You’ve a ton of skill so you’re way more likely to succeed than most people, but expect some frustration.
Interesting! I definitely need to do some more reading/learning, I didn’t expect the crystals to perform better as flux increases (but I suppose it makes sense, given how they work). Sorta lol situation that they get better until damage occurs though :)
I do have a nitrogen laser kicking around, was planning it for something else but might be interesting to see if it could do the job instead. I imagine it’s very non-optimal though, with slow repetition rate. And I think i’ve read they have pretty poor beam quality in general? Unsure, it’s new to me so I haven’t had a chance to play with it yet.
Thanks for the extra details! I think I’ll be bugging you in the future with more questions ;)
The company I work for just sold off out circuit and wafer trim division. The circuit trim machines are used for trimming resistors on ceramic substrates and wafer trim trimmed stuff like ADCs for calibration. They used 1064 and 532nm lasers from spectra physics.
You can get crystals from china with everything you need to get green light from a pump diode pretty easily, Though this is CW which is pretty useless for most material sciences, you need q-switched or MOPA type lasers to get the peak energy needed to do the real work.
Technically you can do it with just green 532 is you have enough pulse energy, thats how they make those images in a block of glass, they focus a pulse in x,y, and z and thats where the bubble forms. But really going to need UV to do much. And its not as simple as putting a crystal in front of a 1064 source. To get 355 you have to use a KTP to get 532+1064 and then use a THG which sums the 532 and 1064 to get 355.
To get 266 you double the 532 though another doubler crystal. Temps, alignment, everything is super critical. It best just to buy a used 355 system and go from there.
Interesting. I’ve got something sketched out that could use that bubble in glass thing. I was going to “fake” it in resin for the prototype.
And now I can do something with my liquid glass.
https://newatlas.com/materials/liquid-glass-new-state-matter/
I’ve done a lot of experiments with glass etching/cutting on an 80-watt laser.
(I needed a 1.5″ by 2″ piece of glass to replace a piece of glass on an antique meter, and thought it would be a good time to experiment with laser glass cutting.)
The engraved line (on glass) you get from a laser is not the same as the line you get from a glass cutter, and the resulting piece of glass cannot be broken along the etched line.
The engraved line (on glass) cannot be deepened to any great extent by using more power, lower speed, or multiple runs.
Trying to cut regular glass on the laser by using high power and low speed won’t work because the thermal stress will cause the glass to crack.
Placing a piece of wet (blank) newspaper over the glass will help the thermal issues somewhat, but cutting/breaking is still very iffy and not repeatable. There is *perhaps* a mode or setup where this is possible, but I couldn’t find it. Maybe someone else will have better luck.
Very thin glass, such as a Gorilla glass phone display cover, can be cut somewhat using wet paper – but the edges are rough and burned and there is still a lot of thermal cracking. (Again, maybe someone else can find a setup or process that is more robust.)
I think using a vaporizing material, such as covering the object in water or solution of other things, would be a productive area for experimentation by hackers. It’s not that hard (soak a piece of paper in solution, place it over material), and could result in really useful results.
There’s this old trick http://dailydistraction.net/how-to-cut-glass-with-scissors/
Which leads me to wonder about boosting the number of hydroxyl ions available with a bit of sodium hydroxide or something. Potential simple approach, spray it with oven cleaner (Wet out thoroughly) however, hot oven cleaner splatter is not something you want on your skin or eyes, shield it, wear googles.
Same result, though a deep narrow laser etched line can guide a glass cutter more accurately than freehand.
Yeah, with CO2 once the surface of the glass is etched the beam is scattered and becomes mostly useless.
The company I work for did make a CO2 based machine before I started, massive machine with a 400w and a 200w laser. I dont know anything about it other than helping to take a lot of it apart.
Is the thin black plume originating from the target a plume of carbonized materials or just heat diffraction? Also has anyone tried changing the angle of source to target?
Video guy here! I’m not positive, but I _think_ it’s just heat diffraction. I have some other footage where the power was very low and you can still see the dark plume/line appearing, but no bubbles or flashes. It might also be the red targeting laser, which is just a cheap red diode laser and might have flicker in the drive circuit. I haven’t figured out how to turn off that targeting laser however, and it’s internal to the machine so you can’t just tape it off easily.
If anyone has ideas how to definitively prove what the dark pulsing line is, I’m all ears! Would love to know myself.
Great project, and great presentation. The hand-drawn explanation is a very good way to show it.
What kind of laser is that? Nd:YAG or fiber? Unlikely to be both. if it’s really a 30-100 ns pulse with it sounds like a diode-pumped Nd:YAG, or possibly Ytterbium fiber. In any case, it is a great tool, but you’re dancing with the one you brought to the party: A femtosecond laser is much more suited to this sort of work. Although a fs laser deposits some heat, the ablation process is mostly non-thermal: the pulse is so short and the field strength so high that the molecules themselves are torn apart. A popular demo is to drill a hole in a match head without it igniting.
Oh, oops, I was confused in that case! It’s definitely a fiber laser, the pulse length was a guess based on me thinking it was Nd:YAG so we can ignore that. It’s basically a no-name OEM china unit with an JPT fiber laser inside. Hard to say, being chinese unit and all, but after poking around I think it might be a q-switched ytterbium fiber laser? Does that make sense? It’s not a MOPA laser (can’t adjust pulse length), so probably q-switched and thus has a pulse length of ~100ns for this kind of laser?
I’d love to get my hands on a femto, but seems hard to find on secondary market :) I did find a Nature paper on building one but I think it might be a bit out of my capabilties at the moment :)
There are _a lot_ of cool things I stumbled on with a femto though. I saw one paper where they used the femto to alter the properties of glass without ablating, and then those alterations caused the irradiated regions would chemically etch at an accelerated rate. Neat stuff!
Is the “something growing” at the end of the video (under the glass, in the liquid solution) a version of Prince Rupert’s Drop? looks like it just about explodes every few seconds like the tension build-up in a PRD, but on a smaller scale.
https://en.wikipedia.org/wiki/Prince_Rupert%27s_drop
Came looking for guide to make tiny windshields for tiny cars, was not disappointed