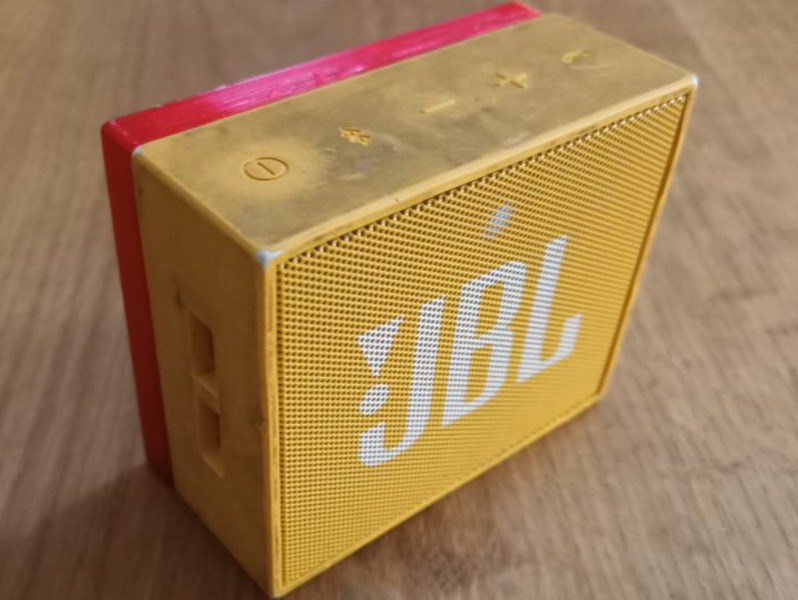
Perhaps the weakest point in modern electronics when it comes to user servicability is the lifecycle of the batteries included from the manufacturer. Without easily replaceable batteries, many consumer goods end up in the landfill when they’re otherwise working perfectly. If you’d like to get more out of your devices than the manufacturer intends, you might have to go to great lengths like [Théo] did with his JBL speaker.
This was a Bluetooth device produced by JBL nearly a decade ago, and while the original device boasted several hours of battery life, after so many years of service, it was lucky to get a half hour before the battery died. To replace it, [Théo] removed the original battery and extended the case to be able to hold a larger cell phone battery. He also decided to use the original battery management circuit from the speaker with the new battery after verifying the voltage and chemistry were close enough to the original.
Since the phone battery is a proprietary Samsung device, [Théo] also decided to build a version that uses standard 18650 cells instead, although he prefers the slimmer design with the phone battery for his use case. Straightforward as this build may be, it does go a long way to demonstrate the principle that if you can’t fix your devices, you don’t really own them.


I have a Streetz CM730 speaker I like to repair (Yeah, I know it’s crap)
But I can find a way to open it up. There are no obvious screws or places to crack it apart.
I can of course use force, but then it will break and not be useful anymore.
Anybody have a tip in how to take the Streetz CM730 apart ?
Judging from photos, you have to pry the metal frame out of the plastic back frame. Get some plastic prybars from eBay or Amazon. I suspect there will be at least one screw on the back panel, probably hiding behind a label.
Strong thumbnails not trimmed down too far are a bonus also. I have a guitar pick/plectrum when I can’t do it with my thumbs like shelling peas.
Theres a name for that class of tools I blanking on right now…. coffee required.
Ah got it, spudgers, spudging tools.
Should also mention the label trick, rub hard with your finger over the label to see if you can feel a hole. Under pushed or glued in rubber feet or stoppers is a fav place for hiding screws also.
Maybe you’re thinking of Ifixit tools I thank they called they the blue ones alot people that fixed phones so on buy them
I tried to tear down a cheap “clock radio”, and when I couldn’t find the screws, ended up cutting the damn thing open. Turns out the screws were behind the press fit speaker grille, which makes perfect sense. Easy to push into place at the end of assembly, and no visible screw holes in the product.
Teardown thread here, if anyone cares
https://twitter.com/RoganDawes/status/1441376003511619589
Thanks for feedback. Turns out you have to tear of a big rubber pad that is covering the whole bottom of the CM730 speaker to access some screws. Then you also get access some tabs on the speaker grille and a PCB for the charging and 3.5 mm sound ports.
batteries are now the deliberately designed in obsolescence mechanism. It’s a component with a know life cycle – yet it is glued in and made as hard to change as possible.
I have lost track of how many things I’ve cracked open and put another battery in to extend the life – some things I’ve done so many times and am using the product more than a decade past what the manufacturer wanted me to.
It’s a ‘simple’ decision from the manufacturer, ie make it last a certain time, then get the users to buy a new one…
Given the road they have gone down, I suspect (loath that I am to say it) we are going to need regulation to fix the problem..
I had to replace the LiPo battery in a NEW Bluetooth speaker. Granted, it was on deep, deep discount for being discontinued, but the battery was dying extremely rapidly, even when I wasn’t using it.
Fortunately in my case, the entire front grille could be gently pried out, the control board unscrewed, and the battery desoldered and replaced. I had a spare, larger LiPo cell from something else, so it’s lasting much longer than it would have if the battery hadn’t basically failed before I obtained it.
Hi
Having only seen photos, it does look interesting. That front’s a grill, so it probably clicks on, but –
1. Accept that it’s landfill
2. Once you’ve done that, it doesn’t matter how much you break it tearing it apart
3. (and I’m sure there’s more experience people than me out there), get a prising tool – v stiff v thin edges, and look for the edges / joins. Alternatively a v thin screwdriver
4. Gently prise apart.
5. Photo every step, and write a teardown, or youtube it!
Cheers
Chris
The video is just is just for illustrating my first attempt to replace the battery. I ended up building an extension case to hold the battery externally. Everything is detailed my blog post (first link in this article).
Been doing it since 2007 before the fuken battery banks were invented. You’re late 🤓