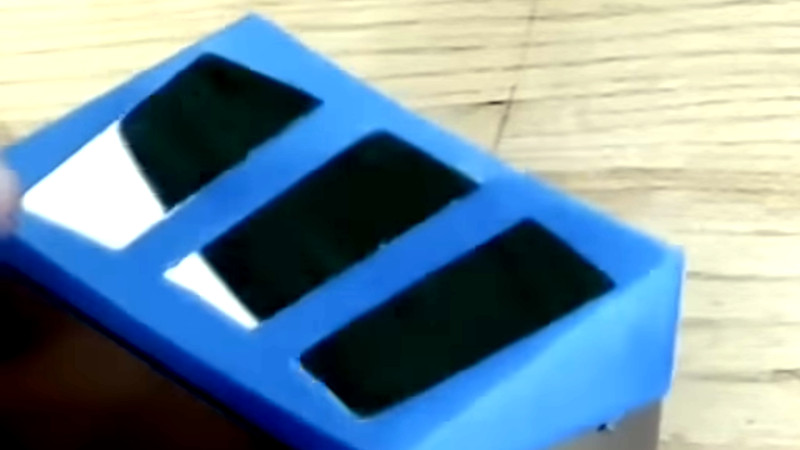
While a machinist can put a beautiful finish on a piece of metal with their lathe or mill, to achieve the ultimate finish, a further set of polishing procedures are necessary. Successively finer abrasives are used in a process called lapping, which removes as far as possible any imperfections and leaves eventually a mirrored smoothness. It’s not without problems though, particularly at the edge of a piece it can result in rounded-off corners as the abrasive rubs over them. [Adam the machinist] has a solution, and he’s found it with a 3D printer.
To avoid the rounded edges, the solution involves fitting a piece of metal or wood flush with the surface to be lapped, such that the pressure doesn’t act upon the corner. This can be inconvenient, and the solution avoids it by 3D printing a custom piece that fits over the entire machined object providing a flat surface surrounding the edges. We see it being used with a demonstration piece that has three separate surfaces in the same plane to lap,something that would have been challenging without the 3D printed aid.
Lapping isn’t a process we see too often here. But it has cropped up as an extreme overclocking technique.


This is some really high-quality advice with a logical and easy to follow explaination why it works. I am quite impressed and very grateful. This is what I always hoped the internet could be.
Adam’s entire channel is packed full of toolmaker wisdom like this, one of my absolute favorite YT channels. He has a clear style of communication and his high precision skills are top flight.
Oh that’s awesome to see Adam the Machinist on here. For those that aren’t aware, he’s not only got his Youtube channel, but a podcast called the Precision Microcast, where he talks about precision machining with a watch maker from Australia.
A note on the ‘pitch’ he uses. I had an idea after watching this video, as I’ve experimented a bit with recycling plastics. Instead of using a pitch, you could melt some PLA with abrasives mixed into it in a pan, and apply that to the surface of the polishing tool. If filaments like “bronzefill” are abrasive enough to wear our printer nozzles, then surely a plastic surfaces with embedded abrasives can achieve the same thing!
I might attempt this, and report back.
In the world of professional metallography when we need to polish a sample for microstructural examination, its fairly common to mount smaller samples in epoxy (good for filling gaps) or a bakelite/thermoset polymer compound (very fast). Likewise, its important to try and match the relative hardness of the material to the mount to avoid issues like edge rounding.
Its not unheard of to make custom fixturing for holding oddly shaped parts, especially if you’re not mounting the parts and or are going to do a lot of them; I’ve never considered “mounting” a part via 3D printing but it’s something I’ll keep in mind going forwards.
Couldn’t you just pot the part in something like plaster? Place on a flat surface, mix goop of choice, pour around flat bits, do other stuff until it sets, then lap.no fussing with finicky cad, and gets even the most complex shapes right every time.
After a little consideration my comment came out sounding a little too dismissive, I should have said “you could also… In addition this is probably the wrong place to say “finicky cad” :) Finally I really like adam’s channel too.
Mmmmm, shoe polish…
I did not get to the video yet but making a lap for polishing your own telescope mirror is done that way.
Funny you mention it, that’s in part how I know of the technique. I’m slowly preparing to build a large-ish telescope (for amateurs) and I have yet to decide whether to grind or buy the primary mirror. I’m aware of the journey I would have to take if I roll my own; I’ll have to make several smaller ones first, in addition to all of the tooling, materials and testing equipment I’ll need. I’ve heard that in spite of the much more significant investment of time, that the satisfaction is worth it.
Shiny!