The Raspberry Pi shortage has been a meme in hacker circles for what feels like an eternity now, and the Pi 4 seems to be most affected – though, maybe it’s just its popularity. Nevertheless, if you’re looking for a Pi 4, you would need to look far and wide – and things are way worse if you need the 8 GB version specifically. Or so we thought – [MadEDoctor] shows us that refreshing online store pages isn’t the only way, having successfully upgraded the RAM chip on the Pi 4 from 1 GB to 8 GB with help of a hot air gun.
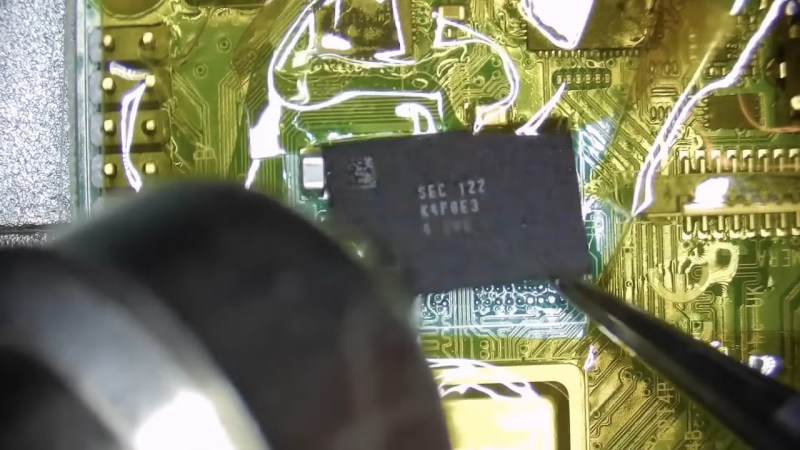
These chips are BGA, and those might feel intimidating if you’re just starting out with hot air – however, we recommend you watch this video, as [MadEDoctor]’s approach is of the kind that brings BGA replacement to hobbyist level. First off, you get a compatible RAM chip somewhere like Aliexpress – lucky for us, those come equipped with a set of balls from the factory. The default balls are made of lead-free solder, and [MadEDoctor] reballed the RAM chip with leaded solder balls to lower the melting point, but it’s by no means a requirement that you do the same.
In fact, you only need a hot air gun, flux, a soldering iron and some solder wick to perform the replacement – no reballing equipment. Put some kapton or metal tape on the board for heat shielding, get the old chip off with hot air, use an iron with wick to clean the pads, add some flux, align the chip, then use hot air to solder a new chip onto the board. Replacing this chip can get your Pi 4 to the highly-sought-after 8 GB target – as an aside, we’re surprised that there was no configuration needed, as the Pi 4 booted right up and successfully recognized the extra RAM added.
We’d personally recommend preheating for such an upgrade – that said, this sure went without a hitch, and such a RAM swap method doesn’t require any stencils, solder paste or solder ball applications. Drop by the video description for compatible RAM chip part numbers, make sure you have your tacky flux and solder wick in order, and let [MadEDoctor] walk you through upgrading your Pi 4 the hacker way. Is this hack to your liking? Take it up a notch with this laptop soldered-in RAM upgrade journey, or that one RAM upgrade for an old GPU to comply to Apple’s whims.


“We’d personally recommend preheating for such an upgrade…”
Definitely pre-heat the board if you can. The thermal differentials generated by spot heating may create enough unrelieved stress to cause a failure down the road. Such a failure might not even be at the RAM chip – a solder joint, trace, or component somewhere else could also separate or crack.
An alternative might be to reflow the entire board, but that has its own risks.
100% on the preheat and not just for BGA, it can really help for all sorts of SMD rework.
another outcome I’ve seen for lack of preheating is the board physically bending – though, that’s mostly applicable to laptop boards, which are large and thin. And, yea, people should do preheating more for “hot air a largeish board” scenarios – it doesn’t even take much, can just heat up the board at like 100-150C for a bit, and even a max setting hairdryer for a few minutes will be better than nothing! Since at least a few pins on any component are inevitably GND, preheating seriously helps.
I would also bake the board out at 125C for 27 hours to drive out any moisture in the board. Do not want those layers to popcorn.
The author has ordered a 16GB chip to see if that works too. If it works, especially if larger sizes are possible, makes the risk of BGA replacement even more appealing
The author found it wasn’t actually 16GB ( they ordered it on aliexpress ), and is looking for a compatible chip that they can buy.
Yup. Perfectly doable for theaverage hobbyist on a kitchen table on a saturday morning. Easy as pi.
Any 858D or similar hot air station is around 50€ , you might even get a station with soldering iron included. Go for the ones with fans on the handle due to lower pressure that would blow components away
Soldering station Hakko clone or anything that uses T12 tips – 30€ ( PTS100 cab be powered from USB-C)
Kapton tape – 8€ for the big one
Solder wick – 3€ upward – prefer full copper with flux
Tweezers – 3€ upward – you get nice sets of 6 for 15€
Solder – can be as low as 5€ but realistically would go with something Lead based with flux (multicore) for home use
Cutting pliers – 5€+
Flux – 5€ upwards , but I rely like the Louis Rosmans Amtech NC-559-V2-TF Tacky Flux and they are sending to Europe again
Isopropanol 1L 10€
So price range for all the tools needed for this operation would run up to 150€ which is less than a budget android phone, but also half-way to budget 3D printer.
Would you be able to re-solder successfully BGA chip without any practice on some old phone / laptop motherboard? – unlikely
But with 50€ you can drop hot air and have everything to start learning soldering including some chip soldering kits.
As long as you have soldering iron, solder with lead, flux and tweezers you are good to go.
A pi 400 with 8GB, that is a target I’d like :)
My thoughts exactly
8gb RPI400 =)
the next project would be a daughterboard to replace the USB controller with an PCIe switch and USB controller combo with a flex cable to put an M2 slot on the backside… and a 3D printed trapdoor =)
or would making a new PCB and just moving the SOC be simpler?
It kinda sounds like you might be more interested in the Pi4 compute module.
oh you could absolutely do that! use a method like this, base it off this board, use an ASM1182 for the switch – cheap and accessible; there’s no datasheet, but there’s a reference (and working) schematic in the Clevo P750ZM Service Manual doc, which gotta be enough. Making a new PCB would absolutely not be simpler – it’s a Broadcom chip, there’s no docs to speak of, and assembly would be quite painful – a daughterboard would be way cooler to pull off!
What could possibly go wrong?
yea like, with this method, there’s not much – I’ve done a very similar repair, worked first try. IMO the most important part is the new chip alignment, and even that has a good amount of leeway!
If only I had some 1GB 4Bs lying around…
The most important thing learn from the video. If you think the BGA is soldered, give him a very small tip to the side. If it is sucked back into position by the solder, all is good.
yes, surface tension is wonderful! however, making clear just in case – this kind of check needs flux to be still present under the chip.