
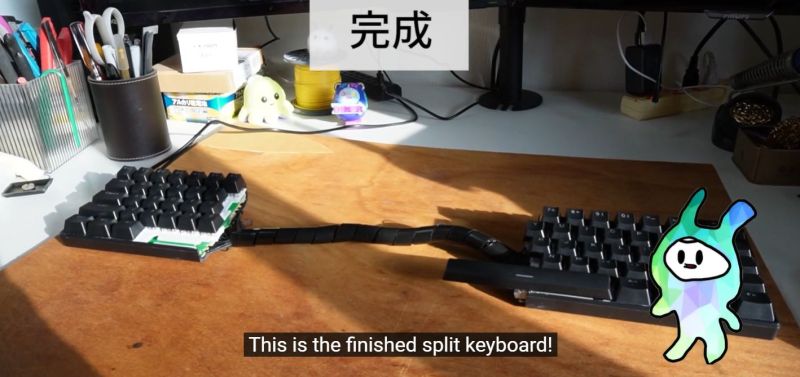
Split keyboards are becoming more popular, but because they’re still relatively niche, they can be rather expensive if you want to buy one. So why not make your own? Sure, you could assemble one from a kit, but why not take a cheap mechanical keyboard, slice it in half and just waves hands connect the two halves back together? If this thought appeals to you, then [nomolk]’s literal hackjob video should not be ignored. Make sure to enable English subtitles for the Japanese-language video.
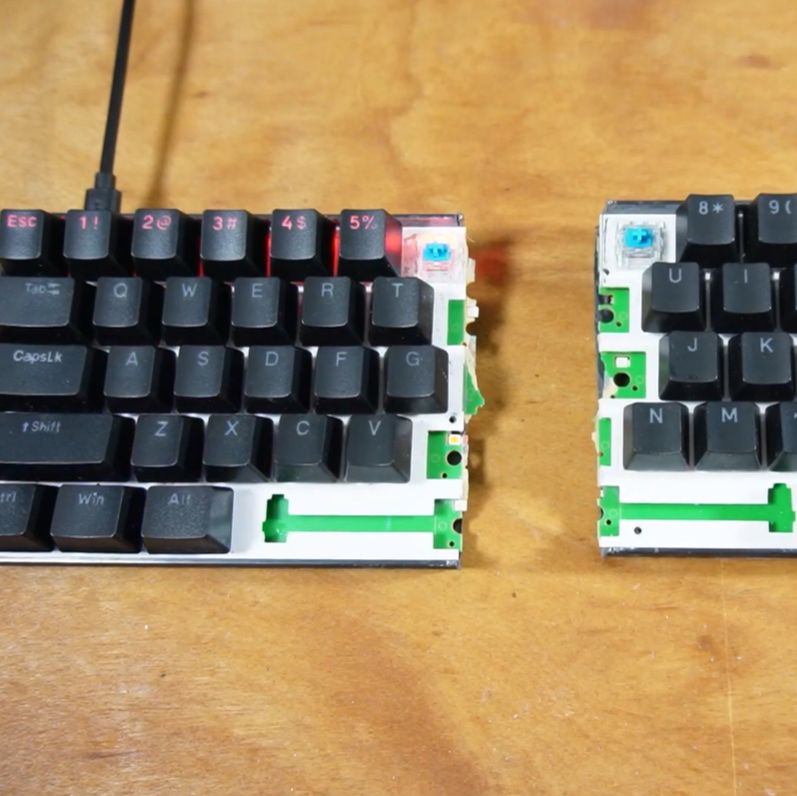
In it, the fancy (but cheap) mechanical keyboard with Full RGB™ functionality is purchased and tested prior to meeting its demise. Although the left side with the cable and controller still works, the right side now needs to be connected, which is where a lot of tedious wires have to be soldered to repair traces.
Naturally this will go wrong, so it’s important to take a (sushi) break and admire the sunset before hurling oneself at the tracing of faulty wiring. This process and the keyboard matrix is further detailed on the blog entry (in Japanese) for this process.
Although this was perhaps easier than the other split keyboard project involving a membrane keyboard, this tongue-in-cheek project demonstrates the limits of practicality with this approach even if it could be cleaned up more with fancier wiring.
We give it full points for going the whole way, however, and making the keyboard work again in the end.












Hah, nicely done 👍😁
I wonder, would it be easier to buy two keyboards and thus two controllers, and somehow move the controller of one to the right (and then plug in two USB devices)?
If the two keyboards already had controllers on the opposite sides, it would be easier.
Otherwise, it would be more work. As mentioned, the keys are connected in a matrix (grid) of horizontal and vertical wires, the ends of which connect to the controller. The work involves figuring out the matrix and reconnecting it.
You don’t need to move anything. Just think if you have two whole keyboards but typing on two different sets of keys.
If the key switches are in a grid, they’re probably only connected to the controller on one side. Therefore, it would take some work to separate them.
Question: was it a hack-saw? (sorry, I couldn’t resist)
This is a DIWhy, not a hack.
Now this is a true hack!
Never mind the keyboard. I just want one of those Japanese saws.
There is nothing special about Japanese saws, except they cut on the pull instead of on the push stroke.
I am a (fine)woodworker-in-training and there is about a 50-50 split in class as who likes them. I personally don’t like them, I prefer a European style push saw and have just done some very fine cabinetry with an ordinary universal/panel saw (a basic construction saw, cheapest from home depot). No saw cut is fine enough for a glue job or sight work, so you always need to use some smoothing (in this case, an ordinary hand plane) after hand sawing, Japanese or not.
But if you want one, they are not that expensive. Basic models are about €25 (similar in USD). Expensive models have the extra quality of being overpriced, which for some people might be a valuable asset.
Do you tape your cuts? I don’t need to plane even with a radial arm saw if i use tape.
That’s the difference between carpentry and woodworking right there.
I was talking about manual saws. I find that with manual sawing, the resulting surface (tape won’t help with that) is never smooth enough for a glue job. With a good radial or table saw blade it usually is.
?
I’m no expert with using saws, and have a quite cheap one of these pull saws and was surprised at how I couldn’t tell the difference between the shop cut sides and my hand cut end. This was not with some rough timber….
The use of the oft fetishized Japanese saw is the cherry on top.
Cable on the left, all I’ve seen are on the right. Find one of those and cut off half and half each and plug in both to USB. A scissors is all you’d need to cut the membranes, hopefully with no dead areas. Could cut neat or savage to the plastic case.
I think this hack job is only feasible for keyboards with a base PCB. You don’t want to deal wwith connecting anything to traces on a foil membrane…
I really expected some April Fools video here…
They really wasted this story. They could have waited just a couple days!
Heh, this is even worse than my tenkeyless hackjob for a Model M keyboard.
(I removed the keys, cut the plastic part, then dremeled apart the metal base, masked the edges with tape and folded the membrane back over. The outter shell was cut (slightly offset) so that the base retained the foot and the top retained the inset edge. While being at it I addeed a QMK based avr something for USB connetivity)
andifouneedtouykecapsortpewithspacesouhaveallsortsofprolems.
translation:
and if you need to buy 67 keycaps or type with spaces you have all sorts of problems.
and I made at least one mistake.
I included at least one ‘h’ and that also appears to be impossible based on the pictures
I cut off the numeric keypad of a keyboard long ago because I wanted it narrower and never used the keypad. You just fold the membrane under the keyboard case and tape it. Worked fine.
What I wonder is if this same technique could be done with 2 USB keyboards by basically cutting each in half.
Not sure about the space bar spring return mechanism though. You’d need to disassemble the keyboard beforehand or both if they are not identical (try to use identical keyboards!) and check to make sure that it still works – you’d need some sort of spring on each side and would it be balanced?. Or could you use just one side for the spacebar? We type without even thinking about the spacebar. Maybe some people only use their dominant hand for it which would make this much easier. I do. So type a bit and see if your non-dominant hand ever even touches the spacebar. If not, this will be a lot easier.
Fold the right side of the membrane under the left keyboard and vice versa for the other side. This way you don’t have to mess with any tiny, delicate, oh so breakable wires. I tried typing with 2 USB keyboards to test to make sure shift works and on one set of keyboards it worked and on another set it didn’t so make sure you test both before you embark on this in case there is some incompatibility. It might have been a driver issue as well. The one that didn’t work was Win7 I believe. The one that worked was Win10. But they weren’t the same keyboards.