Eventorbot 3D Printer

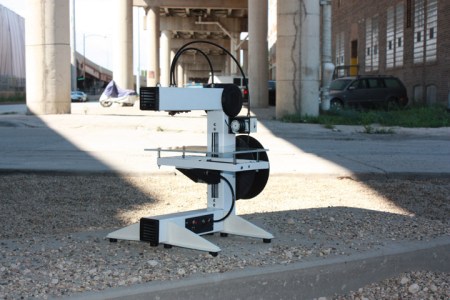
Tired of 3D printers that use t-slot construction? The Eventorbot is yet another open source 3D printer,  but it’s built out of steel and 3D printable parts. The design also aims to minimize the effect of vibrations by using a single solid frame. All of the wiring runs through the steel frame, which gives the printer a professional look.

The Eventorbot page on the RepRap wiki provides details on how to build your own, along with STL files for all the printable parts. If you want to see renders of the parts, they’re all available on Thingiverse. The material cost is $300-$500, and the assembled cost is quoted at $799.

Like many of the open source printers we’ve seen, this one uses the RepRap Mega Pololu Shield (RAMPS) to control the actuators. This is attached to a Sanguinololu motherboard, which runs the RepRap firmware.

The Eventorbot Youtube channel has a collection of videos detailing the assembly of the robot. Check out a video of a test print after the break.

Via Make

Continue reading “Eventorbot 3D Printer”

Genetic Research On The Cheap

When you think of DIY hardware, genetic research tools are not something that typically comes to mind. But [Stacey] and [Matt]’s OpenPCR project aims to enable anyone to do polymerase chain reaction (PCR) research on the cheap.

PCR is a process that multiplies a specific piece of DNA a few million times. It can be used for many purposes, including DNA cloning and DNA fingerprinting for forensics. PCR is also used for paternity testing.

The process involves baking the DNA at specific temperatures for the right amount of time. The DNA is first denatured, to split the helix into individual strands. Next, the temperature is lowered and primers are bound to the strands. Finally, another temperature is used to allow the polymerase to duplicate the DNA. This process is repeated to multiply the DNA.

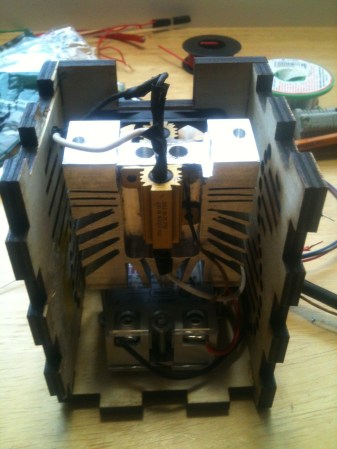
The OpenPCR uses an Arduino to control a solid state relay. This relay provides power to two large resistors that act as heaters. A MAX31855 is used to read a thermocouple over SPI and provide feedback for the system. A computer fan is used to cool the device down.

A milled aluminium sample holder houses and heats the samples during cycling. The laser cut, t-slot construction case features some helix art, and houses all of the components. It will be interesting to see what applications this $85 PCR device can perform.

Via Adafruit

Toorcamp: The Tesla Gun

We discussed [Rob]’s Tesla Gun in the past. At that time, the build looked very impressive, but had not been fired yet. Fortunately, [Rob] got the device working and brought it to Toorcamp. He took the gun out every night and demoed the handheld Tesla Coil by having volunteers catch the streamers with a knife.

The gun uses a cordless drill battery for power, and a flyback transformer to generate the ~20,000 volts needed to drive the coil. The power electronics module was designed to be easy to replace, and [Rob] had extras at Toorcamp in case he burnt one up. [Rob]’s build log is very detailed, and definitely worth reading through. It explains how he cast the enclosure out of aluminium, built a custom porcelain high voltage switch, and designed the power electronics.

While this build should probably get a “do not try this at home” label, he definitely created something unique. We’re looking forward to when [Rob] shows the gun off next.

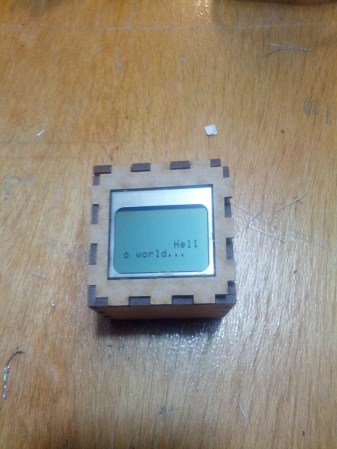
Toorcamp: Nibble Node.js Widget

The hardware hacking village at Toorcamp provided space and tools to work on hardware. It was interesting to see what hardware hacks people had brought to work on. One example is [Owen]’s Nibble Node.js Widget. The widget combines the popular node.js platform and custom hardware to create a node for the “internet of things.” The hardware consists of a Arduino Pro Micro, a bluetooth module, a LCD display, and a speaker in a laser cut box.

By using a custom package in node.js, the Nibble becomes an object which can be controlled by its methods. This allows for the developer to push messages to the display and control the device without worrying about the details of the hardware. Since node.js is designed for web applications, it’s simple to make the device controllable from the web.

[Owen] also wrote an emulator for the DCPU from the upcoming game, 0x10c. DCPU assembly is passed in from node.js, which compiles it and sends it to the Nibble. The device can then run the application using the DCPU emulation, which also allows for control of the display and the speaker.

There’s a lot of neat things that can be done with this minuscule cube, and [Owen] plans to release an NPM package for the node.js code.

Toorcamp: The Church Of Robotron

“Only 72 years until the Robotrons conclude that the human race is inefficient and must be destroyed. Only the mutant produced by a genetic engineering accident can save us now!” –Church of Robotron Doctrine

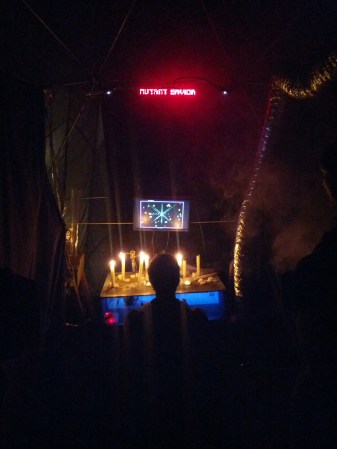
Based on the 1982 arcade game Robotron: 2084, Dorkbot PDX’s Church of Robotron was an impressive installation at Toorcamp. Located in a large dome, the Chruch features an altar where the the player kneels and finds out if they are the saviour.

Many things in the Church are triggered by game events. Lasers fired in time with the game, a bright LED flashes at the player when they die, and the LCD display above the altar shows high scores. There’s a webcam that takes a player’s picture when they die so that it can be added to the high score list. There was also a Jacob’s Ladder and a fog machine to add to the eerie feel of the Church.

A side room in the dome has a TV displaying list of high scores, handouts of their doctrine and documentation, and stickers of the Church’s logo. Aside from the electronics, the group also created lore around the installation. There was a sermon that played on a constant loop at night, and the doctrine handouts explained the story of the Church. This is all documented on their website, and the build details and source are also available.

The combination of art, lore, and electronics made this installation one of my favourites at Toorcamp, even though I’m awful at the game. I’ll need to practice my Robotron for next time the group sets up the Church.

Toorcamp: Kelp Horns

[Ari] and Jake from Noisebridge were out on the beach at Toorcamp when they saw some giant kelp and had an idea. Using a pocketknife, [Ari] cut a mouthpiece into the stem and cut the bulb in half. After some practice, they figured out how to play the kelp horn. [Jimmie], shown here, was able to get a pretty good range of notes out of it by playing it like a bugle. [Neil] tried to cut holes into the stem to play it like a flute.

The horns were fairly loud, so they attracted a few people who wanted to make their own. Once the group had six or seven horns playing various tones, they headed to the camp to show off their new instruments. They weren’t quite in tune, and didn’t taste very good, but they did make a variety of odd sounding tones. Leave it to a camp of hackers to make musical instruments of whatever they find washed up on shore.

[Photo maltman23]

Toorcamp: The Lock Picking Village

The Open Organization Of Lockpickers (TOOOL) ran the lock picking village at Toorcamp. They gave great workshops on how lock picking works, provided a lot of examples of security flaws in popular locks, and let everyone practice with their locks and tools. Lock picking is a bit addictive, and I spent quite a bit of time at the village.

TOOOL is an international organization that aims to advance the general public knowledge about locks and lockpicking. If you’ve ever wanted to know more about locks, you can check out their list of chapters to see if there’s one in your area, or send them an email to see if there’s other lock picking enthusiasts near you. Their detailed slides that were used for the village are also available.

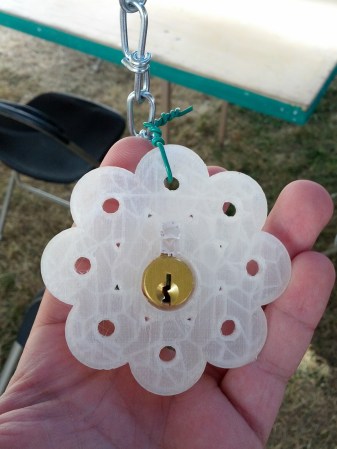
[Eric] from TOOOL worked on building a lock picking installation called the Labyrinth of Locks. The first prototype of this consists of locks enclosed in 3D printed enclosures, and lit by LEDs. The goal was to string them up in the woods and challenge people to find and pick the locks. MakerBot Industries printed the orange and flower shaped enclosures that the LEDs and locks were mounted into.

This is a first prototype, and [Eric] plans to expand on the idea and use it at other lock picking events he attends. It’s a neat way to mix lock picking and an art installation into an interactive activity.