Eventorbot 3D Printer

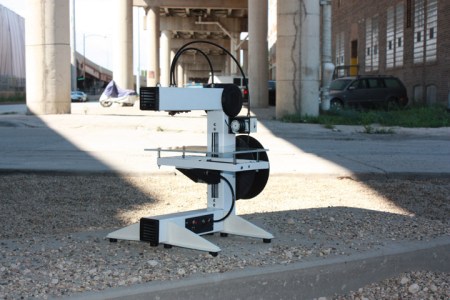
Tired of 3D printers that use t-slot construction? The Eventorbot is yet another open source 3D printer,  but it’s built out of steel and 3D printable parts. The design also aims to minimize the effect of vibrations by using a single solid frame. All of the wiring runs through the steel frame, which gives the printer a professional look.

The Eventorbot page on the RepRap wiki provides details on how to build your own, along with STL files for all the printable parts. If you want to see renders of the parts, they’re all available on Thingiverse. The material cost is $300-$500, and the assembled cost is quoted at $799.

Like many of the open source printers we’ve seen, this one uses the RepRap Mega Pololu Shield (RAMPS) to control the actuators. This is attached to a Sanguinololu motherboard, which runs the RepRap firmware.

The Eventorbot Youtube channel has a collection of videos detailing the assembly of the robot. Check out a video of a test print after the break.

Via Make

Continue reading “Eventorbot 3D Printer”

A Watch For Curiosity’s Drivers

Eight long years ago, when the Martian rovers Spirit and Opportunity were steaming towards our dusty neighbor, JPL systems engineers [Julie Townsend] and [Scott Doudrick] were stuck trying to solve a very strange problem. After the twin rovers landed, the rover drivers would have to live on Mars time. Because a Martian day lasts 24 hours, 39 minutes, rover team members would have to report to work 39 minutes later than the previous day. After much cajoling, a watchmaker by the name of [Garo Anserlian] was convinced to create a mechanical watch that lost 39 minutes per day, giving the team responsible for driving Spirit and Opportunity across the Martian desert these last eight years a temporal connection to the task at hand.

Of course, a lot happens in eight years. Now we have incredibly inexpensive, fully programmable TI Chronos watch, used by [Arko] to make a wristwatch set to Martian solar time. Instead of a master watchmaker selling the slowest wristwatch ever for hundreds of dollars, staying on Curiosity time is a simple matter of reprogramming a $50 wrist-mounted computer.

The build began by taking the default firmware for the Texas Instruments EZ430 Chronos wristwatch. In its stock configuration, the Chronos takes a 32.768khz clock signal, counts out clock pulses, and increments the number of seconds every time a counter reaches 32,768.

Because a Martian Sol is 24 hours, 39 minutes and 35 seconds of Earth time, [Arko] needed to program the seconds display to change every 1.027 Earth seconds. This meant changing the seconds every 33,668.833 clock cycles, instead of the Earth-oriented 32,768 clock cycles.

There’s one small glitch with that plan: the timer in the Chronos wristwatch can’t deal with floating point numbers, meaning [Arko] had to settle for incrementing the number of seconds ever 33,668 or 33,669 clock cycles. After a bit of math, [Arko] found using a value of 33,669 would mean his Martian time watch would only lose about 2 seconds a day, a minute after 78 Martian Sols, or 8.57 Martian minutes after one Martian year.

The build only took [Arko] five hours in front of his computer, and he doesn’t consider this to be a finished product. He plans on adding a few bells and whistles such as being able to display both Earth and Mars time. Still, an awesome build if your job description includes driving a rover across the Martian plains.

Genetic Research On The Cheap

When you think of DIY hardware, genetic research tools are not something that typically comes to mind. But [Stacey] and [Matt]’s OpenPCR project aims to enable anyone to do polymerase chain reaction (PCR) research on the cheap.

PCR is a process that multiplies a specific piece of DNA a few million times. It can be used for many purposes, including DNA cloning and DNA fingerprinting for forensics. PCR is also used for paternity testing.

The process involves baking the DNA at specific temperatures for the right amount of time. The DNA is first denatured, to split the helix into individual strands. Next, the temperature is lowered and primers are bound to the strands. Finally, another temperature is used to allow the polymerase to duplicate the DNA. This process is repeated to multiply the DNA.

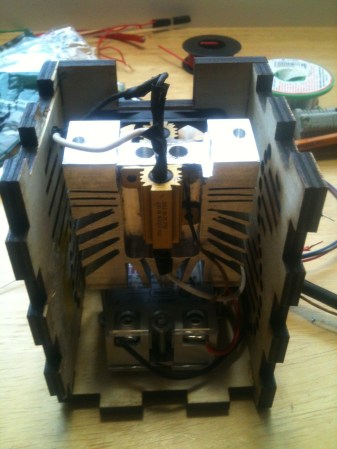
The OpenPCR uses an Arduino to control a solid state relay. This relay provides power to two large resistors that act as heaters. A MAX31855 is used to read a thermocouple over SPI and provide feedback for the system. A computer fan is used to cool the device down.

A milled aluminium sample holder houses and heats the samples during cycling. The laser cut, t-slot construction case features some helix art, and houses all of the components. It will be interesting to see what applications this $85 PCR device can perform.

Via Adafruit

3D Games For The Arduino With Raycasting

For all the Arduino-based video game builds we’ve seen, we’re really only left with a bunch of 2D platformers and other sprite-based games. [Reimecker] wasn’t satisfied with this level of computational complexity, so he ported the 3D game engine made famous by Duke Nukem 3D to the Arduino (German, Google translation).

[Reimecker]’s project is based on the very popular Build Engine written by [Ken Silverman] and used in games such as Duke Nukem 3D,  Shadow Warrior,  Blood, and TekWar. The Build Engine can be used to make a first person shooter, but more on the level of Wolfenstein 3D instead of Half-Life.

The hardware [Reimecker] used is a regular ‘ol 8-bit Arduino with an attached LCD touch screen displaying 320×240 pixels of a ray cast environment. From the videos of the build (available after the break), [Reimecker] has a fairly decent game engine capable of displaying a 2.5D environment. The frame rate might not be very high, but it’s still an amazing build considering the hardware [Reimecker] is working with.

Continue reading “3D Games For The Arduino With Raycasting”

It Was Only A Matter Of Time Before We Saw Nixie Modules For The Arduino

The Nixie tube, a neon-filled tube with a series of 10 cathodes shaped like numerals, is a classic display for any build wanting a unique, vintage, or steampunk aesthetic. We shouldn’t be surprised a factory in China is now turning out Arduino-compatable Nixie modules (English translation, but don’t get your hopes up), but there it is.

The modules are based on the QS30-1 Nixie tube capable of displaying the digits 0 through 9, and include an RGB LED behind the tube for some nice additional illumination. According to the manual, the modules themselves are based on a pair of 74HC595 shift registers, and are ‘stackable.’ By applying 12 volts to a pair of pins and connecting another 5 wires to an Arduino, it’s possible to drive as many of these Nixie modules as you’d like.

[Paul Craven] got his hands on a quartet of these modules and is planning on building a steampunk style alarm clock as a personal project. [Paul] was able to get the modules up and running fairly quickly, as seen after the break.

While they’re most certainly not the cheapest option, if you’re planning a build with Nixies, this probably is the easiest way to get a vintagey, steampunkey numerical display.

Continue reading “It Was Only A Matter Of Time Before We Saw Nixie Modules For The Arduino”

The Easiest Way To Dive In To ARM Programming

[Brad] has been very excited about an ARM Cortex-M0 chip released by NXP; it’s a fully featured ARM microcontroller, and is, quite amazingly, stuffed into a hobbyist and breadboard-friendly DIP-28 package. After finding a supplier for this chip, [Brad] dove in and put together a great tutorial for programming an ARM on the breadboard using open source tools.

The chip in question is NXP’s LPC1114FN28, a 28-pin breadboard friendly chip we’ve posted about before. After finding a single supplier for this microcontroller (only $1.26 for one chip!), [Brad] pulled out his breadboard and started wiring things up.

Because this microcontroller has an on-board oscillator, wiring up a breadboard and putting in a breakout for an FTDI cable was a snap. After configuring a toolchain and writing a bit of code, the only issue was uploading the code to the chip. This was handled by the lpc21isp programming tool, slightly modified and configured by [Brad] to support his favorite microcontroller.

The LPC1114FN28 is an impressive bit of kit, and with free tools to program the damn thing, we can’t wait for a homebrew ARM dev board to show up.

Wireless Upgrade For A Heathkit HERO 1 Robot

F3DDY

For those of you that don’t know, the Heathkit HERO (Heathkit Educational Robot) was a ‘bot built in the early 1980s. [Rick] wasn’t satisfied with his model ETW-18’s programming interface, so decided to upgrade it to be able to run Python using a hacked wireless router. We’d agree that things have advanced since then, since this little guy was originally programmed in machine code using an onboard keypad.  As [Rick] points out, it’s “exactly as awful” as it sounds!

To begin restoring and upgrading his robot, a kit was obtained from [hero-1] to allow for a serial programming interface. Although an improvement, the desire was to be able to program this robot using Python, and to not have to have a cable running across the floor all the time. A router with a serial port was obtained from a thrift store, then hacked using [OpenWrt]. After fitting the components into the robot, [FR3DDY] was born, “A ~30 year old robot, accessible through wifi, capable of running Python.”

Be sure to check out his site, which has some videos we weren’t able to embed. He’s also included some Python code that he used to program it. If this has made you curious about the Python language, why not check out this recent post about learning it the hard way?