Coin-based Rube Goldberg Helps Bring In Donations

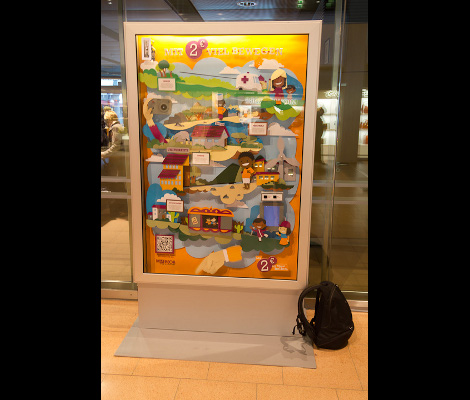
This kiosk was conceived as an interactive poster to help raise donations for a German relief organization. Instead of just providing a coin jar, the piece puts on a little show of transporting a two-Euro coin from the slot at the top to the repository in the base. Along the way many of the parts move, telling a story in that Rube Goldberg sort of way.

What is surprising to us is how much this looks like one of our own projects — at least up to the point that the display is painted. The link above shows off some pictures from the development stages. The prototype shapes up on an oddly shaped scrap of plywood with the coin’s path plotted out. After the particulars of a trip from point A to point B were established the empty spaces were filled in to add visual interest. If you take a gander at the back of the plywood you get an eyeful of protoboard and draped wires. A camera, Mac Mini, and Dropbox were included in the mix to share an image of the donor on the group’s Facebook page (with the donor’s consent of course).

The piece had a month-long home in the Hamburg airport earlier this year. See what that looked like in the video clip after the break.

Continue reading “Coin-based Rube Goldberg Helps Bring In Donations”

Retrotechtacular: 1983’s Answer To Information Overload

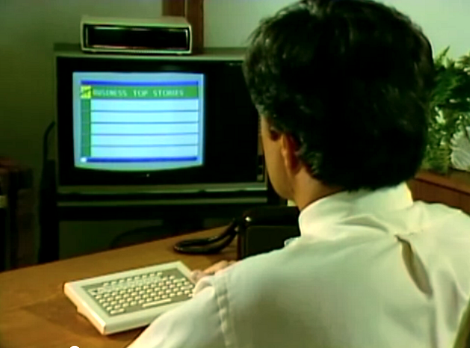
We can’t say we ever really thought that the problem with the early 1980’s was too much information in the hands of the people. But this promotional video for the Sceptre Videotex Terminal claims that it is the solution to the information overload of the time. The entire video is embedded after the break.

You use your TV as a display, connecting the hardware to a phone line and using a keyboard for navigation. Perhaps our favorite bit is when the announcer informs us that the secret behind the system is its “vast sources of information”. These include the Miami Herald, the Associated Press, the Wall Street Journal, and Consumer Reports. Just remember that at the time you’d need to hit the local library to access all of those resources. Also, searching them wasn’t a possibility.

But wait, this wasn’t just conceived for news. The system — which was backed by Night-Ridder (a huge Newspaper conglomerate) and AT&T — boasted commerce and banking abilities as well as education services. It’s the vision of the Internet which Ma Bell would have preferred to be in place today.

Continue reading “Retrotechtacular: 1983’s Answer To Information Overload”

Passion Fruit Acquire Laser Defenses

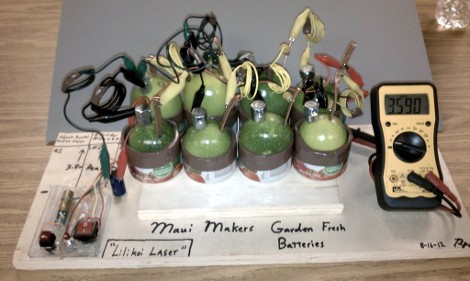
Apparently being overrun by ripe Passion Fruit is a problem if you live in Hawaii. [Ryan K’s] solution to the situation was to use his extra fruit to power a laser. In an experiment that would make [Walter White] proud, [Ryan] gathered everyday supplies to form a battery based on the fruit.

He used some galvanized bolts as the source of zinc. It forms one pole of each cell, with a thin copper tube as the other pole. Each cell is rather weak, but when combined with others it makes a respectable battery. We’ve seen acidic fruit used to power LEDs, but [Ryan] wanted to do a little more. He built a circuit that would store electricity until he had enough potential to power an LED diode. After the break you can see a four second clip of the fruit wielding its new laser defense system.

Continue reading “Passion Fruit Acquire Laser Defenses”

Portable Light Box For Small Photography Needs

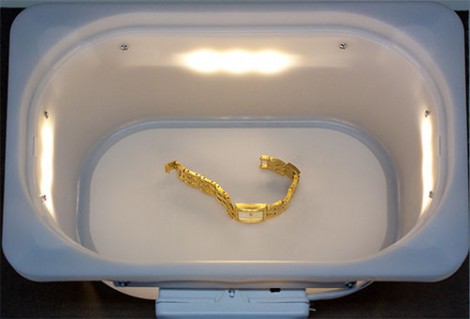
[Paulo] needed to photograph small objects on the go. Since you can’t always depend on ambient lighting conditions he built a battery operated light box which is easy to take along on his travels.

We’ve featured portable light tents before, but they still tend to be a bit too bulky for his tastes. He chose to go with a white plastic storage container from Ikea. It’s lightweight, and acts as a diffuser for the light sources. Four strips, each hosting three LEDs, were mounted on the exterior of the container. Half of a PVC pipe protects the boards while providing a way to fasten the strips in place using nuts and bolts. The driver board and batteries find a home inside of a travel container for a bar of soap.

He likes the results, especially when a glossy white piece of paper is used as a top reflector.

Arduino WiFi Shield Available, Costs $85 USD

Over on the Arduino blog, the release of the official Arduino WiFi shield was just announced. On the spec page for this WiFi shield. we can see this new board isn’t a slouch; it’s powered by a 32-bit ATMega 32UC3 microcontroller, has provisions for WEP and WPA2 encryption, and supports both TCP and UDP with the Arduino WiFi library. It also costs €69/$85/£55 from the Arduino store.

Now that the announcement of the Arduino WiFi shield is over with, we’ll take this opportunity to go through a few other WiFi adapters for the Arduino that don’t cost an arm and a leg.

The WiFly shield – available from Sparkfun – is a WiFi adapter with the same form factor as the ever popular XBee modules. Of course, it’s possible to make your own breakout board; the WiFly only needs a TX, RX, power and ground connection to connect your Arduino project to the Internet.

We’ve seen a few projects use the WiShield from async labs. It’s a WiFi module packaged in the familiar Arduino shield form factor, and costs $55 USD.

For the hardcore hackers out there, you could always get a bare Microchip WiFi module and get it to work with an AVR as [Quinn Dunki] attempted to. In all fairness, [Quinn] was trying to de-Arduinofy the WiFi library; if you’re cool with Arduino code swimming around in your project, this method will probably work.

There’s also the very, very cool Electric Imp. Basically, it’s an SD card with a built-in WiFi module. After configuring the Imp by holding it up to patterns flashing on your smartphone screen, this device serves as a transparent bridge to the magical ‘cloud’ we’ve been hearing about. The Electric Imp was supposed to have been released in late July/early August, and we’ll put a post up when this cool device actually launches.

Of course we’re neglecting the simplest solution to getting WiFi running on an Arduino project: just use a wireless router. Really, all you need is a pair of TX and RX pins and a copy of OpenWRT. Easy, and you probably have the necessary hardware lying around.

We’re missing a few methods of Arduinofying a WiFi connection (or WiFying an Arduino…), but we’ll let our readers finish what we started in the comments.

Building A Resistor Substitution Decade Box

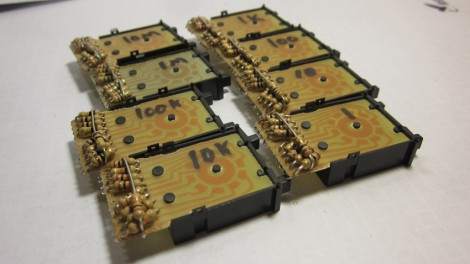
[George] built an incredibly tidy resistor substitution decade box. These devices feature a pair of connections and a way to select the resistance between the two of them. In [George’s] case it’s a pair of banana jacks and these eight thumbwheel switches.

What you see above is the side of each thumbwheel switch. These are panel mount devices which show one digit with an up and down button to change the setting. As you can see, the PCB for each provides connections to which a set of resistors can be mounted. This is the difficult part which he goes to great lengths to explain.

At this point he’s got the resistor groups for each digit soldered in place, the next step is to stack the switches next to each other and connect them electrically. From there it’s off to a project box in which they will be mounted.

This project does a great job of explaining the assembly process. If you’re interested in the theory behind a substitution box check out this other project.

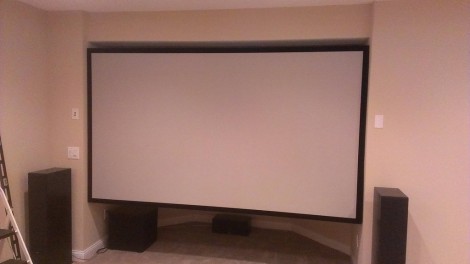
128-inch Silver Screen For Your Viewing Room

This huge projection screen fills an odd alcove in [Dodge Boy’s] screening room. He built it himself for under $200. The materials, tools, and techniques make this a possibility for anyone who wants their own projection setup.

The frame is made of pine 1×3 dimensional lumber. To keep the fabric from touching the supports in the center of the frame he added quarter-round trim to around the perimeter. From there he painted it black and went for a test-fit. The bad news is that the drywall is neither perfectly flat, nor parallel/square. He ended up taking the trim off and ripping down one side of the frame. That did the trick and he went on to stretch spandex over the whole thing. The frame hangs from a french cleat on either side of the opening. From what we can tell, the surface is just fabric and not painted as we usually see with these setups.

[Dodge Boy’s] utility room shares the back wall of the screening room. That’s where he stores the HTPC which feeds he project, with an RF remote to control it through the wall.

[via Reddit]