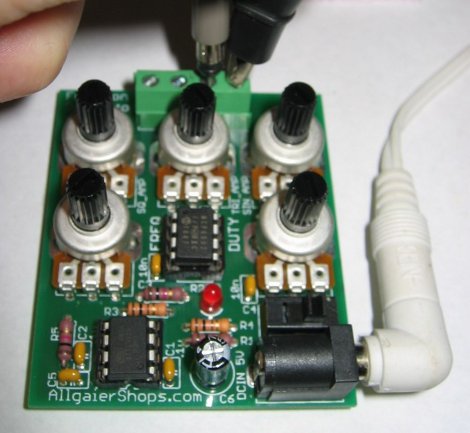
Attiny25 Based Function Generator Causes A Wave

Function generators are a handy bench tool to have around, and while you can usually cobble something together that works, it is much more handy to grab a device when you need it. Thats where this function generator sent to us by [Mohonri]comes in. Based around a ATTiny25 and a rail to rail op amp which is able to replicate frequencies from 1Hz to about 40KHz, in square, triangle, and sinewaves simultaneously.

The function generator also features independent amplitude control on each output. And it’s all on one palm-sized, single-sided PCB. The main part of the code is split into two parts: the main loop gets the inputs and constructs a waveform table in SRAM, and then an ISR reads that table and outputs it to one of the timers, which produces a PWM output, which is low-pass-filtered and then passes through a potentiometer (for amplitude control) and then to an op-amp before landing on a set of terminals.

Though its not 100% perfect, trading speed for a 6 bit resolution, it should be more than enough for most electronic projects. You can pick it up in kit form from the on-line shop, but schematics, software and PCB layouts are also available for download.

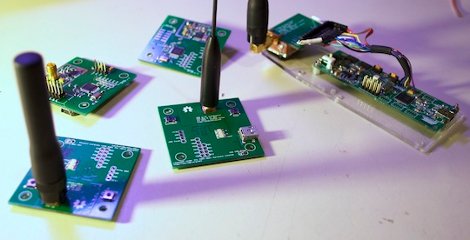
Designing A Smarter RF Transceiver

Two  months ago we featured a transceiver based on the Microchip MRF49XA, and a lot of feedback was sent to [hpux735] requesting that some brains be added onto the system. [hpux735] decided that if he was going to do it, might as well go the distance and make a make a native USB transceiver.

The prototype model is designed for use with the Atmel AT90USBKey, and uses the LUFA USB framework. The protocol and packet format was revised, and a Hamming Code implementation was built using look-up tables to give error control. Finally once the prototype was ready to go [hpux735] created some awesome little PCB’s that contain the AVR, radio, antenna hookups, and blinky lights (no project is complete without blinky lights) are all ready to go when you are.

This project has come quite a long way, covers 3 blog pages, uses a fair bit of ribbon cable, but you just got to love when a plan comes together.

DIY Solid State Tesla Coil

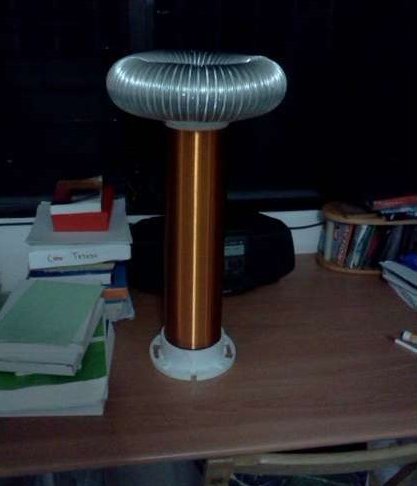
Tesla Coils are always a blast to see and are relativity simple to build. While there are plenty of sites on the subject, [Michael’s] newest instructable breaks building a solid state Tesla Coil down to 12 easy steps.

Items that should be familiar to anyone who has even looked at a Tesla Coil include PVC pipe, Aluminum ducting, and wire … lots of wire. The PVC pipe is cut to length and a flange is attached to help form a base. From there the pipe is wound with about ¾ of a pound of 30 AWG enameled wire, which takes some time by hand to make sure you don’t overlap or get space between the coils.

Aluminum ducting is then wrapped around the outside of a second flange. Some stovepipe wire is ran though the ducting and twisted to close up the 2 ends, and hot glue is used to attach the two ends together. The assembly is screwed to the top of the pipe now containing the secondary of the massive transformer. All that is left is to attach a primary, which is made out of a few turns of 16 AWG wire, and the control circuitry.

Join us after the break for a shocking video!

Continue reading “DIY Solid State Tesla Coil”

Robotic Etch-a-Sketch Draws Grayscale Images

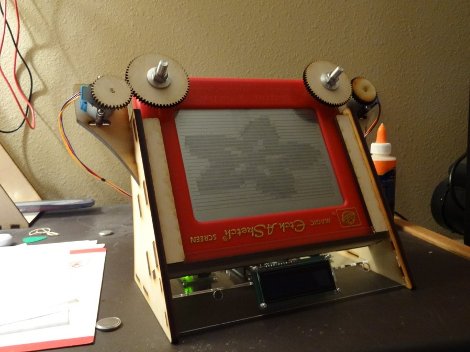
[Patrick] decided to make a computer controlled etch-a-sketch. While the idea is not that new, there is always a different way to accomplish a goal. An Arduino is used to control a pair of stepper motors which were sourced for pretty cheap, and even came with their own driver. Next a stand was mocked up using foam board, which helps determine where all the parts should live.

Next was a way to attach the steppers to the knobs, gears would be used and a collet meant for model airplanes was sourced to make the mechanical connection between gear and shaft. With everything set in place via foam board and paper printouts, it is off to get some thin plywood. The plywood is sent though a laser cutter creating most of the stand and gears. Now its all software, a program was whipped up for OSX which converts low res pictures into squiggly lines perfect for the etch-a-sketch to draw on its screen.

The results are quite impressive, join us after the break for a quick video.

Continue reading “Robotic Etch-a-Sketch Draws Grayscale Images”

DIY Windows 8 Tablet

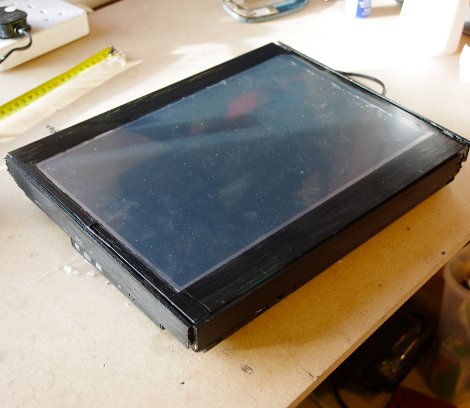
[hackitbuildit], from instructables, has brought us a a DIY windows 8 tablet. To make the tablet, an old laptop is used that meets the minimum requirements of windows 8 preview, a touch screen conversion kit, and of course the software itself. The laptop is first prepared by removing the casing around the screen, and if you just go by the pictures it kind of looks like he is ripping it apart! Though if you look at the video screws are being removed.

The screen is flipped around and laid on the keyboard with a couple spacers between them, as many laptops use the keyboard area as heat sinking. The touch screen is installed, and some wood strips are hot-glued to the outside to fill in the gap between the screen and base. With a little paint you’re left with a large, but functional windows 8 tablet to get started developing for.

Creating A Game For The CoCo

Retro is in the air today as [John] has tipped us off about a new game he has written for the Tandy Color Computer (CoCo), The game, inspired by the homebrew game DOWNFALL for the Atari Jaguar, features what looks like snappy game play, lots of bright colorful animation and has just entered the Alpha stages. The blog page above sheds some insight on what it takes to make a game for these old 8 bit wonders, cause no matter how easy it sounds, you do have to do some dancing to get even the simplest of things working correctly on such limited resources.

The game was part of this years Retrochallenge which is typically held in January, which we recommend checking out if you want your fill of random projects for old computers. From building an Apple I replica kit, to making a soccer game for a SGI system, getting a 5160 XT online or just noodling with a KIM, there is plenty of interesting projects to keep you occupied during the afternoon.

Join us after the break for a quick video of Fahrfall, the fun looking CoCo Game.

Continue reading “Creating A Game For The CoCo”

Reverse Engineering A 1.5 Inch Photoframe

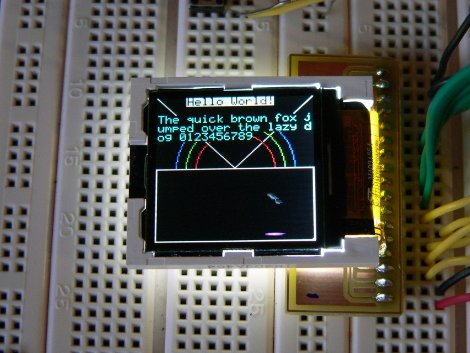
Little, no name, 1.5 inch LCD photo key-chains are all over the place for practically nothing. Not too surprisingly these things do not vary much in the parts that they use, some flash ram, a little lipo battery and a 16 bit color LCD. Wanting to find a way to reuse that LCD [Simon] Has an excellent tutorial on how to reuse a FTM144D01N LCD with a ILITEK ILI9163 LCD driver for your electronic projects.

Two units were used, one was ripped apart and soldered to a home made breakout board, the other was kept intact so its logic could be sniffed out with an oscilloscope. A pin-out was quickly determined since these things typically use a 8 or 16 bit data bus. Then a driver library was put together for AVR micro controllers, which includes some basic shape drawing and a 5×8 font.

While you may not be lucky enough to get this exact LCD screen from your local bargain store, there are a lot of pointers in here to hopefully get you up and going. We will be trying our luck on a very similar screen this afternoon as these things do have a decent picture and fairly quick response times already packaged in a hand-held case.

Join us after the break for a quick video.

Continue reading “Reverse Engineering A 1.5 Inch Photoframe”