Coming in hot from Cornell University, students [Amanda Huang], [Caroline Hohner], and [Rhea Goswami] bring a project that is guaranteed to tickle the funny bone of anyone in the under-40 set, and sadists of all ages: The Tamagochi Torture Chamber.

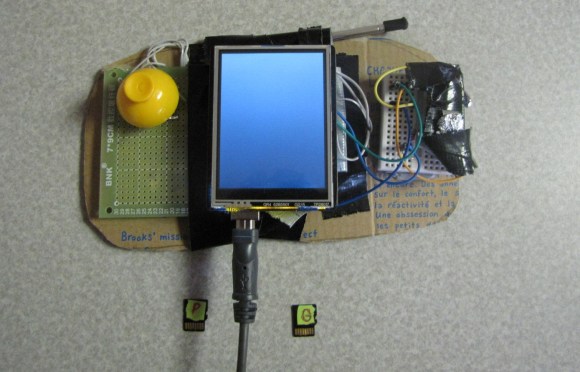
In case you somehow missed it, Bandai’s Tamagochi is a genre-defining digital pet that was the fad toy at the turn of the millennium, and has had periodic revivals since. Like the original digital pet, there are three pushbuttons to allow you to feed, play with, and clean your digital pet. These affect the basic stats of happiness, health, food and weight in ways that will be familiar to anyone who played with the original Tamagochi. Just as with the original, mistreatment or neglect causes the Tamagochi to “die” and display a tombstone on the TFT display.
Where the “Torture Chamber” part comes in is the presence of an accelerometer and soft physics simulation– the soft physics gets an entire core of the Pi Pico at the heart of this build dedicated to it, while the other core handles all inputs, display and game logic. What this enables is the ability to bounce the digital pet off the walls of its digital home with an adorable squish (and drop in health stat) by tilting the unit. You can check that out in the demo video blow.
Is it overkill for a kids toy to have a full soft body simulation, rather than just a squish-bounce animation? Probably, but for an ECE project, it lets the students show off their chops… and possibly work out some frustrations.
We won’t judge. We will point you to other Tamagotchi-inspired projects, though: like this adorable fitness buddy, or this depressingly realistic human version.
If you’ve got an innovative way to torture video game characters, or a project less likely to get you on Skynet’s hitlist, don’t forget to send in a tip!
Continue reading “Tamagotchi Torture Chamber Is Equal Parts Nostalgia And Sadism”