3D Print In Wax, Cast In Metal

What does dry ice, ethonal, wax beads, and a blender have in common? It was the first attempts at making media for this wax 3D printer that [Andreas] has been building up. Wanting to produce 3D printed objects out of metal, and finding that direct metal laser sintering machines were still out of reach of reason, he set out to find a different way.

After trying a few different methods of making the powdered wax himself, he decided that it was much more time effective to just buy the stuff. Using the commercially available powered wax mixed with activated carbon, and a custom printer, the wax is blasted with a moderately high powered laser. More wax powder is applied over the freshly sintered layer, and the 3d part is built upwards. Once he has the part in wax, he can then make a mold of it and cast metal using the Lost Wax Casting method.

While the quality is not perfect, and you still need a roughly 2500$ laser setup (which was borrowed from his school) its surely a step into the future.

Join us after the break for a quick video.

Continue reading “3D Print In Wax, Cast In Metal”

Paint Your Pictures, No PC Needed

LEDs and and cameras always make a fun mixture, and its not all that hard to have quite a bit of fun as well. The Light Painting Stick is similar to other long exposure camera tricks like LightScythe and gets about the same reults. The difference is the Light Painting Stick is self contained meaning you don’t have to drag nearly as much stuff along with you to have fun.

Hardware used is HL1606 controlled RGB led strip commonly found at Adafruit, the brains are a Leaf Labs Maple micro controller board with an SD card and some human interfaces attached, and is powered by a 6 volt lantern battery.

Images are 64*infinity 24 bit BMP files which means there is not much fuss preparing your graphics other than doing a simple rotate. You can select which image is displayed by using a 2 way switch and the LEDs on the stick. Select your images, dial in your speed with the potentiometer, and you’re  ready to hit the fire button for some photo fun.

Powering An Ultrasonic Transducer

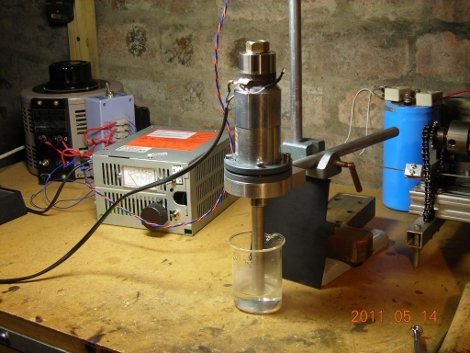
[Lindsay] has a wonderful writeup about a new toy in the shop, an ultrasonic transducer. The 28kHz, 70W bolt-clamped Langevin transducer by itself is not much use, you need a power supply, a horn to focus the energy, and a way to tune it. [Lindsay] starts off by showing how to find out the resonant frequency of the transducer, designing and building a high voltage high frequency AC power supply, and how to design a horn.

Not missing the meaning of DIY [Lindsay] casts and machines a horn for the transducer with a high level of precision as this will also tune the horn to the correct frequency. Once some brackets are machined the whole setup is put through some fun experiments in water and lemonaide, but the real purpose is to drill fine holes in glass for his home made Panaplex displays.

Join us after the break for a short video.

Continue reading “Powering An Ultrasonic Transducer”

Sixty4Racer An 8×8 Game

[Pete] has a cool new tutorial creating a re-imagining of the Atari classic “River Raid” for the PIX-6T4 micro controller based game system. The PIX is a netduino on a larger board featuring 2 analog controllers, a speaker, an sd card and an 8×8 monochrome LED display. With a resolution that low, it may make the good ole VCS look like a 360, but there is still a lot to learn about making a game at this low of a level.

The tutorial [Pete] has put together covers concept, gameplay, progression goals, screen handling and a boat load of code to show how it all goes together. Though this is for a C# based system many of the basics apply to just about any system you can imagine. So if you’re looking to learn how to handle graphics in C, sprite animation, collision, or randomly putting levels together out of tile blocks then you should take a look.

Join us after the break for a quick video.

Continue reading “Sixty4Racer An 8×8 Game”

Analog Joypad For Your Retro PC

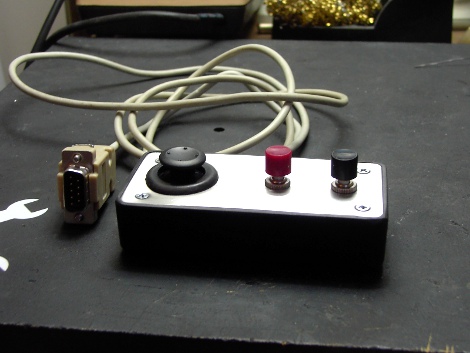
Part of the fun with old computers is playing some old school games, and while you could play them with a keyboard it is much more fun with a joystick. You can get old joysticks all day long on auction sites, but you have to watch out. Some are digital, which wont work for many games on many systems. Some were cheap to begin with and probably worn out, and many are flight sticks … ever play pac-man with a giant flight stick?

What I really wanted was a game pad like device for my 1986 Apple //c , using one of the modern thumbstick analog controllers. Using a thumbstick out of an old XBOX(1) controller, some generic parts from Radio Shack, and a little bit of effort , I ended up with exactly what I wanted.

Join us after the break and I will show you how to get there!

Continue reading “Analog Joypad For Your Retro PC”

Jam A Remote Helicopter

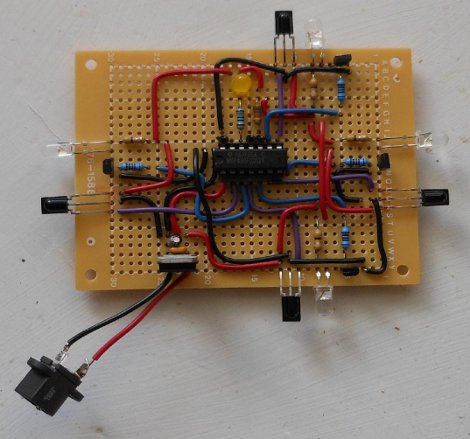
The Syma S107 IR is a popular little remote controlled helicopter. When a friend of [Michael]’s started flying one around the office he decided to try and jam the signal, creating a no fly zone. Luckily some people on the internet have already decoded the IR signals used by the flying menace. From there, a quick browsing of Mouser to source some LEDs, and to whip up some code for a TI MSP430 was all that was left.

The software on the micro controller is set to broadcast a “thrust off” signal, but [Michael] admits he is not 100% sure if the helicopter is actually receiving that, or if the signal from the no fly zone is mixing with the remote’s signal, causing garbage to be received. Either way when the helicopter gets in range of the no fly zone pad it drops from the air.

Things didn’t go perfectly though, overestimating the current capabilities of the MSP was causing the micro controller to reset and crash the debugger. But a simple rearrangement of how the signals are sent quickly solved this problem.

Join us after the break for a quick video.
Continue reading “Jam A Remote Helicopter”

Hide Your Repeater And Gain A Radio

[Bradley]’s workplace was recently put into a position where they needed to install a WIFI network to operate some wireless barcode scanners, which was left open for anyone to connect to. Management thought that the people in the shop, who didn’t really need internet, would get less work done if they had access to it. So they just simply stuck the access point as far away as they could. Problem with that theory is that the signal still reaches a little bit where they don’t want it, and people in the shop really want access, so a repeater is needed.

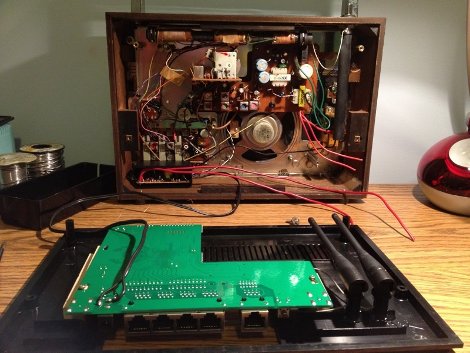
Of course this repeater cant be just sitting out in the open. so [Bradley] decided to hide the it inside of an old radio. Searching around he finally settled on a 10$ ebay radio from the 1980’s, which is large enough to hold the guts of a WRT54G. The routers AC adapter was popped open and wired into the AC input of the radio, the main board and antennas were epoxied to the back. Once everything is buttoned back up you’re left with a hidden repeater, and a fully functional radio.

Now hopefully none of his bosses read his blog!