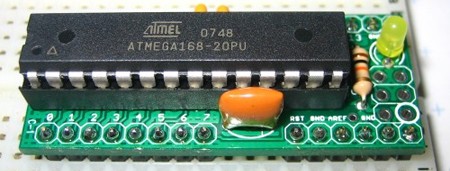
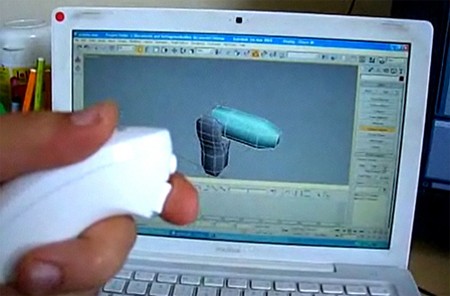
Twittering From The Command Line

[Yuri] spent some time building a computer controlled, arduino interfaced beer brewing rig. A cooler serves as a mash tun, while the arduino controls a steam source that’s used to raise the temperature of the mash as desired. A java app talks to the arduino to set the temperature parameters and monitor the steam boiler. You can catch a nice video walkthrough of the setup, see some screen shots of his java interface.

Remember the voltage detector that I mentioned a while back? [Tim] hasn’t put up quite enough info to make me happy, but definitely enough to make me jealous. He updated his NES controlled Silvia to become a Wii nunchuck controlled (via Arduino) Silvia. That said, his last couple of blog posts have me questioning just how much espresso he’s been drinking. Theoretically, he could actually program the Silvia to refuse shots to people who are too jittery.

[John Ryan] posted his dual core Arduino rig on the Arduino forums. These two ATMega168 chips share the same 16Mhz resonator and I2C bus – allowing them to run in semi-parallel. The uC’s don’t actually communicate with each other, but they run rather nicely as concurrent circuits. It’s a pretty interesting method of adding I/O pins to a project for a minimal cost.
[youtube=http://www.youtube.com/watch?v=MD_-YnFZFP8&hl=en]
I found this while looking for a teardown of a Wii Nunchuck remote since they’re cheap and include a 3 axis accelerometer. I mentioned an interface board the other day, but the responsiveness of the interface in this video grabbed my attention. If you like it, you should check out this [via] Nunchuck Arduino RF controlled robot. You can find details on that bot here. The accelerometer itself only runs about $10, but it’s a pretty small SMD part.

I’ve spent about 18 of the last 24 hours working on milling a PC board for my upcoming how-to. So far I’ve murdered several copper clad boards, built a hold down table, redesigned the board in eagle at least five times and snapped off a $15 half round engraving bit.
If you’re wondering, my new board milling table is a piece of MDF that I laser etched a .25″ grid onto, then added some aluminum strips to act as hold-downs. On the side of the strip opposite the board, I put thin slices of PC board to level out the hold downs. As usual, I’m building the board in eagle. To turn the board into something the mill can handle, I’m using pcb-gcode, a nice little g-code generation tool for eagle. I may switch methods later, but if I can get the settings tweaked, it’ll make my design to board milling process very fast.
[Scott] sent in the beginning of his attempt to build a frequency detector. He’s started out with just simple LCD matrix. Nothing intensely interesting just yet, but I like it when people send in stuff they’re working on.
If you haven’t checked out the Arduino yet, do it. It’s the easiest micro controller dev platform I’ve seen. If you’ve got one, now you can hook up a Wii-Nunchuck to it. If you like smaller and cheaper, check out [ladyada]’s boarduino.
[eliot] wanted me to mention this video on hacking drive through speakers. It’s a bit cheesy – and all I could think of was Thunder Run – where the geek character swapped the crystals in the CB radios. (Warning, The FCC might have some expensive words for you if you get caught.) Update: this is what you get if you don’t watch the entire video and catch the joke about taking apart toasters.
Tomorrow I should be picking out some winners for my laser etched laptop (or whatever) offer. You can still win some free etching time! Just send in a tip! The winners are selected from the ones that get published on Hack-A-Day.

Here’s a good rule of thumb: “Don’t update your firmware five minutes before you’re going to fly an autonomous robot ten feet away from a former Vice President of the United States.”
That was one of the afterthoughts of [Chris Anderson] after presenting his Arduino controlled blimp at TED. (I might have to squeeze TED into my con schedule next year.) The project itself is somewhat documented here, with some hi-res photos, parts list, and some firmware. Apparently the blimp was overcome by the A/C in the auditorium, but I still dig it.