3d Printing Ice Sculptures

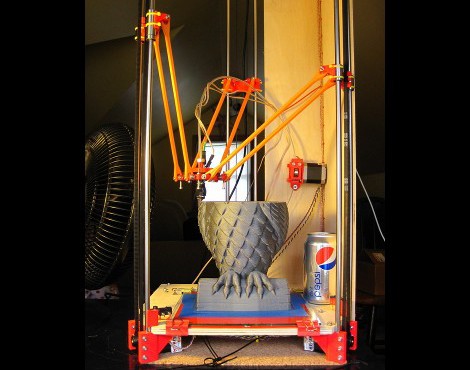
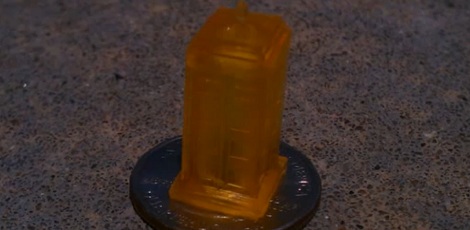
[Jared Kotoff] asked an interesting question on Facebook. He asked if we had ever seen 3d printing in ice before. Though we couldn’t find anything in our archives, he managed to find a project that makes 3d printed ice sculptures. To do this, they actually print two materials inside a chamber that is -8 degrees Fahrenheit. The first material is Shortening Methyl Esther (SME) that is used as a scaffold or mold. The second material is just water, but the tip is heated to 68 degrees to keep it from freezing in the nozzle. They do two passes of water for every layer of SME, and scan with a laser and perform corrections after every five layers.

Once the print is completed, the sculpture has to be scraped clean of SME and then soaked in kerosine to remove the last of it.  There are several pictures at the linked article, but sadly no video.

3D Printed Circuit Boards Using Conductive Ink

The thought of using a 3D printer to fabricate PCBs is tantalizing and the good news is that it’s a reality. This project shows that it’s possible to use a special printer head to apply traces to an extruded substrate.

This is similar to the point-to-point 3D printer circuits with one big upgrade. Now the traces can be printed directly onto the ABS using conductive ink. The process starts with the design files, which are used to model a substrate that has a trench for each trace. A Makerbot then prints out this model. Once complete, the ABS extruder head is swapped for a special ink head. Each trace is then filled with the conductive fluid, which is kept in place by the trench walls until it can dry. We think this improves on the trace printing techniques we’ve seen before because it doesn’t require your printer heat to use molten metals.

The circuit above uses printed traces for the high and low side of an LED circuit. It’s a bit rough at the edges, but it shows a lot of promise. Don’t miss the demo video embedded after the jump.

Continue reading “3D Printed Circuit Boards Using Conductive Ink”

Win $40,000 For Squirting Plastic Out Of A Nozzle

3D printers such as the RepRap and Makerbot turn spools of plastic filament into just about any object imaginable. There’s a problem though: this filament costs about $40 a kilogram, and raw plastic pellets cost about 1/10th of that. Obviously, there’s a lot of room for improvement. The folks at Inventables are throwing $40,000 at the problem in a contest to build a machine that takes plastic pellets and turns it into usable plastic filament.

The object is simple: build a device that takes ABS or PLA pellets and turns them into a 1.75mm filament. The machine has to cost less than $250, be able to add colorant to the plastic, and be usable in a 3D printer. The winner gets $40,000, a laser cutter, a 3D printer, and a CNC milling machine courtesy of Inventables. Sign up on the official contest website and don’t be shy about sending your progress into the Hackaday tip line

If you’d like to get started, here’s a great page that goes over the basics of plastic extrusion, and a few attempts (1, 2) from [Adrian Bowyer] and [Forrest Higgs] that show exactly how hard this is. There’s also the Filabot that had a successful Kickstarter, but there’s apparently been no (or very limited) progress in the four months since the Kickstarter. I’ve even given this idea a go, but am currently stuck at manufacturing a proper auger. To put this in perspective, this is the moonshot of the current crop of 3D printers; a simple device to lower the barrier of entry to 3D printing is desperately needed, and we’ve got to give props to the Inventables crew for putting this contest together.

3D Printing With Nylon For A More Useful Objects

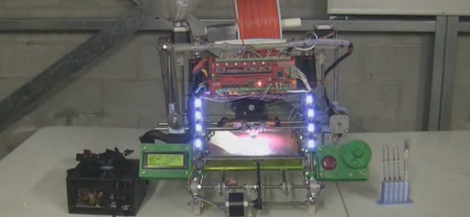
[taulman] over on Instructables has been working on his own version of a 3D printer. Unlike the usual PLA or ABS filament all the RepRaps and Makerbots use, this printer uses nylon to make parts with very interesting properties.

Most extrusion printers are designed to print with ABS (a very hard plastic that melts around 220-230° C) or PLA (a somewhat softer plastic that melts at about 180° C). [taulman] is using Nylon 6, a very slippery and bendable plastic that melts around 320° C (about 600 degrees Fahrenheit). He’s doing this with a hot end of his own design and a ‘spiky’ extruder bolt that allows high-temperature thermoplastics to be extruded into any shape imaginable.

For the longest time, the 3D printer community has been using low-temperature thermoplastics such as PLA and ABS. There are obvious benefits to these materials: it’s pretty easy to source a spool of filament, and the low melting point of these plastics makes building a printer easier and safer. Now that [taulman] has the high-temperature plastic nut cracked, he’s moving on to easily-machiniable Delrin and transparent Polycarbonate. Very cool, and hopefully in a year’s time we’ll have a choice of what material to run in our printers.

After the break, there are a few videos [taulman] put up showing his printer at work and the properties of his 3D printed objects. It looks like [taulman] can print objects that are impossible on any other 3D printer we’ve seen; the flexible iPhone case probably couldn’t be made on any other DIY machine.

Continue reading “3D Printing With Nylon For A More Useful Objects”

3d Printing A Mini Lathe

While browsing on one of our regularly visited sites, RobotsDreams, we found this interesting little video. Here, [Sublime] is showing off his 3d printed mini lathe. In the video he mentions that all the files are available for download so you could make one for yourself, but there were unfortunately no links. A quick bit of googling and we found some more information.  We found the project on Thiniverse, though reading through the comments it seems that [Sublime] no longer uses Thingiverse. You can now find the files on his GitHub account to make your own.

The design seems very solid and looks like it could handle some basic jobs. As [Sublime] points out in the video below, you already know what parts are going to wear out fast and can simply print a few extras to have on hand.  While that may seem somewhat wasteful, he also points out that he’s using PLA which is compostable and much easier to recycle.

Continue reading “3d Printing A Mini Lathe”

Printing Circuitry On A RepRap

Over on the RepRap blog, [Rhys] has been experimenting with molten metal to build circuits with the RepRap.

Last June, [Rhys] found a neat alloy made of Tin, Bismuth, and a little bit of Indium that melts at around 130° C, and has just the right properties to be extruded with a standard RepRap setup. The results were encouraging, but the molten metal quickly dissolved the brass and aluminum nozzles [Rhys] was pushing liquid metal through.

The solution to this problem was solved by anodizing the heck out of a RepRap nozzle to make a hard, protective oxide layer. Already [Rhys] has logged hundreds of hours squirting molten metal out of his RepRap with no signs of any damage to the nozzle.

Since [Rhys] figured out how to print in metal, he whipped up an extremely minimal Sanguino board. You can see this RepRapped PCB running a LED blink program after the break. Now to work on the RepRap pick and place…

Continue reading “Printing Circuitry On A RepRap”

Solidoodle, A $500 3d Printer

3D printers are very popular right now. We’ve seen them go from an interesting project to multiple commercial entities. Makerbot seems to be the poster child for the commercial side of things, at least they were. Their former COO [Samuel Cervantes] is now in charge of a new company called Solidoodle. Their main product is a complete 3d printing kit for $499. You supply power and a computer.

The Solidoodle is capable of building things 6″x6″x6″. The quality seems to be comparable to most of the others we’ve seen. They tout a .1mm layer thickness in HD mode (makerbot shows .2-.3mm). Not bad considering it is less than 1/3 the price of the makerbot replicator with a single extruder. The video after the shows it in action, as well as both with the optional case and door and without.