Improving Terrible Computer Speakers

[Victor] likes to watch movies on his laptop, but the tiny speakers in his machine don’t do [John Williams] and other perfectly fine soundtracks justice. To pump up the jams a little bit, [Victor] got a pair of Trust Mila 2.0 speakers for Sinterklaas. Unfortunately, these speakers were terrible – noise everywhere, tinny output and a brighter-than-the-sun blue LED. These problems were fixed once [Victor] replaced the amplifier in both speakers.

After shopping around for a new power amp to go in each speaker, [Vic] hit upon the MAX9575 3.2 Watt amplifier. This little guy met all of [Victor]’s requirements. The only problem is that the MAX9575 is only available in a TQFN package.

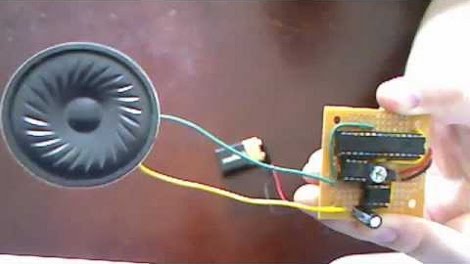
After a deep breath and much sweat of the brow, both amps found a new home in their respective speakers, deadbug style. It probably would have been easier to etch a PCB, but we’ll give a tip of the hat to [Victor]’s fine motor skills anyway.

Because of the insane soldering skill demonstrated in the title pic, [Vic] now has a really nice pair of speakers. Check out the demo of the improved speakers after the break.

Continue reading “Improving Terrible Computer Speakers”

Muff-Fones Sound Dirty; Well, Not Literally

Baby, it’s cold outside. But that doesn’t stop [Grissini] from listening to some tunes when not indoors. He added headphones to a pair of ear warmers. We guess you could call them ear muffs, which is where the name comes from. But these are the newer type that wrap around the back of your head.

[Grissini] picked up a set of headphones that similarly wrap around the back of your head. After pulling the speakers out of their plastic enclosures he needed a way to soften the sharp edges when they’ll be pressed against your ears. Sugru once again shows its versatility by providing a soft, self-bonding, and moldable surface. The last step is dead simple, as the ear warmers already have a fabric pocket by each ear perfect for accepting the speakers.

Now we need this to go one step further, by making them wireless. We figure hacking in a bluetooth headset board would make it work with your cellphone. Or you could roll your own minimal MP3 board and house it in the part that wraps around your neck.

Musical Greeting Card With Minimal Parts

We’re all familiar with those musical greeting cards. Give the Hallmark store $10, and you have a card with a microcontroller inside that plays one of several songs available. [Jarv] was playing around with translating MIDI tracks to square wave songs with an Arduino earlier, so he decided to see how cheaply he could reproduce these musical cards. The resulting build allows him to put any song he wants in his card and costs less than the Hallmark offering.

The circuit is extremely minimal – just an ATtiny 85, a battery holder, and two piezo speakers for two-voice harmony. After soldering up the battery and speakers, [Jarv] needed a way to get music on his chip. For this, he used MuseScore, a music notation program that allows [Jarv] to merge multiple voices together.

Once the sheet music was cleaned up, [Jarv] used his XML2H Python script that takes MIDI data and spits out frequencies and delays. In the end, [Jarv] spent less than $5 on his greeting card – almost cheap enough to start thinking about musical throwies to complement the batteries, LEDs and magnets on our window flashing.

Check out the video after the break to hear [Jarv]’s circuit play the theme from Toy Story.

Continue reading “Musical Greeting Card With Minimal Parts”

A DIY Audio Player For When All That Matters Is The Music

orange-mepod

[Grissini] hasn’t had the best of luck when it comes to personal audio players. He estimates that he’s gone through about half a dozen iProducts/iKnockoffs over the years, which ultimately adds up to a lot of money poured right down the drain. Rather than lay down his cold hard cash for yet another music player that would succumb to a dead battery or cracked screen, [Grissini] decided that he would be better off if he built one himself.

His Orange mePod isn’t exactly the most attractive or sleekest music player out there, but [Grissini] says it works like a charm. An Arduino Uno powers the device, and he uses an Adafruit Wave Shield to handle the audio playback. Power is supplied via 4AA batteries which keep the tunes going for a reasonable amount of time, and afford him the ability to swap them out for recharging without much fuss.

The player was encased with some leftover cardboard and wrapped in bright orange duct tape, before being mounted on [Grissini’s] belt. He says he gets plenty of looks when he’s out and about, which you would expect from such a unique design.

Stick around to see a quick video of the audio player in action.

Continue reading “A DIY Audio Player For When All That Matters Is The Music”

Stylophone 5 – Modernizing The Best Of The 1968 Hardware

We love looking in on [Simon Inns’] projects, and this must be one of his very best. This is the fifth version of his MIDI-capable stylophone. The gist of the control system is that a conductive keyboard (made of a tinned PCB) is played by making a connection with the tip of a wired stylus — hence the name. The idea comes from the original 1968 Dubreq Stylophone hardware, but [Simon’s] not just using the idea. He has his own working original and used it to reverse engineer the circuit design.

When it first came out, the Stylophone had three flavors for Bass, Standard, and Treble audio ranges. They differed only in the choices of passive components used in the circuit. [Simon] built the variations into his design so that they are selectable on one unit. This most recent version connects via USB, allowing you to control MIDI software. But unlike his first four iterations, this also offers MIDI-In capabilities. This makes it possible to control tuning, vibrato, and to drive the Stylophone circuitry from the computer interface. Get a good look at that, and a nostalgic Portal moment, by watching the clip after the break.

If you’re looking for an easier build, you might try this analog standalone version of the Stylophone.

Continue reading “Stylophone 5 – Modernizing The Best Of The 1968 Hardware”

Audio Output Selection Courtesy Of The Internet

[Peter] was tired of crawling behind his desktop computer to switch between headphones and speakers. We feel his pain, as the headphone port on our computer speakers has its own demonic hum rendering the jack useless to us. His solution was to build this output selector board, then control it via the network.

A relay is responsible for routing the single input to one of two outputs. One output is wired to the normally closed pin on the relay, the other to the normally open pin. The important thing here is to make sure you have a separate audio ground so as not to pick up noise from the rest of the hardware.

What you see above is only the switching circuitry. This is where [Peter] went a little overboard, using an Arduino along with an Ethernet shield to drive the relay via a transistor. For this particular application there must be an easier way. But if you’re working on home automation from your smart phone, this might be just the thing to make your audio setup browser-controlled.

[via Build Lounge]

IPad 2 Gets A Home In Hacked IDJ Live Console

[DJ FileSpnR] did a number on this IDJ Live hardware to make room for an integrated iPad. Those that have seen the hardware before may not even recognize it. In stock condition the controller has two turn-table actuators with cross-fader control in between them. The iPad perches on top like a book, making it a fairly bulky setup.

In its hacked format, the device is much more mobile. The physical turntables have been removed, and the center console was moved to one side. This leaves just enough room to fit the iPad 2 (the original iPad is probably too thick for this to work). A cresent of the original turn table bezel has been retained to clamp the iPad in place, and to protect the dock connector at the same time. Now the touchscreen serves as turntable control, with physical sliders to the right which mange the cross-fading.

Check out the video after the break where the DJ explains his alterations and demonstrates the finished project.

Continue reading “IPad 2 Gets A Home In Hacked IDJ Live Console”