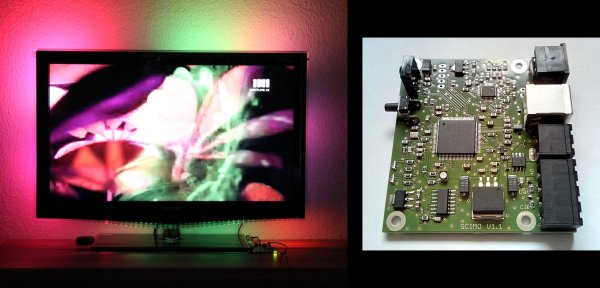
It may seem confusing that you’re looking at a Raspberry Pi when this hack is about an Ambilight clone system that doesn’t need a computer. The point here is that this system works no matter what your video source is, where many projects in the past have required the video to be playing from a computer.
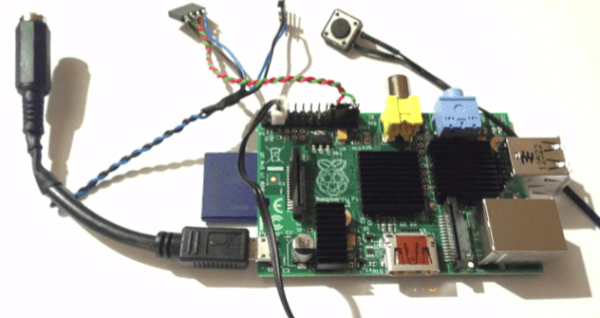
This hack follows in the same path of the ARM based custom job we was almost a month ago. Just like that project you use an HDMI splitter to gain access to the feed going to your television. The split signal is fed into an HDMI to composite video adapter. The composite signal is captured by a USB video encoder. The GPIO header drives a strip of addressable RGB LEDs. The whole thing is powered as one using a bit of cable hacking.
It’s slightly convoluted. But all of the components are easy to source and relatively cheap. The one caveat is that it works best if you are already using a hardware HDMI source selector instead of the one build into your TV. That way there is just one HDMI cable going to the television, and this can siphon off of that feed.
Continue reading “No Computer Ambilight Clone Uses A Computer”