LEDs Fade To The Music Using A Python Filter

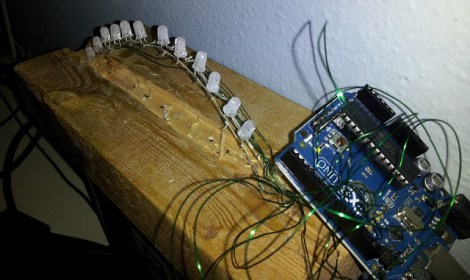
This little LED rig fades in time to music. The hardware itself is quite simple, some LEDs connected to the PWM pins of an Arduino. But the signal processing is happening on a computer using a Python script.

Many of the projects we see which pulse lights to music use the MSGEQ7 chip to perform hardware processing on the audio signal. But since [Zolmeister] is using a computer to play his tunes he took a different route. His Linux box uses PulseAudio to handle sound. This allows him to record from the audio playback which provides an internal source for the pyAudio package. His Python script saves snippets of the streaming audio to .wav files. I then normalizes the volume level and uses the amplitude to set a PWM value before deleting the sample and moving onto the next. These values are pushed to the Arduino at 115200 baud to achieve the results seen in the video after the break.

Continue reading “LEDs Fade To The Music Using A Python Filter”

A PIC Powered Pair Of Electronic Dice

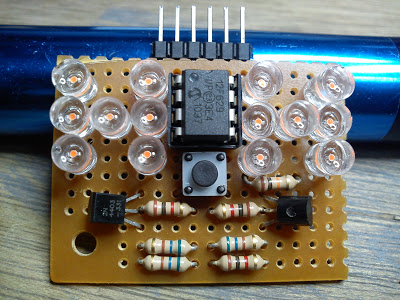
[Timothy] is honing his microcontroller skills with this electronic dice project. In addition to giving him an opportunity to work on some code, the use of an 8-pin chip provides a design challenge for driving the twelve pips and providing a user input.

The project started off with some $4 strings of LED Christmas lights. He promptly disassembled the strands, each yielding 100 LEDs. The microcontroller he chose to work with is a PIC 12F629. It’s DIP8 package provides six I/O pins to work with. When examined closely you will find that the pips on a die are always present in pairs with the exception of the center pip. This means that only four pins are needed to drive one die. You can see a pair of transistors above; one is a PNP, the other an NPN. These are both driven from the same uC line, which toggles between the pair of die. This accounts for 5 of the available pins, with the sixth monitoring the push button.

Laptop LCD Resurrection Gets Some Clean Packaging

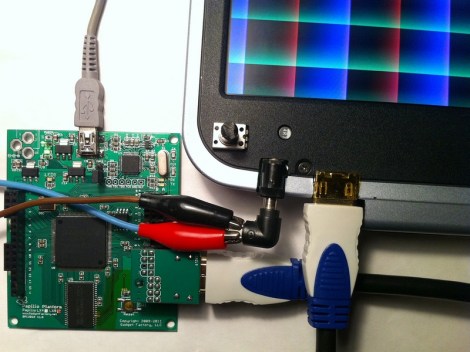
We love to see derivative works that take a great hack and make it even better. This LCD Laptop resurrection project is an excellent example. [Alex] took the work seen on this other FPGA LCD driver and delivered a leap forward on the final hardware packaging.

The link at the top drops you into the second page of [Alex’s] project thread. But if you go back to the beginning you’ll see the protoboard and spaghetti wiring which started off the process. Obviously if he plans to use this for a length of time it needs to be fortified or he’ll be cracking it open and grabbing a soldering iron again before long. But rather than just tidying up he ended up spinning his own circuit boards that make the screen look like it was manufactured to be used in this way.

He was able to mount the add-on board inside the LCD bezel, cutting out a space for the HDMI connector, barrel jack, trimpot, and the head of the inductor which was just a bit too large to fit inside. The trimpot allows him to adjust the LCD brightness. As far as we can tell the HDMI connector is just an easy way for him to deliver the drive signals from the Papilio board (FPGA) to the screen.

LV0 Encryption Key Cracks Current And Future PlayStation 3 Firmware

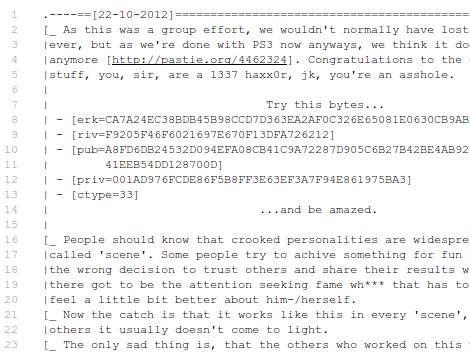
It looks like the security of the PlayStation 3 has been cracked wide open. But then again we’ve thought the same thing in the past and Sony managed to patch those exploits. The latest in the cat and mouse game is the release of the LV0 encryption codes for the PS3 console. The guys who discovered the magic strings of characters supposedly intended to keep them a secret, but have gone public after there was a leak and some black-hats now intend to use them for profit.

The keys are the bottom layer of security when pushing firmware updates to the PS3. With keys in hand, current and future upgrades can be unencrypted, altered, and repackaged without the gaming rig putting up a fuss. Our only real beef with the tight security came when Sony removed the ability to install Linux on systems marketed with this option. The availability of these keys should let you install just about whatever you want on your hardware.

[Thanks Kris via Phys]

Fixing A First Generation GuruPlug’s Cooling Problems

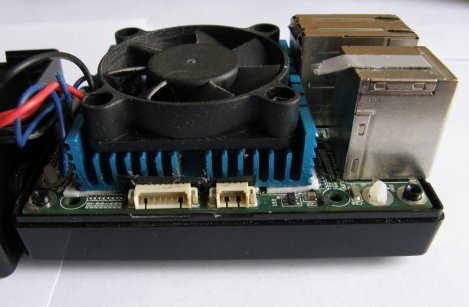
[Doragasu] had been using a hacked Xbox as his file server but upgraded to a single board Linux device when the GuruPlug was released. Unfortunately the first run of these devices had an overheating issue, which resulted in reboots even at moderate CPU load. The design was changed from a passively cooled heat sink to an internal fan, but that didn’t really help those who already had one of the early models. Above is [Doragasu’s] method of cooling down the overheating computer.

The original sink — which was really just a fin-less metal plate — was removed and replaced with a proper heat sink. This makes contact with the ARM, RAM, and Ethernet chips. They were all coated with thermal compound before installation and a silent fan was added to help whisk away the heat. This still fits inside of the original case, but to make way he did remove the original power source and cut a hole to allow for air movement.

The post also details an external LCD screen used to display system information. It’s along the same lines as this USB LCD screen project which inspired him to send us a link to the project.

A Beautiful Pinhole Camera Takes Wonderful Photos

With digital cameras in everything and film slowly disappearing from shelves, everyone loses an awesome way to learn about photography. Pinhole cameras allow anyone to build a camera from scratch and also learn about those crazy f-stops, exposure times, and focal planes that Instagram just won’t teach you. [Matt] put up a great tutorial for building your own pinhole camera, and the project looks easy enough for even those who are still playing around with their cell phone cameras.

For film, [Matt] used 120 film, a medium-format medium that is sill available for purchase and processing in some areas. Because [Matt]’s pinhole is relatively large and made out of very thin material, the camera could take very large pictures – much larger than standard 35mm fare. If you’re using a smaller camera projecting a smaller image onto the film, 35mm would be the way to go as it greatly decreases the difficulty of finding film and a processing center.

[Matt]’s camera is constructed out of laser-cut plywood. Because he’s producing extremely wide images with his camera (6 x 17cm), [Matt] needed to curve the film around the focal plane of the camera to keep the entire image in focus.

The mechanics of the camera are simple – just a pair of knobs to wind the film and a small metal shutter. [Matt] added a shutter release cable to open and close the aperture without moving the camera and had a wonderful camera perfect for capturing either sirs and madams or Civil War battlefields.

Rooting A NeoTV Set Top Box From The Couch

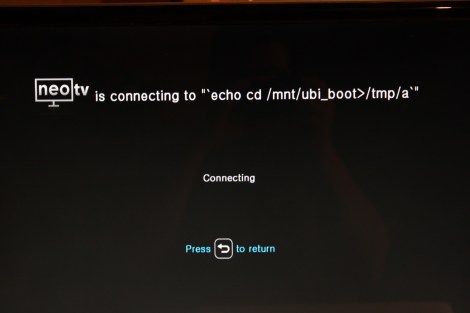
The NeoTV is a set top box built by Netgear to compete with the likes of Roku. It streams video from the usual Internet sources like Netflix, Hulu Plus, and YouTube. [Craig] recently cracked his unit open, and in the process discovered that the NeoTV can be rooted using nothing but the remote control.

He starts with a hardware overview. The box houses a single-board ARM design with a 128MB of NAND and 256MB of RAM. The serial port is easy to find, but it does not provide a root shell (which often is one of the easiest ways to root a device). He next turns to poking around the unencrypted firmware update to see what he can learn. That’s how he discovered that the SSID value when connecting to WiFi is fed into a system() command. This glaring security hole lets you run just about anything you want on the device by issuing commands as fake SSID names. It’s just a matter of a little Linux know-how and [Craig] now has root access on his device.