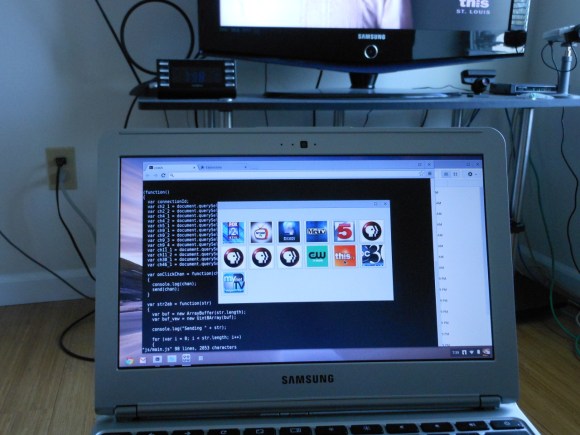
[Michael Kohn] only accomplished about half of what he set out to, but we still think his TV channel switcher from a Chromebook turned out nicely. When starting the project he wanted to include a grid of listing so that he could choose a specific program, but decided that scraping the data was too much work for this go-round.
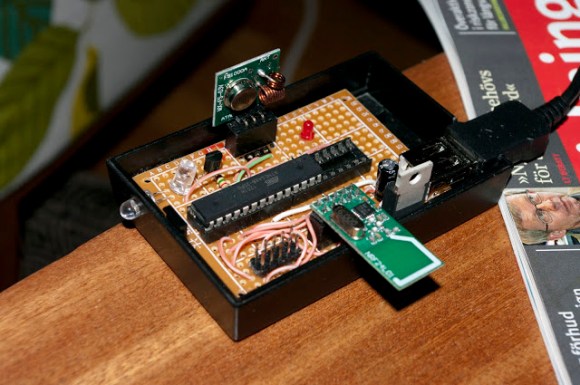
The Chromebook doesn’t include an IR transmitter so he built one using an MSP430 chip. He had previously built a little transmitter around an AVR chip and was surprised to find that the internal oscillator on that was quite a bit more accurate than on the MSP430. Timing is everything with the Manchester encoded signals used for IR remote controls so he used his oscilloscope to tune the DCO as accurately as possible.
The app shown on the screen was written in Javascript. Google published some example code on using RS232 with the computer; [Michael] used this resource to provide communications between the computer and the microcontroller.