An Appeal To Microsoft To Consider The Hackers

[PT] is climbing up on his soapbox again to make an appeal to Microsoft. We think his editorial is well-aimed; appealing for better support for hobby electronics in Windows 8.

This is of course not strictly a hobby electronics feature request, but deals with how a lot of USB devices are treated by the upcoming operating system. Specifically the Communications Device Class, which is a protocol used by most hobby projects (and boards like the Arduino) that take advantage of the Universal Serial Bus. The way communications are handled by OSX and Linux makes this a snap, but not with Windows 7. [Phil] post specifics about how the former two operating systems handle these communications, and how Windows 8 could be tweaked to fall in line with them.

It means not installing drivers. Drivers…. for a USB device. Think about that for a while and then ask yourself which decade Windows 8 is being developed in. Thanks for pointing this out [PT]. We often get spoiled using a Linux box and don’t realize the hassles sometimes found on other systems.

Hackerspace Intro: Hacker Consortium In Nashville TN

The last stop on my trip this summer was the Hacker Consortium in Nashville TN. The Hacker Consortium has been around since late 2007 after acquiring a building that had been abandoned for several years. They had quite the task ahead of them, since parts of the roof had caved in and the building was in a general state of disrepair. The price was right though, so they set out to make it habitable. They did a great job too. We found the space to be pretty cool. They’ve got tools for wood working, metal working, collaboration, etc. They also have a nice little kitchen area, a classroom, and a laser cutter. Unlike the other spaces we visited where anyone willing to pay the monthly fee can be a member, these guys tend to be a little more concerned with how you can contribute to the group. You don’t necessarily have to bring a new skill to the table, but you have to be an active part of the team somehow.
Continue reading “Hackerspace Intro: Hacker Consortium In Nashville TN”

Incredible Home Made Low Cost CO2 Laser

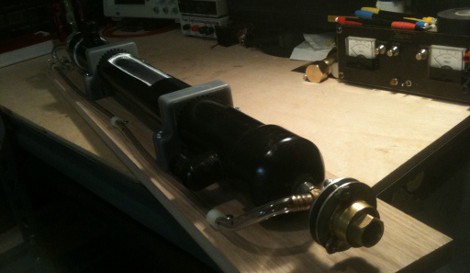
[LokisMischief] wrote in to the tip line to let us know about this incredible home made CO2 laser. This thing is a complete DIY beauty, from the PVC cooling jacket to the toolbox based controller.  The whole thing is essentially built from DIY parts,  hand blown glass for the laser tube, plumbing store mirror mounts,  a PVC cooling jacket with a caulked glass viewing window, and a neon sign transformer with a variac to control output. Even the optics are completely DIY, a hand drilled gold mirror and a NaCL window made from a polished chunk of  icecream salt! [ThunderSqueak] says the control box only cost 60 bucks, and the rest of the parts don’t look too terribly expensive.

We could only find one video of the setup in the variac section of the site, and it was just a test the amp meter in the controller (no lasing anything at all).  [ThunderSqueak] does make a note on the to do list about doing a good laser-y demonstration video, which we are looking forward to.

If you want more DIY CO2 laser action check out this other one or some plans for one.

Shakerbot Leverages Inertial For Locomotion

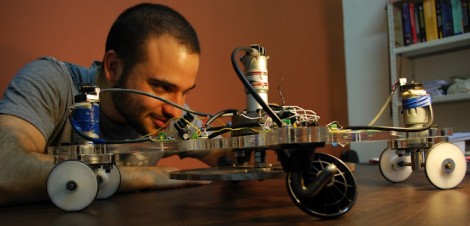
This robot uses the concept of a snakeboard for getting around. [Sevag Babikian] built the project, and has gone out of his way to explain how it works.

We’d recommend skimming over his explanation, but it was the video after the break that made all things clear to us. There is a large fly-wheel at the center. This is not continuously rotating, but oscillates a few inches in either direction. This inertial change shifts the center of gravity for the entire frame, causing motion. By oscillating the front and rear axles at the appropriate time the beast can move forward in a surprisingly straight line.

It’s doing this with just three motors. [Sevag] speculates that with further testing and refinement this could be a very efficient way to move the bot around. We have our doubts about that, but we are mesmerized by the undulations and how well they really do propel the thing along.

Continue reading “Shakerbot Leverages Inertial For Locomotion”

Adding Remote Control To Klipsch Surround System

The speaker system [Zurcher] bought was made by Klipsch. It is a surround sound unit but it’s intended to be used with a computer so there’s no wireless remote for it. Instead, a wired unit sits on the desk and lets you select between the speakers or headphones, and has a volume adjustment knob. The thing is he uses them for his home theater system and had to add his own remote control hardware to adjust them from across the room.

He started with some web searches that helped a lot. It seems others have mapped out the hardware in the past and he was able to use that information to find the volume chip inside the controller. A bit of signal sniffing let him work out the control commands coming in over the i2c bus. This was the information he needed to build his own controller. He grabbed his Arduino board, and IR receiver to take commands from just about any remote, and a four-digit 7-segment display to provide settings feedback. You can seen him showing off the final build in the clip after the break.

Continue reading “Adding Remote Control To Klipsch Surround System”

Where Is My *%$#! Virtual Reality Display?

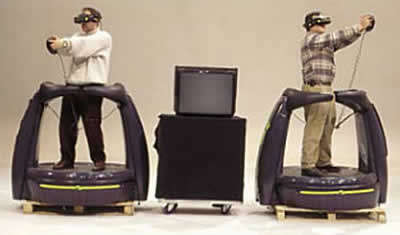
For years I’ve been asking, loudly and frequently, where’s my F*&#$%ing virtual reality?  I realize that many of us, depending on what influenced our dreams of VR will have different definitions, so let me elaborate. When I was a kid, I played Dactyl Nightmare at the Union station in St. Louis. You stepped inside this “stage”, donned a massive clunky headache inducing HMD, and brandished a floating joystick of doom to challenge other players and a flying Pterodactyl.  I was awe struck. My 12 year old brain decided that this was the future.

Continue reading “Where Is My *%$#! Virtual Reality Display?”

Simplest Of SL4A Microbridge Examples

We’re familiar with the daunting task of sifting through mountains of code in hopes you can learn how something works. So when a simple example like this SL4A LED toggle comes along we’re thankful for the trimmed fat. If you’re looking to use an Android device to control your Arduino hardware this will be huge shove in the right direction.

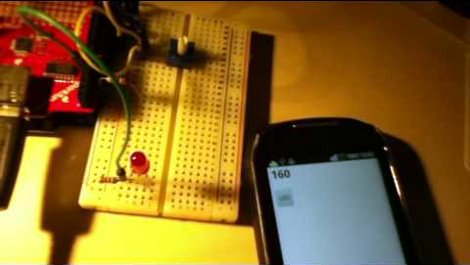
The microbridge is used to get the Arduino talking with the Android phone. It involves a USB host shield that lets you connect the two devices via a USB cable. With the USB debugging enabled on the phone, you can use Scripting Layer for Android as a user interface. In this case, a set of Python scripts builds the button and readout seen on the screen above. They also handle sending and receiving commands based on user input. This means you don’t really need to know anything about Android development. We think it would be a great way to get your project through the development stages, and you could learn to write a traditional App later on.

Continue reading “Simplest Of SL4A Microbridge Examples”