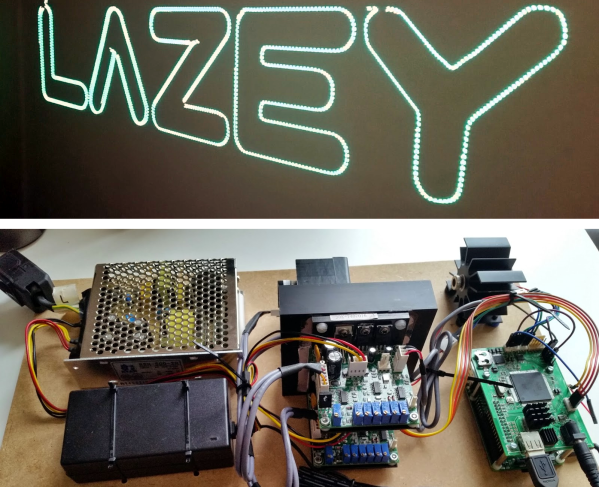
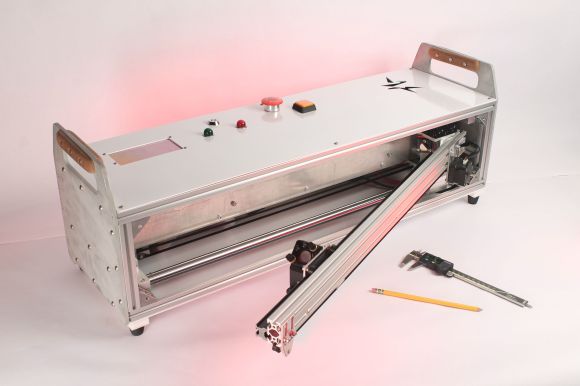
Delta Laser Engraver Uses Inkscape For G-Code

lazer

[Z LeHericy] has a SeeMe CNC Rostock Max 3D printer, and a 2W WickedLasers Spyder Artic blue laser. Naturally, he had to try strapping them together.

Most of our homemade laser engravers featured here use recycled DVD burner diodes, and while they certainly work, they leave a bit to be desired… Well, if you want more power, let us introduce the Class 4 Artic Spyder 2W blue laser from WickedLasers — a company that sells super high-powered lasers to anyone who can afford them — because that’s a great idea!

Safety concerns aside — wear your darn laser goggles! This pair can etch wood and leather quite well. He’s been using it to etch celtic knots onto pieces of leather. To do this he’s used Inkscape to convert a .BMP of the knot into a vector image, and then using the G-Code tools included with Inkscape he can create a tool path for the printer.

The finished leather looks awesome — Stick around after the break to see the laser in action!

Continue reading “Delta Laser Engraver Uses Inkscape For G-Code”

DIY Laser Cutter

[Jens] decided he wanted to try building his own laser cutter to see just how much you can actually cut with a fairly low power 300mW laser diode.

He was inspired by a similar project from earlier this year, and chose to use the same LPC-826 laser diode, which you can find online for about $10-30. The cutter itself is has a wooden frame and uses drawer slides on both axes. Threaded M6 rods and NEMA17 stepper motors provide the actuation, and the whole thing is controlled by an Arduino Nano with Easy Driver stepper motor drivers.

So what can it cut? In his experiments he was able to cut through adhesive plastics (sticker paper), EVA foam, and black paper. He was also able to engrave wood and ABS plastic, although the plastic didn’t play too nicely with the laser. He also found it useful for laser cutting stencils, which he then used to create rusty art using hydrochloric acid and hydrogen peroxide.

Considering how cheap you could make one of these, it’s not a bad tool to have. Stick around after the break to see it laser cut a shark!

Continue reading “DIY Laser Cutter”

Attacknid Becomes Laser Death Drone

Laser Drone

[styroPyro] liked his Attacknid, but decided it needed just a bit more blue death ray laser. We’ve seen [styroPyro’s] high-powered laser hacks before, but this time he’s taken to hacking one of [Jaimie Mantzel’s] Attacknid robots. According to one of the top comments on [styroPyro’s] video—a comment by Attacknid inventor [Jaimie] himself—the robots were meant to be hacked, and [Jamie] is ecstatic.

[styropyro] removed the disk shooter from his Attacknid and used the fire control circuit to activate a 2 watt blue laser. A low powered, red laser pointer serves as a laser sight, allowing you to aim at your target before unleashing the beefy blue laser. As the video shows, 2 watts is a heck of a lot of power. The Attacknid easily pops balloons and sets fire to flash paper. As usual, we urge you to use caution when handling 2 watt lasers, which fall under Class 4: aka the most dangerous class of lasers. Goggles, skin protection, and safety interlocks are the order of the day. [styroPyro] has been working with high power lasers for a few years, and seems to know what he’s doing. That said, we’ll leave the burning lasers to the professionals.

Continue reading “Attacknid Becomes Laser Death Drone”

Laser Wire Stripping

laser wire stripping

Do you find yourself needing to strip many ribbon cables? Isn’t it frustrating? Well, if you happen to own a laser engraver, this cool guide one of our tipsters sent us might just be up your alley.

The typical way to strip these is one by one, with a lot of swearing. Or, if you do it often, you might actually have the proper tool to strip them in one go. There is actually a third solution, and as it turns out, it’s one of the commercial ways it is done for accuracy, and it’s quite impressive. Here’s an entire imgur gallery of what some of the fancy stripping lasers are capable of — we particularly like number 3.

Anyway, if you do happen to have a laser cutter, it’s as simple as engraving a few lines, and setting up a jig to hold your ribbon. Take a pass on each side, and pull it off! There’s a video after the break, but it’s pretty self-explanatory. We can see this being super handy if you happen to be mass producing anything that requires ribbon cables!

Continue reading “Laser Wire Stripping”

Raspi Mini Laser Engraver

If you’ve got a lot of spare parts lying around, you may be able to cobble together your own laser engraver without too much trouble. We’ve already seen small engraver builds that use an Arduino, but [Jeremy] tipped us off to [Xiang Zhai’s] version, which provides an in-depth guide to building one with a Raspberry Pi.

[Xiang] began by opening up two spare DVD writeable drives, salvaging not only their laser diodes but the stepper motors and their accompanying hardware, as well as a handful of small magnets near each diode. To assemble the laser, he sourced an inexpensive laser diode module from eBay and used a vise to push the diode into the head of the housing. With the laser snugly in place and the appropriate connecting wires soldered on, [Xiang] whipped up a laser driver circuit, which the Raspi will later control. [Xiang] worked out the stepper motors’ configuration by following [Groover’s] engraver build-(we featured it a few years back)-attaching the plate that holds the material to be engraved onto one axis and the laser assembly to the other.

Check out [Xiang’s] project blog for details explaining the h-bridge circuits as well as the Python code for the Raspi. As always, if you’re attempting any build involving a laser, please use all necessary precautions! And if you need more information on using DVD burners for their diodes, check out this hack from earlier in the summer

Real-Life Raspi-Controlled Redstone Lamp

redstone-lamp

Minecraft fanatics keep finding impressive ways to bring 8-bit components into the real world, and [Chris Tompson’s] Redstone Lamp Replica is no exception. [Chris] wanted to extend his connection to the game world by not only replicating this block, but also by controlling its light-up effect when an in-game cube is lit.

The lamp is a product of the gang at Hive76, who worked together to develop a quick prototype using the Minecraft Python client pyCraft, an Arduino, a transistor and a temporary papercraft lamp mockup. Hive76 member [Kyle] pitched in to write the plugin for pyCraft, which listens for an on/off message and sets one of the RasPi’s GPIO pins accordingly. The hardware for the actual lamp was designed to smooth out the 8-bit quality into something a bit more precise. The result are laser-cut pieces of MDF with a zebra wood veneer laminated on top. The interior was finished off with amber cathedral glass and then the cube’s sides were glued together. The RasPi, PCB and LEDs fit inside, all snugly affixed together.

Swing over to the Hive76 project page for more details and links to the plugin, and see the video demonstration below. For another Minecraft-inspired real-life project, check out [Bill’s] take on the BatBox.

Continue reading “Real-Life Raspi-Controlled Redstone Lamp”