Building A Better 3D Scanner With An IPhone, And Making Art

Apple’s FaceID system uses infrared depth-sensing technology to authenticate people via their faces. It can also be used for simple 3D scanning, and [Scott Yu-Jan] found a better way to do that.

The main problem with using an iPhone as a 3D scanner in this manner is that the sensor is built into the front side of the device. It’s great for scanning your own face, but if you’re trying to scan an object, you can no longer see the iPhone’s screen. [Scott] solved this problem by slapping together a handheld 3D printed device to hold the iPhone along with an external monitor. This allowed Scott to scan while still seeing what was going on.

Having noticed that some of the 3D scanning apps produced strange, glitchy results when scanning faces, [Scott] decided to innovate artistically. He employed [Andrea] to model, took some scans, and Photoshopped the results into some impressive posters.

Overall, [Scott] demonstrates that it’s relatively easy to repurposed the iPhone for improved 3D scanning. With a simple design, he has a handheld scanner that works way better than just the phone on its own. Alternatively, consider getting into photogrammetry instead.

Continue reading “Building A Better 3D Scanner With An IPhone, And Making Art”

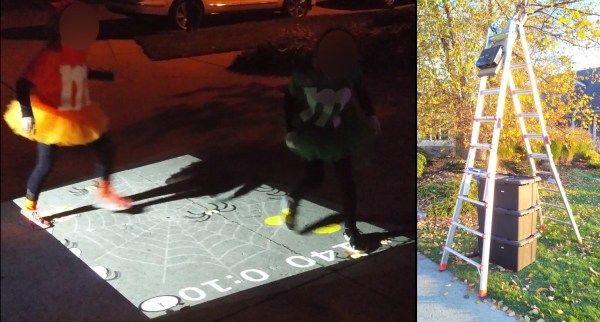
Left: kids stomping spiders projected on a driveway. Right: the setup.

Make This Halloween A Spider-Stomping Good Time

We can count on one hand the number of times that we haven’t needed a coat on Halloween night around here. Even if it was fair and sunny the day before, you can count on Halloween being appropriately windy, cold, and spooky. Trick-or-treating only keeps a kid so warm, and we would have loved to happen upon a house with a spider-stomping sugar-burning good time of a game going on in the driveway.

[Kyle Maas] built this game a few years ago, and it has proved quite popular ever since. It’s so popular, in fact, that they have to have someone on duty with a vaudeville hook to yank spectators off the playing field. The point is to stomp as many spiders as you can in a set amount of time, though you only need to stomp one to win. It can handle one to four players, depending on the size of the projection, but [Kyle] says it’s kind of hard to track more than two at a time.

The setup is fairly simple, provided you can reliably affix your projector to something sturdy. [Kyle] used a Structure sensor for the 3D scanner, but you could easily use a Kinect instead. Conversely, the calibration was challenging. [Kyle] ended up using a DSP math trick known as the inverse bilinear transform to be able to calibrate the system using the 3D scanner itself.

If you’re more into scaring the children, just rig up a coffin bell. Either way, don’t forget about our Halloween Hackfest contest, running now through Monday, October 11th. There are more details over on IO. While you’re there, why not check out the list of entries?

Better 3D Scans Through A Slowed Down Turntable

3D scanners aren’t cheap, and the last thing you want to see after purchasing one is bad data. But that’s what [Dave Does] and others were getting from their Revopoint POP scanners until some communal brainstorming uncovered the reason: the motorized turntable that came with the Kickstarter edition of the product was spinning too fast for the software to accurately keep track of the object. So he decided to replace the stepper motor controller in his turntable and document the process for anyone else who’s scanner might be struggling.

Plenty of room for expansion.

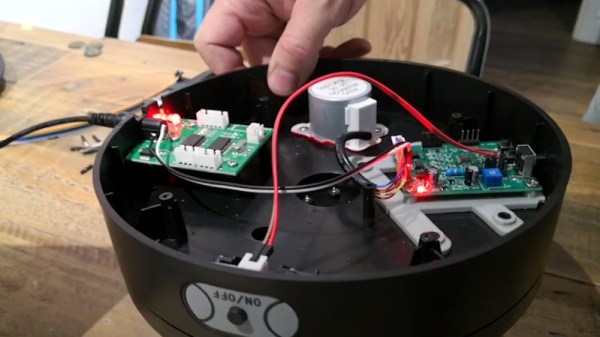
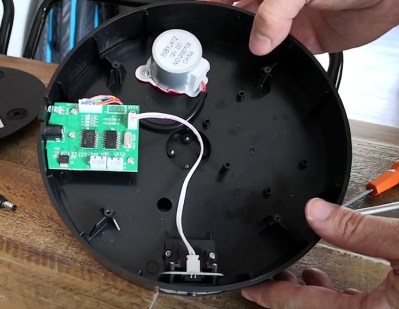
In the video below, [Dave] pops open the plastic case of the turntable and reveals a pretty sparse interior. There’s an incredible amount of empty space inside, and even some mounting studs to screw down new components, should you want to get into some hardcore upgrades. But for his purposes, a generic stepper motor controller that featured a potentiometer to adjust the speed was enough. He found a suitable board online for around $5 USD, and got to designing a 3D printed bracket that mates up to the existing screw holes on the turntable.

But it’s not exactly a drop-in replacement. For one thing, you’ve got to pop a hole in the side of the enclosure for the potentiometer knob to stick out of. You’ve also got to solder wires coming from the original DC jack and power switch to the new board to get it hooked up, but at least the motor plugs right in. In the video below, you can see [Dave] demonstrate the impressively deep throttle capability of the new driver.

If you’d rather build than buy, we’ve covered some impressive DIY turntables in the past that could fit the bill nicely, from automatic models that handle camera control to fully 3D printed versions that you’ve got to crank yourself.

Continue reading “Better 3D Scans Through A Slowed Down Turntable”

A Phased-Array Ultrasonic 3D Scanner From Scratch

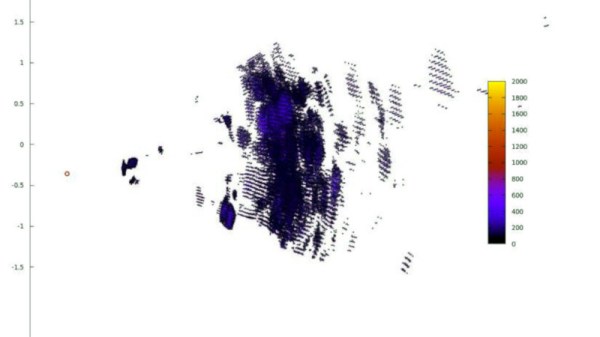
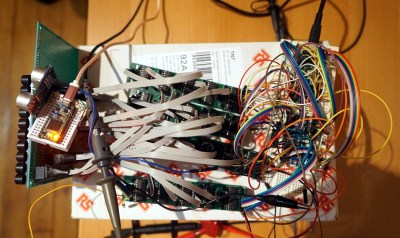
Who wouldn’t want an autonomous drone to deliver cans of fizzy drink fresh from the fridge? [Alex Toussaint] did, and in thinking how such a machine might work he embarked on a path that eventually led him to create a fully functional ultrasonic 3D scanner. In writing it up he’s produced a straightforward description of how the system works, which should also be of interest to anyone curious about phased array radar. He starts with an easy-to-understand explanation of the principle behind phased array beam forming, and there follows his journey into electronics as he uses this ambitious project to learn the art from scratch. That he succeeded is testament to his ability as well as his sheer tenacity.

He finally arrived at a grid of 100 ultrasonic emitters controlled from an Arduino through a series of shift register boards. Using this he can steer his ultrasonic beam horizontally as well as vertically, and receive echoes from objects in three-dimensional space. The ornamental bird example he uses for his scanning tests doesn’t quite emerge in startling clarity, but it is still clear that an object of its size and rough shape is visible enough for the drone in his original idea to detect it. If you would like to experiment with the same techniques and array then all the resources can be found in a GitHub repository, meanwhile we’re still impressed with the progress from relative electronics novice to this. We hope the ideas within it will be developed further.

We’ve seen ultrasonic arrays before, but mainly used in levitation experiments.

“Hey, You Left The Peanut Out Of My Peanut M&Ms!”

Candy-sorting robots are in plentiful supplies on these pages, and with good reason — they’re a great test of the complete suite of hacker tools, from electronics to machine vision to mechatronics. So we see lots of sorters for Skittles, jelly beans, and occasionally even Reese’s Pieces, but it always seems that the M&M sorters are the most popular.

This M&M sorter has a twist, though — it finds the elusive and coveted peanutless candies lurking in most bags of Peanut M&Ms. To be honest, we’d never run into this manufacturing defect before; being chiefly devoted to the plain old original M&Ms, perhaps our sample size has just been too small. Regardless, [Harrison McIntyre] knows they’re there and wants them all to himself, hence his impressive build.

To detect the squib confections, he built a tiny 3D-scanner from a line laser, a turntable, and a Raspberry Pi camera. After scanning the surface to yields its volume, a servo sweeps the candy onto a scale, allowing the density to be calculated. Peanut-free candies will be somewhat denser than their leguminous counterparts, allowing another servo to move the candy to the proper exit chute. The video below shows you all the details, and more than you ever wanted to know about the population statistics of Peanut M&Ms.

We think this is pretty slick, and a nice departure from the sorters that primarily rely on color to sort candies. Of course, we still love those too — take your pick of quick and easy, compact and sleek, or a model of industrial design.

Continue reading ““Hey, You Left The Peanut Out Of My Peanut M&Ms!””

3D Print Your 3D Scanner

[QLRO] wanted a 3D scanner, but didn’t like any of the existing designs. Some were too complex. Some were simple but required you to do things by hand. That led to him designing his own that he calls AAScan. You can see the thing operating in the video below.

In general, you can move the camera around the object or you can move the object around while the camera stays fixed. This design chooses the latter. You’ll need a stepper motor with a driver board and an Arduino to make the turntable rotate. You also need a computer running Python and Meshroom. The phone also has to run Python and [QLRO] used QPython on an Android device.

Continue reading “3D Print Your 3D Scanner”

Building A 3D Scanner With A 3D Printer

Using a 3D printer to make high quality parts is a great way to improve the look and appeal of any project. If you want to replicate something exactly, though, you’ll need either a very good set of calipers and a lot of time or a 3D scanner. Using the 3D scanner and the 3D printer go along very well together, especially if you use your 3D printer to build your 3D scanner too.

This project comes to us from [Vojislav] who spent the past two years perfecting this 3D scanner. Using a vast array of 3D printed parts, this build looks professional on every level. It also boasts a Raspberry Pi Zero and a fleet of camera modules, not to mention its own LED lighting. [Vojislav] has provided the printer files and the software needed to run it on the project page. It all runs through command line and python code, but that shouldn’t be a big hurdle.

While there is no video of it in action, it seems like all the parts are there for a solid 3D scanner, provided you have access to a 3D printer that can churn out the parts you’ll need. If you need something larger, there are some other options available as well that really take your photogrammetry skills to the next level.